Welded metal projects often fail at the paint stage due to poor surface preparation. Weld spatter, mill scale, heat discoloration, and microscopic contaminants prevent primer and paint from bonding properly, leading to peeling, rust undercutting, and premature failure.
Choosing the right sandpaper grit for metal before painting directly determines adhesion strength, finish quality, and long-term durability—especially on welded fabrications exposed to weather, chemicals, or mechanical stress.
Proper sanding creates the mechanical profile needed for coatings while removing impurities that welding introduces. I’ll discuss precise grit recommendations, techniques tailored to welded steel, aluminum, and stainless, and decision frameworks for real-world shop conditions.
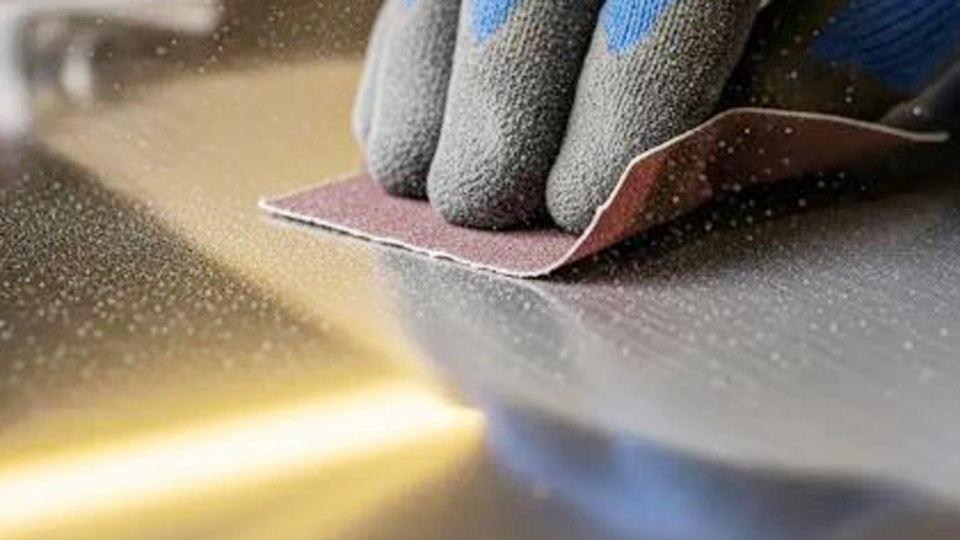
Image by sibottle
Understanding Metal Surface Challenges After Welding
Welding alters metal surfaces in ways that demand targeted preparation. Heat input creates oxide layers, spatter embeds particles, and rapid cooling leaves stress points prone to corrosion if not addressed.
Weld-Specific Contaminants Requiring Abrasion
Weld zones accumulate slag, flux residue, and heavy mill scale on hot-rolled steel. These must be removed completely before any coating. Coarse abrasives excel here because they cut through hardened deposits without glazing. For mild steel post-weld, starting with 40-80 grit quickly eliminates the worst imperfections while establishing an initial profile.
Aluminum welds present different issues—porosity and oxide reformation happen rapidly. Stainless steel introduces chromium oxide that resists standard sanding. Matching grit progression to the base metal prevents over-removal of material or embedding new contaminants.
Impact of Surface Profile on Paint Performance
Paint adhesion relies on anchor patterns measured in microns. Too coarse a grit leaves deep scratches that telegraph through thin coats; too fine fails to provide mechanical grip. Target roughness for most industrial primers sits between 1.5–3.0 mils (38–76 microns), achievable with specific grit sequences.
Selecting Sandpaper Grit for Different Metal Conditions
Grit choice depends on the starting condition of the metal rather than a one-size-fits-all approach.
Bare Welded Steel Preparation
For fresh welds on hot-rolled mild steel:
Heavy cleanup (40-60 grit): Removes spatter, slag, and thick scale efficiently. Use flap discs or sanding belts for larger areas to maintain flatness.
Intermediate leveling (80-120 grit): Refines scratches from the coarse stage and blends weld beads into parent metal. This grit range establishes the primary anchor pattern for epoxy primers.
Pre-primer finish (150-220 grit): Produces a uniform surface without excessive polishing. Stop here for most shop primers; finer grits risk reducing adhesion on bare metal.
Cold-rolled or pre-primed steel often needs only 120-180 grit to degloss and clean, preserving more material.
Aluminum and Stainless Steel Considerations
Aluminum requires gentler handling to avoid loading abrasives with soft material. Begin with 80-120 grit for weld cleanup, then progress to 180-320 grit. Avoid crossing contamination from steel abrasives, which embed iron particles and cause galvanic corrosion later.
Stainless demands dedicated abrasives. Use 80-120 grit for initial weld blending, followed by 220-400 grit to restore the passive layer without compromising corrosion resistance. Non-woven abrasive pads often outperform paper in final stages for stainless.
Handling Previously Painted or Rusted Surfaces
Remove failing paint or rust with 40-80 grit until bare metal appears. Then follow the bare metal sequence. For intact but aged paint, scuff thoroughly with 180-240 grit to create tooth without full removal.
Tools and Abrasives for Efficient Metal Sanding
Hand sanding suits small repairs but scales poorly for welded projects. Power tools deliver consistent results when paired with proper abrasives.
Choosing Between Paper, Discs, and Belts
- Aluminum oxide: General-purpose for steel, good longevity.
- Zirconia alumina: Superior for aggressive stock removal on welds.
- Ceramic: Longest life on hard metals and stainless, though more expensive.
- Silicon carbide: Best for wet sanding and non-ferrous metals.
Random orbital sanders minimize swirl marks on visible surfaces. Belt sanders or grinders with 80-grit belts handle heavy weld cleanup. For contours and inside corners, use flap wheels or cartridge rolls mounted in die grinders.
Wet vs. Dry Sanding Techniques
Dry sanding generates heat that can drive contaminants deeper or warp thin sections. Wet sanding with 320+ grit and water (or lubricant) reduces loading and produces finer finishes for high-end topcoats. Reserve wet methods for final stages after primer application in most welding shops.
Step-by-Step Surface Preparation Process for Painting Welded Metal
- Initial cleaning: Degrease with solvent or alkaline cleaner to remove oils and welding contaminants.
- Coarse abrasion: Attack welds and scale with 40-80 grit until uniform.
- Progressive refinement: Move through 80 → 120 → 180-220 grit, always sanding at 45-90° angles to previous scratches to ensure complete removal.
- Final cleaning: Wipe with tack cloths and solvent immediately before priming to eliminate dust.
- Profile verification: Visual inspection plus fingernail test—surface should feel uniformly textured, not polished.
This sequence typically takes 20-40 minutes per square foot depending on condition and tooling.
Grit Progression Charts for Common Welding Scenarios
| Scenario | Starting Grit | Intermediate | Final Before Primer | Notes |
|---|---|---|---|---|
| Fresh mild steel weld | 40-60 | 80-120 | 180-220 | Heavy spatter removal |
| Light fabrication, clean | 80-120 | 150-180 | 220 | Minimal material loss |
| Aluminum weld | 80-120 | 180-240 | 320 | Prevent oxide loading |
| Stainless repair | 80 | 180-240 | 320-400 | Maintain corrosion resistance |
| Repaint over existing | 120 | 180 | 240-320 | Scuff for adhesion |
These ranges reflect real-world performance across automotive, structural, and artistic welding applications.
Common Sanding Mistakes That Compromise Paint Jobs
Skipping progressive grits leaves deep scratches that appear after painting. Using dull abrasives glazes the surface instead of profiling it. Cross-contamination between metals introduces future corrosion sites. Inadequate cleaning between stages traps abrasive particles under primer.
Power tool speed also matters—excessive RPM burns the metal and creates heat tint that requires additional removal.
Priming and Painting After Sanding
Sanding prepares the surface, but compatible primer systems lock in the results. Epoxy primers tolerate slightly coarser profiles (up to 180 grit) while offering superior corrosion protection. Self-etching primers work well on aluminum but require finer final sanding (220+ grit).
Apply primer within hours of final sanding to prevent flash rust on steel. Sand primer lightly with 320-400 grit before topcoats for maximum smoothness.
Advanced Techniques for Professional Results
For high-visibility welded projects, consider DA (dual action) sanding with guide coats between grits to reveal low spots. Block sanding with flexible boards ensures flatness across large panels. In production environments, invest in vacuum-assisted sanders to control dust and improve abrasive life.
Laser-etched or pre-primed metals may need minimal mechanical prep, but welding repairs on them still demand full grit progression in the repair zone to blend seamlessly.
Wrapping Up
Proper sandpaper selection and methodical surface preparation transform welded metal from a liability into a durable, attractive substrate. The right grit sequence—matched to your specific metal, weld quality, and coating system—delivers adhesion that survives years of service.
Master this process and your painted fabrications will outperform those relying on shortcuts every time. For demanding environments, test small sections with your exact primer and paint combination to confirm the optimal final grit.
FAQ
What is the best grit sandpaper for bare metal before painting?
For most welded steel, finish sanding with 180-220 grit before primer. This provides adequate profile for adhesion without excessive scratches showing through thin coats.
Should I sand metal wet or dry before painting?
Dry sanding is standard for initial weld cleanup and coarse-to-medium grits. Switch to wet sanding with finer grits (320+) for primer and topcoat stages to minimize dust and achieve smoother results.
Can I paint over welded metal without sanding?
No. Welding residues and oxides prevent proper bonding. At minimum, clean and scuff with 120-180 grit. Skipping this step guarantees early coating failure.
What grit after primer before final paint on metal?
Lightly sand cured primer with 320-400 grit (wet or dry) to knock down texture and imperfections. This ensures the topcoat flows evenly and bonds well.