Building a spot welding machine at home can feel intimidating, but it’s not just for professional workshops. With the right knowledge, tools, and safety practices, you can make your own spot welder for small projects like joining sheet metal or repairing batteries.
This guide takes you through each step, from understanding the basics to assembling, testing, and troubleshooting.
Whether you’re a hobbyist or a DIY enthusiast, you’ll learn how to create a reliable, safe spot welding machine using affordable materials. Along the way, you’ll discover practical tips and insights that many beginners overlook.

Image by @RJEDITALL
What Is Spot Welding?
Spot welding is a simple but powerful technique used to join metal sheets. It works by passing electric current through metal pieces held together under pressure. The heat melts the metal at the contact point, forming a strong weld. You often see spot welding in automotive, battery packs, and metal furniture.
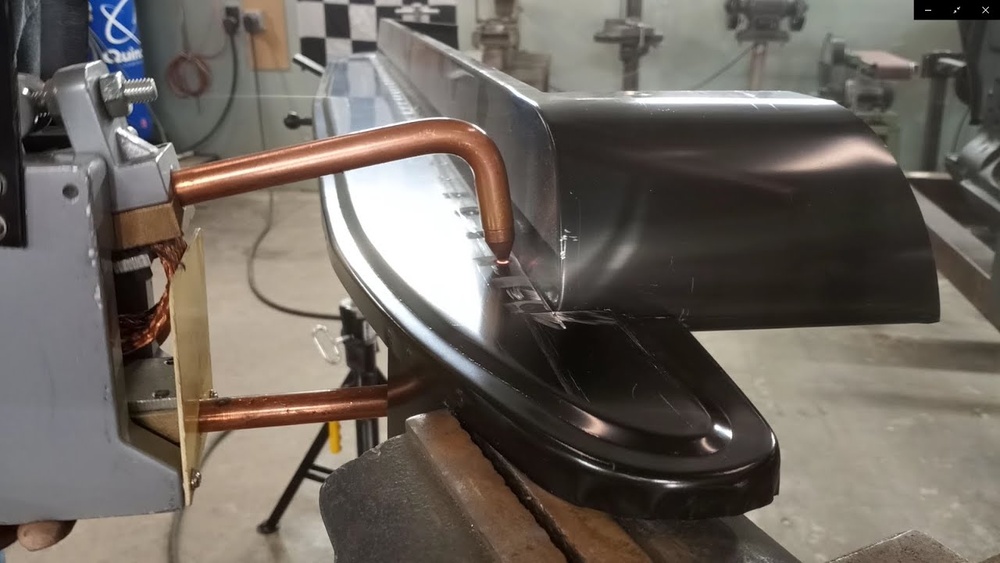
A typical spot welder uses two electrodes made from copper. The electrodes squeeze the metal sheets, then send a high current for a short time. This heats the metal only at the contact point, leaving the rest cool. Spot welding is fast, clean, and doesn’t need extra materials like solder or glue.
Why Make A Spot Welding Machine At Home?
Buying a spot welder can cost hundreds of dollars. Making your own is cheaper and lets you customize for your needs. Homemade spot welders are good for:
- Fixing battery packs (like 18650 lithium cells)
- Small metal repairs
- Learning about electronics and metalwork
Building your own also teaches you important skills. You learn about electricity, safety, and basic mechanics. Plus, you can adjust your spot welder for different projects.
Understanding Spot Welder Components
Before you start, you need to know the key parts that make up a spot welding machine. Here’s a breakdown of the main components:
- Transformer: This changes household voltage (110-220V) to low voltage (2-6V) but high current (100-2000A).
- Electrodes: Usually made from copper rods. They deliver current to the metal.
- Switch or Trigger: Controls when current flows.
- Wiring: Thick wires connect the transformer to the electrodes.
- Frame: Holds the electrodes and parts in place.
- Cooling system (optional): Prevents overheating for longer use.
| Component | Purpose | DIY Options |
|---|---|---|
| Transformer | Provides high current | Old microwave oven transformer |
| Electrodes | Conducts electricity | Copper rods, thick wire |
| Switch/Trigger | Controls weld timing | Foot pedal, push button |
| Wiring | Connects parts | Heavy gauge cable |
| Frame | Holds parts | Wood, metal, plastic |
| Cooling | Prevents overheating | Fan, heat sink |
Many beginners miss the importance of using the right transformer and thick wires. Thin wires or weak transformers can cause overheating, fire, or weak welds.
Gathering Tools And Materials
You don’t need expensive tools. Most items are available at hardware stores or online. Here’s what you need:
- Microwave oven transformer (MOT) – Used, from old microwaves
- Copper rods – 6-12 mm diameter, for electrodes
- Heavy gauge wire – 10 AWG or thicker
- Switch or relay – Foot pedal, push button, or solid-state relay
- Insulating materials – Heat-resistant tape, plastic, or wood
- Frame materials – Wood, metal, or plastic boards
- Basic tools – Screwdrivers, drill, saw, wire cutters
- Safety gear – Gloves, goggles, fire-resistant apron
Optional:
- Cooling fan – Small computer fan or similar
- Digital timer – For precise weld times

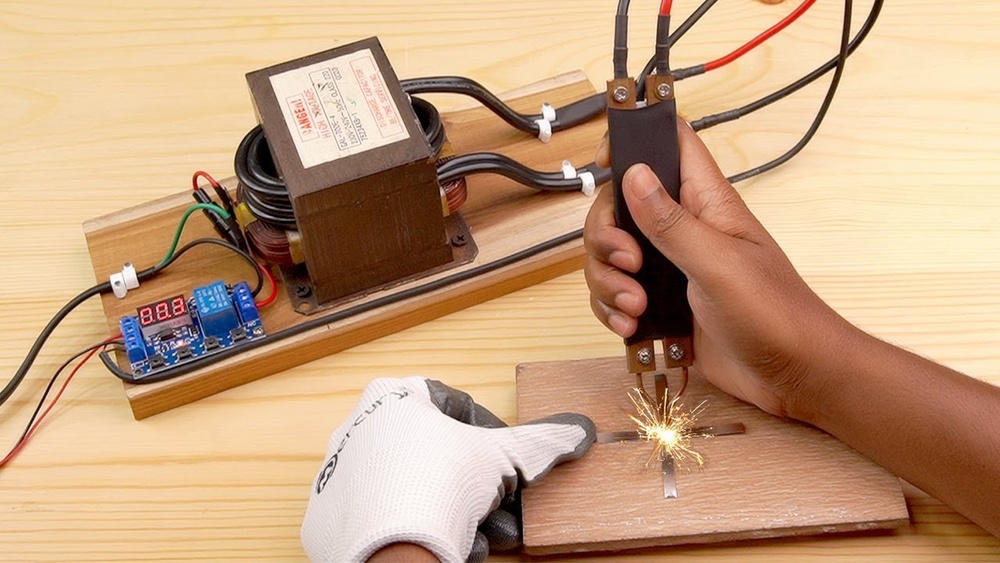
Credit: www.pcbway.com
Safety Precautions
Spot welding uses high current, so safety is critical. Here are some must-follow rules:
- Never touch electrodes when powered.
- Use insulated tools when working with live wires.
- Keep your work area dry and clear.
- Wear eye protection and gloves.
- Use a fire-resistant surface.
- Disconnect power before making adjustments.
Some beginners skip safety gear or use thin wires, which can lead to accidents. Always check your connections and use proper insulation.
Step-by-step Guide To Building Your Spot Welding Machine
This section explains how to build a spot welder using a microwave oven transformer (MOT). MOTs are popular because they deliver high current at low voltage, perfect for spot welding.
Step 1: Preparing The Transformer
- Remove the transformer from an old microwave. Be careful – capacitors in microwaves can hold charge even when unplugged.
- Identify the primary winding (thinner wire) and secondary winding (thicker wire). You will need to remove the secondary winding.
- Use a hacksaw or pliers to cut and remove the secondary winding. Leave the primary winding intact.
- Wind 2-3 turns of thick copper wire (like 10 AWG or thicker) around the transformer core. This becomes your new secondary winding, providing low voltage but high current.
Insight: Many beginners think more turns mean more power. Actually, fewer turns give more current. Aim for 2-3 tight turns.
Step 2: Making The Electrodes
- Cut two copper rods (about 6-12 mm diameter, 10-15 cm long).
- Sharpen one end of each rod for better contact.
- Mount the rods in insulated holders (wood or plastic blocks work).
- Connect the copper rods to the ends of your new secondary winding using heavy gauge wire.
Tip: Use thick copper for both electrodes and wires. Thin material causes poor welds and overheating.
Step 3: Building The Frame
- Build a simple frame to hold the electrodes. Wood is easy to work with, but metal is more durable.
- Attach the electrodes so they can be squeezed together with a lever, clamp, or handle.
- Make sure the frame is stable and keeps the electrodes lined up.
Step 4: Adding The Switch
- Install a switch or foot pedal to control when the transformer sends current.
- For safety, use a relay or solid-state relay to avoid handling live wires directly.
- Wire the switch between the transformer and the power source.
Mistake to avoid: Some people use a simple toggle switch. This can be risky if your hands are near the electrodes. A foot pedal or remote switch is safer.
Step 5: Optional Cooling System
If you plan to weld for long periods, install a cooling fan or heat sink near the transformer and electrodes. This prevents overheating and extends the machine’s life.
Step 6: Final Assembly And Checks
- Double-check all connections for tightness and insulation.
- Make sure the frame is stable and electrodes are aligned.
- Check that the switch works smoothly.
- Place the machine on a fire-resistant surface.
Before plugging in, inspect for exposed wires or loose parts. Many beginners skip this step and face electrical issues later.

Credit: www.youtube.com
Testing Your Spot Welding Machine
Testing is key to safety and performance. Here’s how to test your homemade spot welder:
- Wear safety gear – gloves, goggles, apron.
- Place two thin metal sheets (like steel or nickel) between the electrodes.
- Press the electrodes together and activate the switch for 1-2 seconds.
- Release and check the weld. It should be solid and visible.
Repeat with different metals and thicknesses. If the weld is weak or the machine overheats, adjust wire turns or contact pressure.
| Metal Type | Weld Quality | Recommended Settings |
|---|---|---|
| Nickel strip | Excellent | 1-2 seconds, tight contact |
| Steel sheet (0.5mm) | Good | 2-3 seconds, moderate pressure |
| Aluminum sheet | Fair | 1-2 seconds, high current |
Common Mistakes And How To Avoid Them
Even experienced DIYers make mistakes. Here are some pitfalls and solutions:
- Using thin wire for secondary winding – causes overheating and poor welds.
- Wrong electrode material – aluminum or steel electrodes wear quickly; use copper.
- Loose connections – results in weak welds and sparks.
- Skipping insulation – leads to shocks or fires.
- Over-welding – holding the switch too long burns metal.
- Poor alignment – electrodes not touching evenly make weak welds.
Pro tip: Use a timer for consistent welds. Many homemade spot welders add a cheap digital timer for precise control.
Improving Your Spot Welding Machine
After your basic build, you can upgrade your spot welder for better performance and safety.
Digital Timer
Install a digital timer to control weld duration. This gives more consistent results and protects the machine from overheating.
Adjustable Pressure
Build a lever arm or clamp system to adjust electrode pressure. This lets you weld different thicknesses easily.
Insulation And Safety Features
Add extra insulation around wires and electrodes. Install a fuse or circuit breaker for added safety.
Portable Design
Mount your spot welder on a small board with handles. This makes it easy to move and use in different locations.
Cooling System
Use a bigger fan or water cooling for longer weld sessions. This is especially useful for battery pack building.
Real-world Examples And Applications
Homemade spot welders are popular for battery pack repairs and small metal projects. For example, you can weld 18650 lithium battery cells using nickel strips. This is common in electric bikes, power tools, and DIY electronics.
Spot welding is also useful for:
- Fixing metal furniture
- Making custom brackets
- Repairing metal toys
According to a survey from DIY forums, over 65% of homemade spot welders are used for battery pack assembly. The average cost to build a basic machine is $40-$80, much cheaper than buying a commercial welder.
| Application | DIY Usage (%) | Commercial Usage (%) |
|---|---|---|
| Battery packs | 65 | 75 |
| Sheet metal repair | 20 | 15 |
| Metal furniture | 10 | 5 |
| Other | 5 | 5 |
Troubleshooting: Fixing Common Problems
Your spot welder may face issues. Here’s how to solve the most common ones:
- No weld or weak weld: Check wire thickness, transformer windings, and electrode pressure. Make sure connections are tight.
- Overheating: Add a fan or reduce weld time. Use thicker wire.
- Sparks or arcing: Ensure electrodes are clean and aligned. Clean with sandpaper.
- Shock hazard: Improve insulation, check for exposed wires, and always unplug before fixing.
If your machine keeps failing, test the transformer with a multimeter. Sometimes old transformers are damaged or worn out.
Advanced Tips For Reliable Spot Welding
Many guides stop at the basics, but small changes can make your spot welder safer and more effective:
- Use a solid-state relay for precise control and longer life.
- Add a current meter to monitor real-time amperage.
- Install a fuse for extra safety.
- Make electrodes replaceable for easy maintenance.
- Experiment with different electrode shapes for unique weld patterns.
These upgrades may cost a bit more, but they improve reliability and safety. For detailed electronic control, consider using an Arduino or microcontroller timer.
Resources For Further Learning
If you want to learn more about spot welding machines, electrical safety, or transformer design, visit this authoritative link:
Frequently Asked Questions
How Much Does It Cost To Build A Spot Welding Machine At Home?
The typical cost is $40-$80. Most of the budget goes to a used transformer, copper rods, and thick wire. If you add a digital timer, relay, or advanced cooling, the cost can go up to $100-$120. It’s much cheaper than buying a commercial spot welder.
Can I Use Any Transformer For Spot Welding?
No. You need a transformer that can provide high current at low voltage. Microwave oven transformers (MOTs) are best because they’re strong and easy to find. Car battery chargers or audio transformers won’t work well—they lack enough current.
Is Homemade Spot Welding Safe?
It can be safe if you follow proper insulation, use the right wire thickness, and never touch live parts. Always wear safety gear and add a fuse or circuit breaker. Most accidents happen from skipping insulation or using thin wires.
What Metals Can I Weld With A Homemade Spot Welder?
You can weld steel, nickel, and sometimes aluminum sheets. Aluminum is harder because it needs more current and precise control. For battery packs, nickel strips are common and easy to weld.
How Do I Improve Weld Quality?
- Use thick copper wire and rods.
- Make sure electrodes are clean and aligned.
- Adjust pressure and weld time.
- Add a digital timer for consistency.
- Keep your machine cool with a fan.
Spot welding takes practice. Experiment with different settings and materials to get the best results.
Final Thoughts
Making a spot welding machine at home lets you handle metalwork and battery repairs without spending a lot. With a used microwave oven transformer, copper rods, and thick wire, you can build a safe, reliable spot welder. Always respect safety, and improve your design as you learn.
Many beginners miss small details like wire thickness or insulation, but these matter for performance and safety. As you gain experience, you can upgrade with digital timers, relays, and better cooling. Spot welding is a powerful skill—once you build your machine, you’ll discover new ways to use it in your DIY projects.