A welding helmet that fails to power on or stops adjusting its lens properly can interrupt work and compromise eye protection. Knowing how to change the battery in a welding helmet helps restore reliable auto-darkening performance without unnecessarily replacing the entire helmet.
However, battery replacement is not the same for every model. Some helmets use replaceable lithium batteries, while others have sealed or solar-assisted power systems that require specific handling.
Using the wrong battery, installing it with reversed polarity, or damaging the battery compartment can cause further problems. Before replacing the battery, it is important to identify the helmet’s power system and follow the manufacturer’s instructions.
Understanding the correct replacement procedure helps prevent damage, reduce downtime, and ensure the auto-darkening filter functions correctly. Always verify the lens operation before welding, and never rely on a helmet that fails to darken consistently.
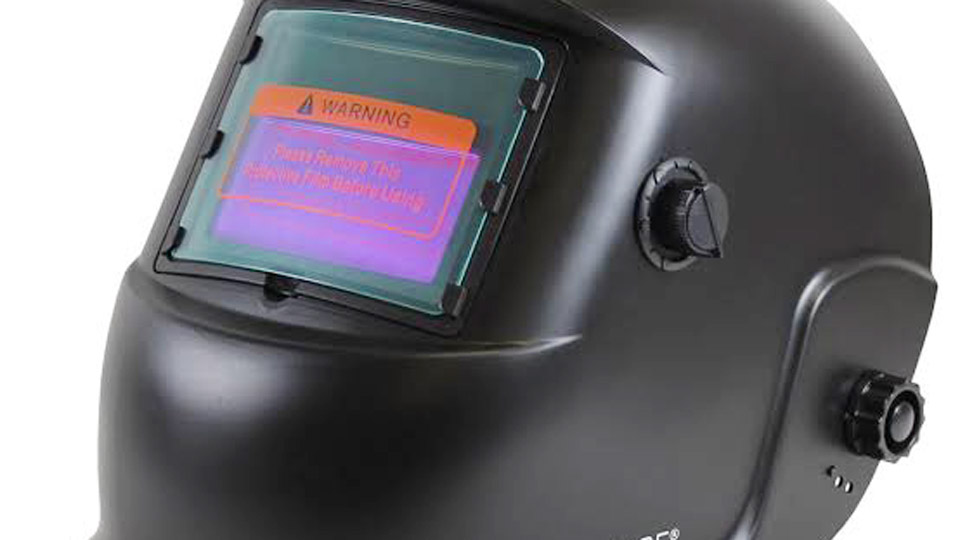
Image by lloyd-jones
Identifying the Correct Battery Type for Your Helmet
Battery chemistry and physical size must match the circuit design of the ADF cartridge. Using the wrong cell produces intermittent contact, reduced runtime, or complete failure to darken.
CR2450 Versus CR2032 Lithium Coin Cells
The CR2450 measures 24.5 mm in diameter and 5.0 mm thick with a typical capacity near 600 mAh. It is the standard cell in many Miller Digital Elite, Digital Infinity, Performance series, Lincoln Viking 2450/3350, and certain ESAB models. The thicker profile supplies higher current for rapid shutter response under repeated arc starts.
The CR2032 is smaller (20 mm diameter, 3.2 mm thick) and holds roughly 220 mAh. It appears frequently in 3M Speedglas, Optrel, Harbor Freight, YesWelder, and various budget cartridges. Both deliver a nominal 3 V, yet they are not interchangeable—the diameter difference prevents proper seating and spring tension.
Multi-Cell Configurations and Alkaline Alternatives
Higher-end digital helmets often require two CR2450 cells installed in parallel or series trays. Classic or entry-level units may use two AAA alkaline cells. A few older designs incorporate AA packs. Rechargeable lithium-ion packs appear only in certain PAPR-integrated systems and are not drop-in replacements for coin-cell circuits.
Always verify the exact type printed on the existing cell or listed in the operator manual before purchase. Mixing brands or capacities within a dual-cell tray produces unbalanced discharge and premature failure of the stronger cell.
Accessing the Battery Compartment on Common Helmet Designs
Access methods differ by manufacturer and series. Forcing the wrong sequence damages clips, gaskets, or sensor wiring.
External Sliding or Twist Covers
Some Performance and Classic series helmets place a small rectangular or circular cover on the exterior of the ADF housing or helmet shell. Sliding covers move in the direction of molded arrows; twist covers rotate a quarter-turn counterclockwise.
These designs allow replacement without removing the cartridge. Keep the work surface clean so grit does not enter the contacts during the exchange.
Lens-Assembly Tray Systems
Miller Digital Elite and Infinity helmets require removal of the front cover lens, outer protector, and rubber gasket. The ADF cartridge then lifts free of the retaining arms. Battery trays slide out from the top or sides of the cartridge. Positive terminals face upward toward the interior of the helmet on most units.
Lincoln Viking models often require unplugging the external grind-mode button cable before squeezing the lock notches and extracting the entire filter cartridge. The battery door is typically a ridged panel on the lower edge of the cartridge face.
Sealed Cartridge Units
Certain low-cost or older solar-assisted helmets encapsulate the cell inside a permanently bonded housing. Access requires cutting or prying the plastic shell, which risks damaging the printed circuit board, solar cells, or LCD.
Replacement in these cases is possible only with soldering skills and a matching cell holder, and it usually voids any remaining warranty. When the housing is sealed, many shops simply replace the entire ADF cartridge rather than attempt field repair.
Step-by-Step Replacement for Replaceable Coin-Cell Models
The following sequence applies to the majority of serviceable CR2450 and CR2032 helmets once the correct access method has been identified.
Preparation and Disassembly
Set sensitivity to minimum or power the unit off if a switch is present. Remove the helmet from the headgear if the headband interferes with cartridge extraction. Work under bright, diffuse light on a clean surface. Photograph the battery orientation before removal.
Extract the old cells with clean fingers or plastic tweezers; avoid metal tools that can short the contacts or scratch the board.
Installation and Polarity Verification
Insert fresh cells with the positive (+) face oriented exactly as marked inside the tray or compartment—almost always facing the interior side of the helmet or toward the test button. Press each cell firmly until the spring or contact fully seats.
Dual-cell trays must receive both new cells at the same time; mixing a new cell with a depleted one accelerates failure of the fresh unit. Wipe any residual dust or oil from the contact surfaces with a dry, lint-free cloth before closing the tray or cover.
Reassembly Sequence
Slide trays fully home until they click or seat flush. Reinstall the ADF cartridge, ensuring the grind-mode cable (if present) routes without kinks and reconnects securely. Replace the gasket, outer cover lens, and retaining arms in reverse order of removal.
Confirm that no gap exists around the cartridge perimeter; light leakage can trigger false darkening or allow arc flash to reach the eyes.
Handling Sealed or Non-Serviceable Battery Units
When the cell is glued or welded inside the housing, the practical decision is whether to attempt a permanent modification or replace the cartridge.
Evaluation Criteria Before Opening a Sealed Unit
Measure the remaining open-circuit voltage of any accessible test points if possible. If the solar cells still produce voltage under strong light yet the shutter remains inactive, the internal cell is depleted.
Cost of a new OEM cartridge often approaches the price of a complete entry-level helmet, so economic justification depends on the quality of the shell and headgear. High-end shells with large viewing areas and premium headgear may justify the repair; disposable budget helmets rarely do.
Technical Requirements for Permanent Access Modification
Successful field conversion requires a rotary tool with a fine cutting disc, a matching coin-cell holder, fine-gauge wire, and a temperature-controlled soldering iron. The original cell must be desoldered or the spot-welded tabs carefully severed without lifting copper traces.
The new holder is then soldered in place with correct polarity and the housing re-sealed with compatible adhesive. This procedure carries a high risk of destroying the ADF electronics and should be performed only when spare parts are unavailable and the operator accepts the possibility of total loss.
Testing and Verifying Proper Function After Replacement
Post-installation verification confirms both electrical contact and optical response before returning the helmet to service.
Immediate Functional Checks
Expose the sensors to a bright work light or sunlight. The lens should darken within the manufacturer’s stated switching time—typically less than 1/10 000 second for modern units. Cycle the shade control through its full range and confirm that the viewing area darkens and lightens correspondingly.
Activate grind mode if equipped and verify the lens remains at the lighter shade. Any delay, flicker, or incomplete darkening indicates poor contact, reversed polarity, or a defective cell.
Extended Operational Validation
Perform several short test arcs on scrap material while observing the lens through a secondary fixed-shade filter or by using a camera. Confirm that the low-battery indicator (if present) extinguishes and that sensitivity and delay settings respond normally.
Record the installation date on the helmet shell or in a maintenance log so the next replacement interval can be anticipated.
Extending Battery Life Through Proper Helmet Use and Storage
Lithium coin cells degrade through both self-discharge and cumulative duty cycles. Controlled habits measurably extend service intervals.
Operational Practices That Reduce Drain
Set sensitivity only as high as needed for the process in use; excessive sensitivity keeps the circuit active during ambient light fluctuations. Turn the unit off or set it to the lowest power mode when the helmet is stored between jobs.
Avoid leaving the helmet face-up under continuous shop lighting for extended periods, because the solar cells may keep the electronics in a partial-on state.
Storage and Environmental Controls
Store the helmet in a cool, dry location away from direct sunlight when not in use. Extreme heat accelerates self-discharge of lithium cells; freezing temperatures temporarily reduce available capacity until the cell warms.
Keep spare cells in their original packaging until needed—exposed coin cells slowly lose capacity even when unused. Replace both cells in dual-cell systems at the same interval rather than waiting for one to fail.
Wrapping Up
Selecting the exact cell type, following the correct access sequence for the specific cartridge design, and verifying full optical response after installation return an auto-darkening helmet to reliable service. Operators who track battery age and maintain clean contacts routinely achieve two to three years of consistent performance from a single pair of quality lithium cells.
Advanced users further extend intervals by pairing high-capacity CR2450 cells with disciplined sensitivity management and by keeping a calibrated spare cartridge on the shelf for immediate swap during production runs.
FAQs
What battery does a Miller Digital Elite welding helmet use?
Two CR2450 lithium coin cells. The positive side faces upward toward the interior of the helmet when the trays are reinstalled.
How do I know if my welding helmet battery is dead?
Delayed or incomplete darkening, flickering during the arc, or a persistent low-battery indicator are the primary signs. A bright-light test that produces no response confirms depletion.
Can I replace a sealed battery in a cheap auto-darkening helmet?
Technically possible with cutting tools and soldering, but the risk of destroying the ADF electronics is high. Most users replace the entire cartridge or the helmet when the cell is non-serviceable.
How long do CR2450 batteries last in a welding helmet?
Under typical shop use, 1.5 to 3 years depending on arc starts per day, sensitivity settings, and storage conditions. Heavy daily production may shorten the interval to 12–18 months.