How to Pin and Weld a Barrel is a precision gunsmithing procedure used to permanently attach a muzzle device so a barrel meets a required overall length while maintaining reliable alignment and structural integrity.
The process demands accurate drilling, proper pin placement, controlled weld penetration, and careful heat management. Mistakes can damage barrel threads, misalign the muzzle device, weaken the weld, or create cosmetic and functional defects that are difficult to correct.
Whether you’re working with steel components in a professional shop or performing compliant firearm modifications, understanding the correct pin-and-weld method helps reduce rework and ensures a durable, properly finished attachment.
I’ll explain the critical preparation, welding techniques, inspection points, and common mistakes that determine a successful result.
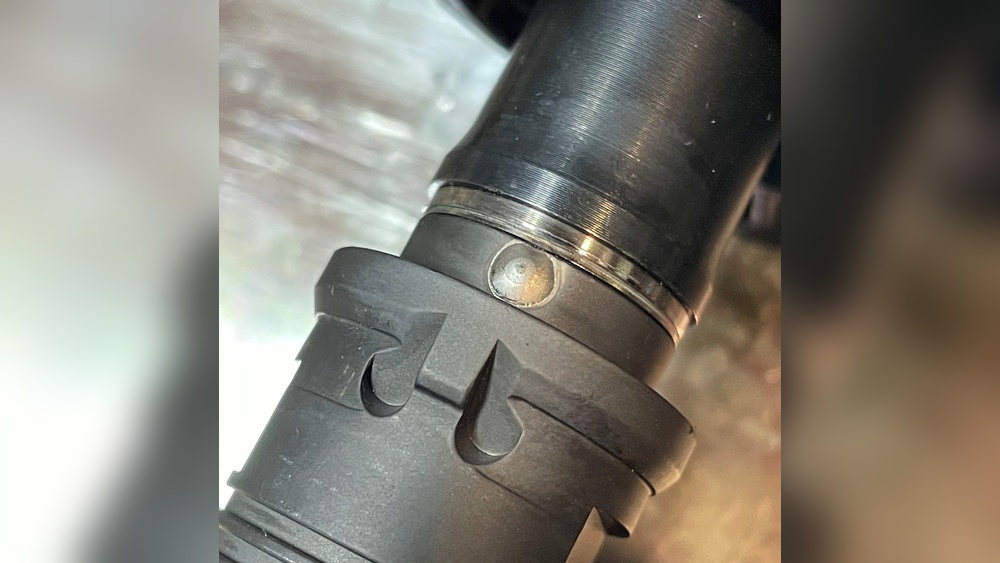
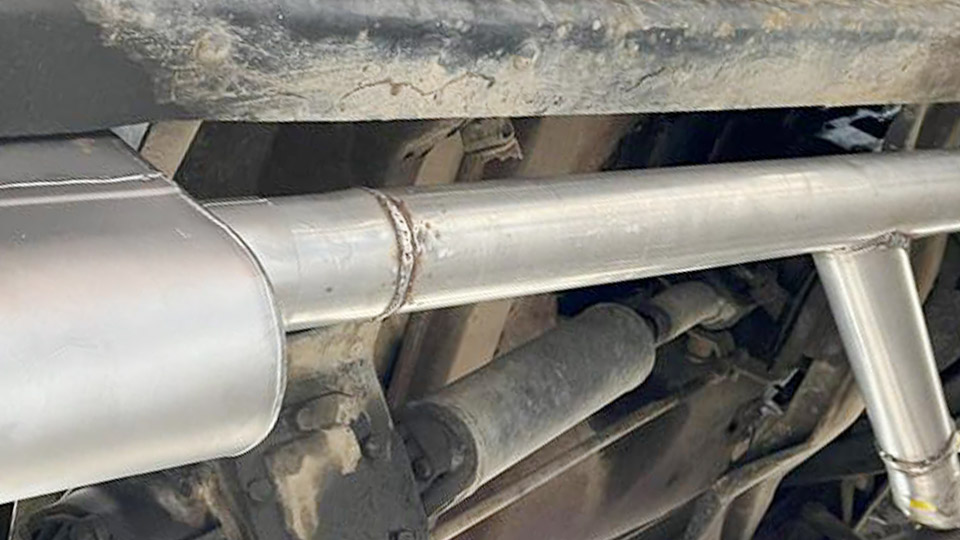
Image by bexararms
What Is Pinning And Welding A Barrel? Why Does It Matter?
What Does “pin And Weld” Mean?
Pinning and welding is a gunsmithing method for permanently attaching a muzzle device—like a flash hider or muzzle brake—to a firearm barrel. This is done by:
- Drilling a small hole through both the muzzle device and a portion of the barrel.
- Inserting a steel pin into the hole.
- Welding over the pin to lock it in place.
This process prevents easy removal, creating a permanent connection that satisfies both legal and technical requirements.
Why Is Pinning And Welding Important?
- Legal Compliance: In the U.S., rifles must have a minimum barrel length of 16 inches. If your barrel is shorter, permanently attaching a muzzle device can make it compliant.
- Performance and Safety: Some shooters want a specific muzzle device for recoil control or flash suppression, and pinning it ensures it won’t loosen or detach.
- Customization: Pinning and welding allow for shorter, lighter barrels while staying within the law.
Key insight: Not all muzzle devices are suitable for pin and weld. The device must be long enough and have enough material for safe drilling and pinning.
When Should You Pin And Weld A Barrel?
Common Scenarios
- Short-Barreled Rifles (SBR) Compliance
- If your barrel is under 16 inches, you must either register as an SBR (with strict regulations) or permanently attach a device to reach 16 inches.
- State or Local Laws
- Some regions require permanent muzzle devices to comply with assault weapon laws or feature bans.
- Competition or Duty Use
- Competitors and law enforcement sometimes need a non-removable muzzle device for reliability.
Is Pin And Weld Always Necessary?
No. If your barrel is already 16 inches or longer without a muzzle device, or you only use detachable devices, pinning and welding are not required. However, for legal compliance with shorter barrels, it’s essential.
Example
If you have a 14. 5-inch barrel, you must add a muzzle device at least 1. 5 inches long and pin/weld it to meet the 16-inch rule. Simply screwing on the device does not count.

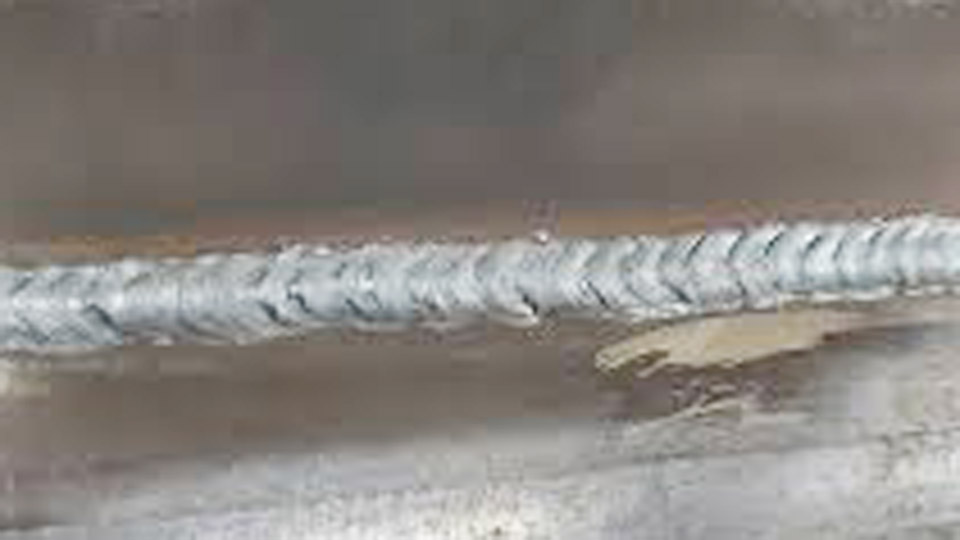
Credit: www.reddit.com
What Tools And Materials Do You Need For Pin And Weld?
Essential Tools
- Drill press or hand drill (with proper vise)
- High-speed steel (HSS) drill bits (usually 1/8″ or 3/32″)
- TIG or MIG welder (TIG preferred for precision)
- Bench vise
- Punch set
- Files or Dremel tool
Materials
- Hardened steel pin (1/8″ diameter common)
- Muzzle device (must be suitable for pin/weld)
- Protective gear (gloves, goggles, etc.)
- Welding rod or filler wire (ER70S-2 for TIG is common)
Optional But Helpful
- Calipers (for measuring pin depth and device length)
- Heat-resistant tape
- Cold blue or finish touch-up supplies
Beginner insight: Use a quality drill bit and go slow—cheap bits can snap, damaging the barrel or device.
How Do You Measure Barrel And Muzzle Device Length For Legal Compliance?
The Atf 16-inch Rule
To legally qualify as a rifle (not an SBR), your barrel must be at least 16 inches long. The ATF measures from the closed bolt face to the end of the permanently attached muzzle device.
How To Measure Correctly
- Close the action and ensure the firearm is unloaded.
- Insert a cleaning rod or dowel down the barrel until it touches the bolt face.
- Mark the point where the rod exits the muzzle device.
- Remove and measure the rod—this is your overall barrel length.
Common Mistakes
- Measuring only the barrel, not including the attached device.
- Using a device that’s too short or not permanently attached.
Practical comparison:
| Barrel Length | Muzzle Device Length | Pin & Weld Needed? | Compliant? |
|---|---|---|---|
| 14.5″ | 1.5″ | Yes | Yes (if device is pinned/welded) |
| 14.5″ | 1.25″ | Yes | No (too short) |
| 16″ | Any | No | Yes |
Key tip: Always check both federal and state laws, as some states have additional rules.
Which Muzzle Devices Can Be Pinned And Welded?
Device Types
Not every muzzle device is suitable for pinning and welding. Consider:
- Material thickness: Must be thick enough to drill a hole for the pin without weakening the device.
- Overall length: Must be long enough to add the required inches for compliance.
- Design: Some devices (like suppressor mounts) are not intended for permanent attachment.
Popular Choices
- A2 flash hider
- Extended compensators
- Hybrid brakes/flash hiders
Comparison Table: Device Suitability
| Muzzle Device | Material Thickness | Can be Pinned? | Recommended? |
|---|---|---|---|
| A2 Flash Hider | Good | Yes | Yes |
| Thin Compensator | Poor | No | No |
| Hybrid Brake | Good | Yes | Yes |
| Suppressor Mount | Varies | Depends | Check with manufacturer |
Non-obvious tip: Some aftermarket devices advertise “pinned and welded ready”—always verify actual dimensions and material before starting.
Step-by-step: How To Pin And Weld A Barrel
1. Prepare The Barrel And Muzzle Device
- Unload the firearm and remove the upper.
- Clean the barrel threads and muzzle device.
- Thread on the muzzle device, using shims or crush washer for timing if needed.
- Mark the top dead center (TDC) for reference.
2. Secure The Workpiece
- Place the upper receiver in a bench vise using soft jaws.
- Make sure the muzzle device is tight and properly aligned.
3. Drill The Pin Hole
- Choose a drill bit (usually 1/8”).
- Mark the drill spot—most choose the 6 o’clock position.
- Drill slowly through the muzzle device and slightly into the barrel (about 1/8” deep).
- Remove all metal shavings and debris.
Beginner pitfall: Drilling too deep can weaken the barrel. Go just past the threads.
4. Insert The Pin
- Use a hardened steel pin that fits snugly (not loose).
- Tap the pin into place with a punch.
- The pin should sit just below the surface for welding.
5. Weld Over The Pin
- Set up your TIG or MIG welder.
- Weld over the pin until it’s fully covered and flush with the device.
- Allow to cool naturally.
- File or sand smooth.
Pro tip: TIG welding allows better control and less heat damage than MIG.
6. Refinish The Device
- Clean the area with solvent.
- Apply cold blue or paint to match finish and prevent rust.
Step-by-step Recap Table
| Step | Purpose | Common Error |
|---|---|---|
| Preparation | Clean, align, and secure | Poor alignment |
| Drilling | Create pin channel | Drilling too deep |
| Pin Insertion | Lock device in place | Loose pin fit |
| Welding | Permanently seal pin | Overheating, poor weld |
| Refinishing | Protect and blend weld | No rust protection |
Non-obvious insight: Always keep the weld small and controlled. Excessive weld can deform the device or impact barrel harmonics.

Credit: www.blackanklemunitions.com
What Are The Legal Requirements For Pin And Weld?
Federal Law (atf)
- Permanent attachment is defined by the ATF as welding, high-temp silver solder, or blind pinning and welding.
- The weld must make removal difficult without specialized tools.
State And Local Laws
- California, New York, New Jersey, and others may have additional restrictions (such as device type or total length).
- Always check current laws before starting.
Documentation
- Keep records of the process, including barrel and device measurements, for proof of compliance.
- Take photos before and after for your files.
What Welding Methods Work Best For Pin And Weld?
Tig Vs Mig Vs Silver Solder
Tig Welding
- Pros: Precise, clean welds, minimal heat.
- Cons: Requires skill and equipment.
Mig Welding
- Pros: Faster, easier for beginners.
- Cons: More heat, risk of excess splatter.
Silver Solder
- Pros: Acceptable if done at 1100°F or higher.
- Cons: Hard to verify permanence, not always accepted.
Which Should You Use?
For most DIY and professional jobs, TIG welding is preferred for control and finish. MIG is acceptable if done carefully. Silver solder is less common and sometimes questioned by authorities.
Practical insight: A small, well-done TIG weld is less likely to damage barrel finish or threads.

Credit: www.dwilsonmfg.com
How Do You Remove A Pinned And Welded Device (if Needed)?
Is Removal Possible?
Permanent attachment means it’s not intended for easy removal. However, with the right tools:
- Grind or file off the weld until the pin is exposed.
- Carefully punch out the pin.
- Unscrew or remove the muzzle device.
Risks And Drawbacks
- Barrel damage: Removing the device can weaken threads or mar the finish.
- Legal issues: Removing a device from a short barrel may create an illegal SBR if not re-attached immediately.
- Heat and tool marks: The process usually leaves visible scars.
Key advice: Only attempt removal if you’re replacing the device with another permanent attachment, and always check legality first.
What Are Common Mistakes In Pin And Weld Jobs?
Poor Alignment
Misaligned muzzle devices can impact accuracy and cause baffle strikes with suppressors.
Inadequate Weld
Too little weld can fail, allowing the device to loosen. Too much heat can damage the barrel.
Incorrect Pin Size Or Placement
A pin that’s too small or placed off-center won’t hold securely.
Legal Missteps
Not measuring the overall length correctly or using an unapproved device can lead to serious consequences.
Non-obvious pitfall: Using a pin that’s not hardened can deform under firing stress.
How Does Pin And Weld Compare To Other Attachment Methods?
Pin & Weld Vs. Set Screw
- Pin and weld: Permanent, legally compliant.
- Set screw: Easily removed, not compliant for length requirements.
Pin & Weld Vs. Crush Washer Only
- Crush washer: Allows timing, but not permanent.
- Pin and weld: Required for legal “permanence.”
Pin & Weld Vs. High-temp Silver Solder
- Silver solder: Acceptable if done at 1100°F+.
- Pin and weld: Easier to verify and more widely accepted.
Summary Table
| Method | Permanence | Legal Compliance | Ease of Removal |
|---|---|---|---|
| Pin & Weld | High | Yes | Difficult |
| Set Screw | Low | No | Easy |
| Silver Solder | Medium | Yes (if >1100°F) | Moderate |
Expert insight: If you’re ever in doubt, pin and weld is the safest legal choice.
How To Achieve The Best Finish And Appearance
Blending The Weld
- Use a file or Dremel to smooth the weld flush with the device.
- Do not over-grind—this can expose the pin.
Refinishing
- Clean thoroughly and degrease.
- Apply cold blue for blued barrels or high-temp paint for others.
- Let dry and cure before handling.
Touch-up Tips
- Small imperfections can be hidden with touch-up pens.
- For stainless steel, use scotch-brite pads for a uniform look.
Tip: Always refinish promptly to prevent rust at the weld site.
Final Thoughts
Pinning and welding a barrel is a practical skill for any serious firearms enthusiast, DIY welder, or gunsmith. By following the right steps, using the correct tools, and understanding both technical and legal requirements, you can produce a safe, compliant, and professional result. Take the time to measure carefully, choose the right muzzle device, and weld with control. Cutting corners may save time up front, but brings risk of legal trouble and poor firearm performance. When in doubt, consult a qualified gunsmith or check with authorities before you start. With practice and attention to detail, pin and weld becomes a routine and valuable upgrade.
Frequently Asked Questions
How Do I Know If My Muzzle Device Is Long Enough For Pin And Weld?
Measure your barrel from the bolt face to the end of the muzzle device. The combined length must be at least 16 inches. Use calipers or a dowel for accuracy.
Can I Use A Set Screw Instead Of Pin And Weld For Legal Compliance?
No. Set screws are not considered permanent by the ATF. Only pin and weld, high-temp silver solder, or full circumferential welds meet the standard.
What Size Pin Should I Use For Pin And Weld?
A 1/8-inch hardened steel pin is standard for AR-15 builds. The pin must fit snugly and not protrude above the device surface after welding.
Can I Remove A Pinned And Welded Muzzle Device Myself?
Yes, but it requires grinding off the weld, removing the pin, and risks damaging the barrel. Also, ensure you don’t make the rifle non-compliant during the process.