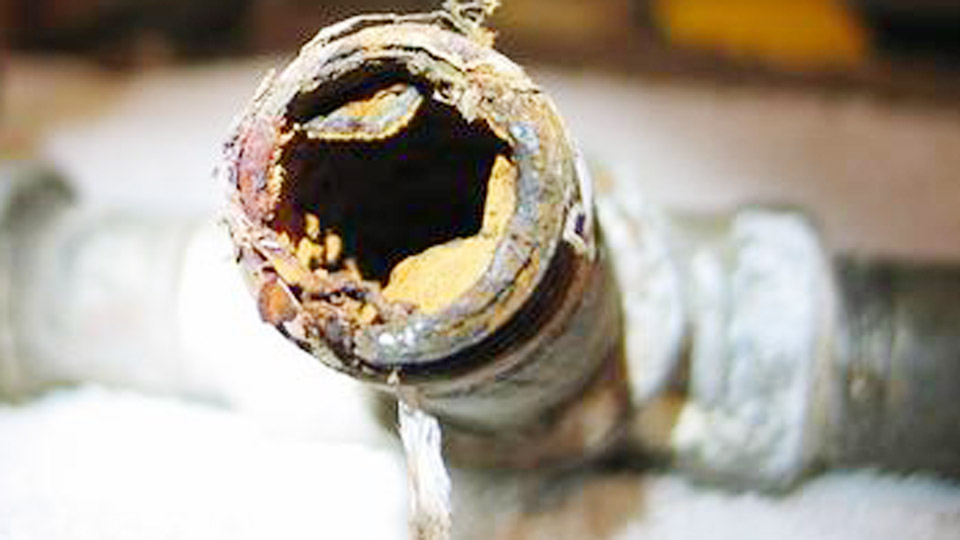
One of the hardest lessons I learned early on was watching a beautiful-looking 304 stainless weld start rusting in a humid environment just weeks after fabrication. The problem wasn’t the weld itself—it was what happened (or didn’t happen) to the surface afterward. That’s where passivation comes in.
Passivation isn’t some fancy extra step for high-end jobs. It’s a practical way to restore the corrosion resistance that stainless steel is famous for after welding disrupts its natural protective layer.
In real-world fabrication and repair work, skipping it leads to premature failure, customer complaints, rework, and wasted time. Whether you’re a hobbyist building a custom exhaust or a pro on a pressure vessel, understanding how passivation works will save you headaches and money.
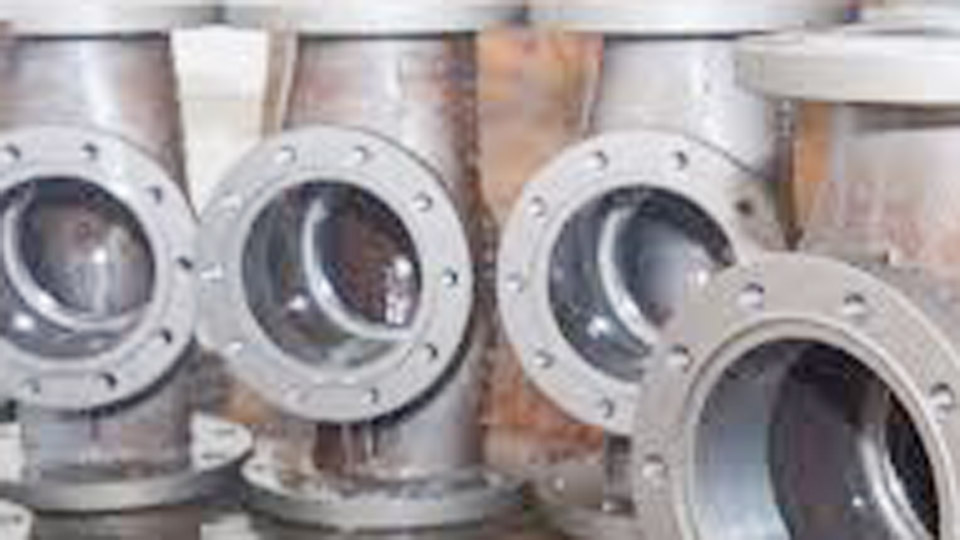
Image by precgroup
What Exactly Is Passivation and Why Does Welding Break It?
Stainless steel gets its name from the thin, invisible chromium oxide layer that forms naturally on its surface when exposed to oxygen. This passive film, only a few atoms thick, acts like a self-healing shield against rust and corrosion. It reforms quickly on clean metal.
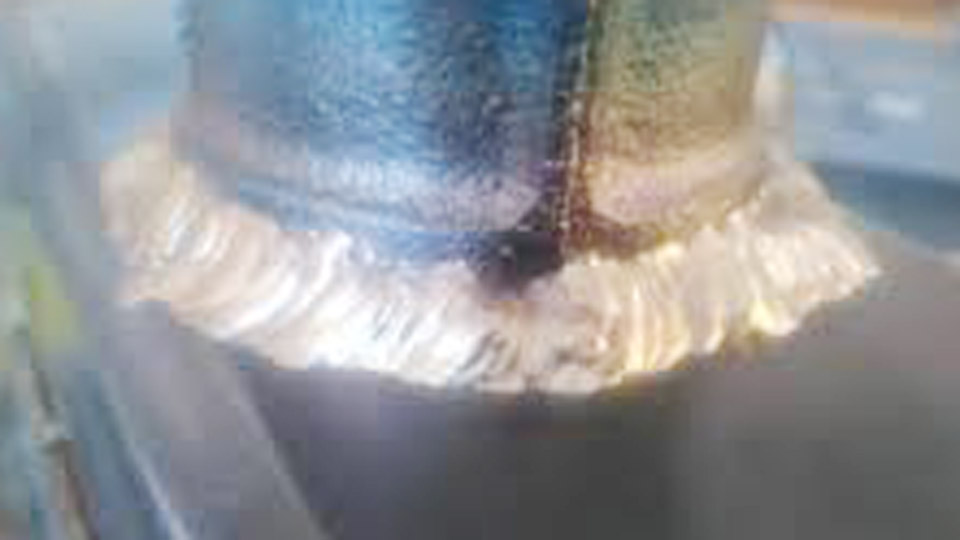
Welding changes everything. The intense heat from SMAW, TIG, or MIG creates a heat-affected zone (HAZ) where temperatures exceed 400–500°C. This burns off or alters the chromium oxide layer.
Heat tint—those rainbow or straw-colored oxides—forms, pulling chromium from deeper in the metal and leaving free iron particles embedded on the surface. Contaminants like grinding dust, shop oils, or carbon from electrodes make it worse.
Without restoring that passive layer, the weld area becomes a weak spot. Chlorides from road salt, cleaning chemicals, or even fingerprints can trigger pitting or crevice corrosion that spreads under the surface. I’ve seen it on dairy equipment and marine railings—ugly brown stains that eat away at structural integrity over time.
Passivation chemically cleans the surface by removing free iron and contaminants, then lets (or helps) a fresh, uniform chromium-rich oxide layer form. It’s not painting or coating; it’s enhancing the metal’s own defense system.
How Does the Passivation Process Actually Work?
The chemistry is straightforward but powerful. Acids selectively dissolve free iron while leaving the chromium mostly intact. This raises the chromium-to-iron ratio at the surface. Once exposed to air (or oxygen in the process), the chromium reacts to rebuild the passive film, often faster and more effectively than it would naturally.
Step-by-step in a typical shop setting:
Thorough Cleaning: Remove all visible contaminants, slag, spatter, and heavy heat tint. Use alkaline cleaners, dedicated stainless wire brushes, or grinding with clean abrasives reserved only for stainless. Never use carbon steel tools—iron contamination is the enemy.
Acid Treatment: Immerse or apply nitric acid or citric acid solutions. Nitric is traditional and aggressive; citric is safer, more environmentally friendly, and gaining popularity in US shops. Contact time is usually 20–60 minutes depending on concentration and temperature (often 120–150°F for best results).
Rinse and Dry: Neutralize and rinse thoroughly with clean water to remove all acid residues. Dry completely to prevent water spots or new contamination.
Air Exposure: The passive layer develops fully over the next 24–48 hours in normal air. Some processes accelerate this.
In practice, many fabricators now use electrochemical tools—like brushes with electrolytic fluids—that clean heat tint and passivate in one pass. These are game-changers for field repairs or large fabrications where tank immersion isn’t feasible.
When Should You Passivate Welds? Real-World Triggers
Passivate after any operation that disrupts the surface: welding, grinding, cutting, machining, or even heavy handling. It’s especially critical for:
- Food, beverage, pharmaceutical, or medical equipment (where contamination risks are high)
- Marine or outdoor architectural work exposed to chlorides
- Pressure vessels and piping under corrosive service
- Any 300-series stainless (304, 316) in humid or aggressive environments
You can sometimes skip it for painted or powder-coated parts, or internal welds in non-critical applications. But for most structural or visible stainless work, it’s cheap insurance. I passivate almost every stainless job now—learned that the hard way after a couple of callbacks.
For hobbyists in a home shop, even a simple citric acid soak can make a huge difference on custom bike frames or BBQ smokers.
Pickling vs. Passivation: Don’t Confuse the Two
Beginners often mix these up. Pickling is more aggressive—it removes a thin layer of base metal, including heavy scale and oxides, using stronger acid mixes (often nitric + hydrofluoric). It etches the surface and is great for descaling after heavy fabrication.
Passivation is gentler. It targets free iron without significantly removing sound metal and focuses on rebuilding the passive film. You often pickle first on heavily scaled welds, then passivate. Many modern one-step electrolytic processes handle both cleaning and passivation effectively.
Quick Comparison Table:
| Aspect | Pickling | Passivation |
|---|---|---|
| Purpose | Remove heavy scale & oxides | Restore protective film |
| Acid Strength | Strong (e.g., HF mixes) | Milder (nitric or citric) |
| Metal Removal | Yes, etches surface | Minimal to none |
| Appearance Change | Dull or matte | Little to none |
| When Used | Heavy heat tint/scale | Post-cleaning for corrosion resistance |
| Safety/Env Impact | Higher | Lower (esp. citric) |
Choosing the Right Process for Your Shop
Nitric Acid: Reliable, specified in many ASTM standards like A967. Good for broad applications but requires careful handling, ventilation, and waste disposal. Common concentrations around 20-50% by volume.
Citric Acid: My go-to for smaller shops and hobbyists. Biodegradable, less hazardous, effective on many grades. Typical 4-10% solutions at elevated temps. Safer for DIY setups.
Electrochemical: Fast, localized, minimal waste. Great for in-situ repairs on large tanks or installed piping. Tools like TIG brushes combine cleaning and passivation beautifully.
Pastes and Gels: Convenient for vertical or overhead welds. Apply, wait, rinse. Handle with full PPE— these are still nasty chemicals.
Always follow manufacturer guidelines and local regulations for handling and disposal. In the US, check OSHA and EPA rules for acid use.
Practical Tips from the Welding Bench
Joint Prep Matters: Clean base metal thoroughly before welding. Use acetone or dedicated stainless cleaners. Maintain good shielding gas coverage (100% argon for TIG) to minimize heat tint.
Filler Metal: Match or over-alloy with your base (e.g., 308L or 316L). Low-carbon “L” grades reduce sensitization risks.
Amperage and Technique: Use lower heat input where possible. For TIG on 1/8″ 304, I’m often around 90-120 amps with a 3/32″ tungsten. Travel speed helps control the HAZ.
Electrode/Process Choices: For SMAW, 316L-16 rods work well. Keep them dry. MIG requires proper tri-mix gas for stainless.
Post-Weld Cleaning: Grind or brush only with stainless-dedicated tools. Avoid carbon steel wire wheels at all costs.
Common beginner mistake: Thinking a pretty-looking weld with light straw tint is “good enough.” That tint is a sign of chromium depletion. Another pro pitfall: Rushing the rinse step, leaving acid residues that cause flash attack or new corrosion.
Safety Considerations Every Welder Must Know
Acids demand respect. Wear full PPE: chemical-resistant gloves, goggles, face shield, apron, and boots. Work in well-ventilated areas or outdoors. Have neutralizing agents (baking soda or lime) and eyewash stations ready.
Never mix acids haphazardly. Dispose of spent solutions per local hazardous waste rules—don’t just pour down the drain. Citric is more forgiving, but still handle carefully.
For shop setups, consider dedicated passivation stations with proper containment. Training is key; I’ve seen experienced welders get sloppy and regret it.
Material-Specific Advice for Common Alloys
304/304L: Workhorse alloy. Passivates well but sensitive to chlorides. Great for general fabrication.
316/316L: Better corrosion resistance due to molybdenum. Preferred for marine or chemical exposure. Still needs proper passivation after welding.
Duplex and Super Duplex: More challenging due to balanced microstructure. Follow specific procedures to avoid harming the phase balance—often require qualified procedures.
400 Series: Less common for welding in hobby shops; they behave more like carbon steel and may need different treatments.
Always verify with material certs and welding procedure specs (WPS) for critical work.
Step-by-Step Guide: DIY Citric Acid Passivation for Small Parts
- Degrease parts thoroughly.
- Mix citric acid solution (follow product instructions—often 10% by weight).
- Heat to 140–150°F if possible (hotter = faster).
- Immerse for 30 minutes, agitating occasionally.
- Rinse in clean, flowing water until pH neutral.
- Dry with compressed air or lint-free cloths.
- Allow 24+ hours for full passivation.
Test with a simple copper sulfate test or water break test to verify cleanliness before and after.
For larger fabrications, spot treatments or professional services make sense.
Common Mistakes That Ruin Passivation Efforts
- Using contaminated tools or rags that introduce more iron.
- Inadequate pre-cleaning—acids can’t work through grease or heavy scale.
- Wrong concentration or temperature leading to etching or ineffective treatment.
- Mixing alloys in the same bath, causing galvanic issues.
- Poor rinsing, trapping acid.
- Expecting immediate results—give the oxide layer time to form.
Pros sometimes overlook ventilation or PPE when in a rush. Hobbyists might skip testing. Both lead to the same disappointing rust later.
Advanced Techniques and Shop Hacks
Electropolishing combines brightening with excellent passivation for high-end parts. For field work, portable electrochemical systems let you treat welds without disassembling equipment.
Some shops use nitric with sodium dichromate for stubborn cases, but environmental regs are tightening. Citric and electrochemical are the future for most US operations.
Monitor bath chemistry regularly in production settings—contaminated solutions fail quickly.
Why Bother? The Real Payoff in Durability and Cost
Properly passivated welds last years longer in service. Less maintenance, fewer leaks, happier customers. In food-grade work, it prevents product contamination. In structural jobs, it maintains integrity.
I’ve seen unpassivated stainless truck hitches rust through while passivated ones look new after seasons of road salt. The upfront time (often under an hour for small jobs) pays for itself many times over.
Taking Your Stainless Work to the Next Level
You’ve got the knowledge now: clean thoroughly, choose the right method for your setup, follow through on rinsing and drying, and give the passive layer time. Combine this with solid welding technique—proper joint prep, controlled heat input, matching fillers—and your stainless projects will perform as expected.
Always dedicate a set of tools exclusively for stainless. Label them clearly. Cross-contamination from carbon steel is the silent killer of corrosion resistance, and once it’s embedded, passivation has to work harder to fix it. Keep your stainless tools pristine, and your welds will thank you for years.
FAQ
How long does passivation last on stainless steel welds?
In normal service, a properly done passivation can last the life of the component if the environment isn’t extremely aggressive. It can be damaged by mechanical abrasion or heavy contamination later, requiring re-treatment. Regular cleaning helps maintain it.
Can I passivate stainless steel at home without special equipment?
Yes. Citric acid solutions from welding suppliers or even food-grade sources work for small parts. Follow safety instructions, use plastic containers, and rinse extremely well. For anything larger or critical, consider professional help or electrochemical tools.
Is passivation required after every weld?
Not always, but it’s highly recommended for corrosion-prone applications. Light-duty indoor projects might get by with thorough mechanical cleaning and time for natural reformation, but why risk it when acid treatment is straightforward?
What’s the difference in results between nitric and citric acid?
Both work well. Nitric is faster and traditional for heavy-duty jobs. Citric is safer, greener, and often sufficient for most welding applications. Many modern specs accept either if test results meet requirements.
How do I test if passivation was successful?
Common field tests include the copper sulfate test (no copper plating means low free iron) or simple exposure to humid air. For critical work, use lab ferroxyl or ASTM A967 tests. Visual inspection for rust after 24–48 hours in a test environment is practical too.