
Welders frequently encounter contaminated joints, uneven beads, or surfaces that refuse to accept paint or coatings properly. A common frustration is spending hours on post-weld cleanup only to discover scratches, porosity risks, or poor adhesion later.
Understanding how sandpaper grit works directly addresses these issues by controlling material removal rates, scratch patterns, and final surface texture—critical factors that determine weld strength, appearance, and longevity in real fabrication shops.
Grit size dictates abrasive particle dimensions: lower numbers mean larger, more aggressive particles that cut deeply and quickly, while higher numbers use finer particles for smoothing.
In metal working, this knowledge prevents over-thinning base metal, reduces heat-affected zone problems, and ensures clean fusion or flawless finishes. Proper grit selection and progression separate hobbyist results from code-compliant, inspection-ready work.
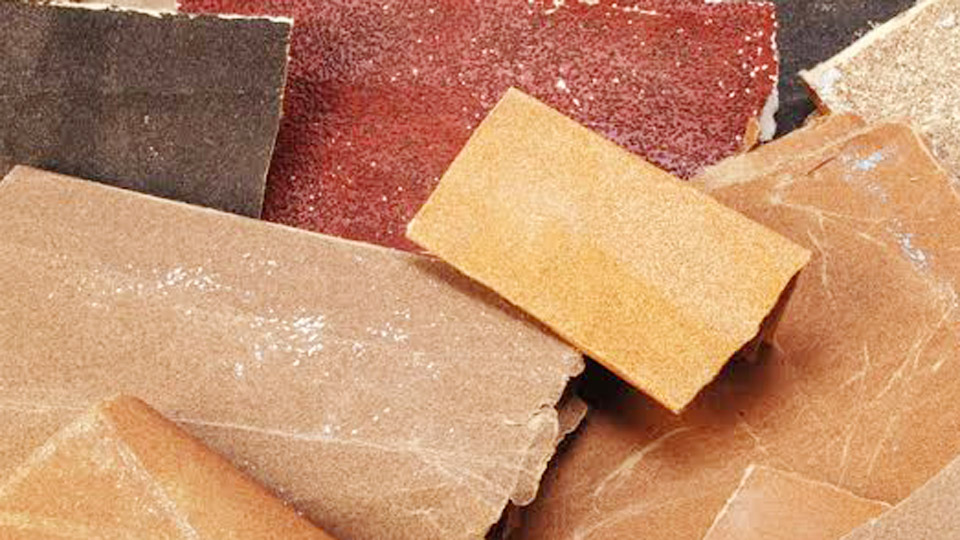
Image by theartofeducation
The Mechanics of Abrasive Action in Metalworking
Particle Size and Cutting Dynamics
Sandpaper grit functions through thousands of microscopic cutting edges. Each abrasive grain—typically aluminum oxide, silicon carbide, zirconia, or ceramic—acts like a tiny chisel. When pressure and motion are applied, these grains shear off material in small chips or swarf.
Lower grit numbers (e.g., 40-60) feature larger particles that create deeper scratches and remove stock rapidly—ideal for heavy weld bead reduction or mill scale removal. Higher grits (220+) produce shallower, denser scratch patterns that refine the surface toward a uniform finish.
The transition between grits matters because each successive pass must fully erase the previous scratch pattern; skipping steps leaves visible or structurally problematic grooves.
In welding contexts, this mechanical action directly impacts joint preparation. Coarse grits efficiently strip oxides, rust, or contaminants that could cause inclusions or weak fusion. Finer grits minimize surface irregularities that concentrate stress or interfere with non-destructive testing.
Abrasive Materials and Their Performance on Welds
Different backing and grain compositions suit specific welding tasks:
- Aluminum oxide: Durable and versatile for mild steel and general prep. Self-sharpening to an extent as grains fracture.
- Silicon carbide: Sharp and effective on non-ferrous metals like aluminum; excels in wet sanding to control dust and prevent loading.
- Zirconia or ceramic: High-performance for stainless and hard alloys. Maintain cutting efficiency under heat and pressure without glazing quickly.
Open-coat designs (40-70% grain coverage) prevent clogging on soft or gummy metals, while closed-coat options deliver more aggressive action on harder surfaces. Backings range from paper (flexible for hand work) to cloth or film (durable for power tools).
Grit Standards: CAMI vs. FEPA and Practical Implications
Two primary systems govern measurements. CAMI (common in the US) and FEPA/P-grade (tighter tolerances, widely used internationally) both use sieve analysis, but particle size distribution varies. FEPA often provides more consistent performance for precision welding work.
For welders, exact micron equivalents matter less than reliable progression. A typical sequence might move from 60-grit (heavy cleanup) to 120-grit (blending) to 220-grit (finishing), never jumping more than one grade to avoid labor-intensive scratch removal.
Surface Preparation Before Welding: Grit Choices for Clean Joints
Removing Contaminants and Oxides
Pre-weld sanding targets rust, mill scale, paint, and oils that compromise arc stability and penetration. Start with 60-80 grit for aggressive removal on carbon steel. These particles cut through scale quickly without excessive base metal loss.
On aluminum, begin at 120 grit or finer with silicon carbide to avoid embedding contaminants or gouging soft material. Stainless steel benefits from 80-120 grit zirconia to prevent discoloration and maintain corrosion resistance. Always wipe with a degreaser before and after to eliminate residues.
Achieving Optimal Joint Geometry and Texture
For butt or fillet joints, uniform surface texture promotes even heat distribution. Medium grits (100-150) level edges and create a slight roughness for mechanical interlocking during fusion. Excessive smoothness from very fine grits can reduce wetting action in some processes.
Key decision factors:
- Material thickness: Thinner sheets (<1/8″) require lighter pressure and finer starting grits to prevent burn-through.
- Process type: TIG demands cleaner, finer prepped surfaces (up to 220 grit) than MIG or stick.
- Environment: Outdoor or humid conditions increase flash rust risk—sand immediately before welding.
Post-Weld Finishing: Blending and Smoothing Techniques
Weld Bead Reduction and Initial Blending
After welding, excess reinforcement or spatter needs removal. Coarse grits (40-60) or equivalent flap discs handle bulk reduction efficiently. Maintain consistent angle (10-15° for discs) and avoid dwelling to prevent undercutting or heat tint.
Progress to 80-120 grit for blending the weld toe into the base metal. This stage eliminates stress risers and improves fatigue resistance. Ceramic grains excel here due to sustained aggressiveness on hardened weld zones.
Achieving Professional Surface Finishes
For visible or coated welds, finer grits deliver aesthetic and functional benefits:
- 150-220 grit for satin finishes ready for primer or paint.
- 320+ grit (often wet) for polished stainless or decorative applications.
Directional sanding (along the grain on stainless) preserves appearance and corrosion properties. Power tools accelerate work but require control to avoid swirl marks.
| Task | Recommended Grit Range | Preferred Abrasive | Expected Outcome |
|---|---|---|---|
| Heavy weld removal | 24-60 | Ceramic/Zirconia flap disc or wheel | Rapid stock removal, rough profile |
| Blending/transition | 80-120 | Zirconia or aluminum oxide | Uniform surface, no visible steps |
| Pre-coating prep | 150-220 | Aluminum oxide/silicon carbide | Smooth, paint-ready texture |
| Final polish | 320-600+ | Silicon carbide (wet) | Mirror or near-mirror finish |
Material-Specific Grit Strategies for Welders
Carbon and Mild Steel
These forgiving materials tolerate 60-grit starts for rust removal and 120-grit blending. Aluminum oxide performs well for cost-effective work. Focus on even pressure to prevent thinning critical load-bearing areas.
Stainless Steel
Prioritize contamination control. Use dedicated abrasives (no cross-use with carbon steel) and 80-180 grit progression. Ceramic grains minimize heat input that could sensitize the material. Final passes often go to 220-400 grit for food-grade or architectural applications.
Aluminum and Non-Ferrous Alloys
Softness leads to loading—opt for open-coat silicon carbide and wet techniques. Start at 120-180 grit for oxide removal. Finer grits (220+) prepare surfaces for TIG without introducing iron particles that cause defects.
Power Tool Integration and Hand Sanding Best Practices
Angle grinders with flap discs dominate production environments for speed. Random orbital sanders suit intermediate and finishing stages on flat or contoured parts. Hand sanding remains essential for tight spaces, edges, and final inspection.
Match backing hardness to the task: firm pads for aggressive cutting, softer for contour following. Monitor wear—clogged or dull paper reduces efficiency and risks uneven results. Vacuum or wipe frequently to clear debris.
Common Challenges and Technical Solutions
Deep scratches from aggressive grits require methodical progression rather than brute force with fine paper. Overheating distorts thin sections or creates hard spots—use lighter pressure, higher speed, and cooling aids where appropriate.
For inspection-critical welds (e.g., pressure vessels), ensure grit sequences produce surfaces free of embedded abrasives or directional marks that could mask defects. Post-sanding solvent wipes and visual checks under proper lighting are non-negotiable.
Advanced Considerations for High-Performance Welding
In precision fabrication, grit choice influences more than appearance. Consistent scratch patterns affect coating adhesion thickness and uniformity. For multi-pass welds or repairs, intermediate sanding between layers prevents slag inclusions and improves interpass fusion.
Pro-level insight: On high-strength alloys or fatigue-prone structures, the final surface Ra (roughness average) achieved through controlled grit progression can measurably extend service life by reducing crack initiation sites. Track your sequences against material specs and test results to refine shop standards.
Real-world application Takeaway
Mastering how sandpaper grit works transforms welding from trial-and-error to predictable, efficient processes. Select grits based on material, process, and end requirements rather than habit.
Progressive, deliberate abrasion delivers stronger welds, faster throughput, and finishes that withstand scrutiny—whether in the garage, classroom, or high-spec shop. This technical command separates adequate work from exceptional, repeatable results.
FAQ
What grit sandpaper is best for preparing metal before welding?
For most steels, start with 60-80 grit to remove scale and contaminants, then progress to 120-220 grit for a clean, textured surface. Adjust finer for aluminum or stainless to minimize risks.
How do I choose grit progression to avoid deep scratches on welds?
Never skip more than one grit level. Coarse removes material, medium blends, and fine refines—each step erases the prior scratch pattern efficiently.
Can the same sandpaper be used for pre-weld cleaning and post-weld finishing?
Dedicate separate sheets or tools. Pre-weld abrasives may carry contaminants that compromise post-weld quality; contamination risks porosity or inclusions.
What grit works best for polishing stainless steel welds?
220-400 grit (or higher wet sanding) followed by non-woven pads produces professional satin or polished finishes while preserving corrosion resistance. Use dedicated stainless abrasives.


