Filling holes in metal with welding can be straightforward or surprisingly difficult, depending on the hole size, base metal thickness, and welding process being used.
Knowing how to fill holes in metal with welding correctly is essential because poor technique often leads to burn-through, lack of fusion, excessive distortion, or weak repairs that fail under load.
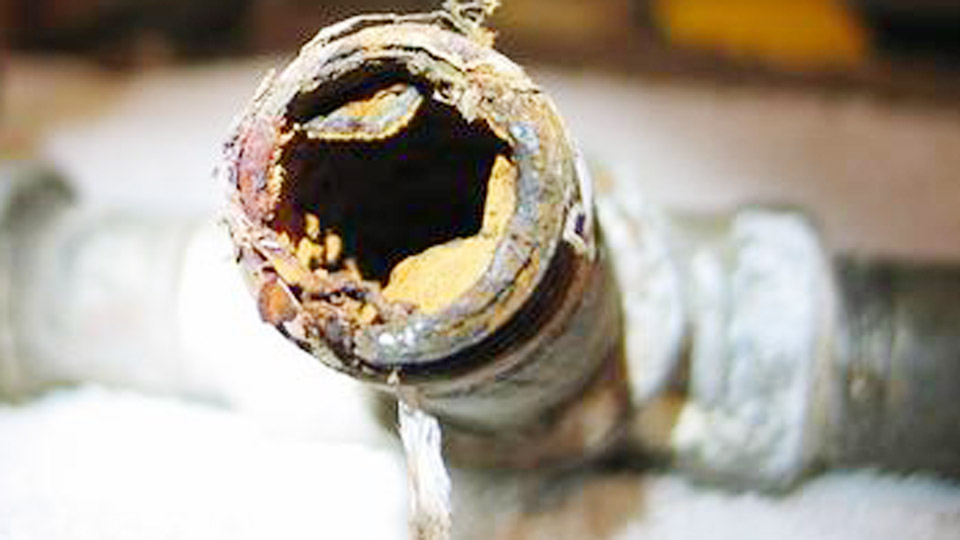
In real fabrication and repair work, holes may result from corrosion, accidental grinding, wear damage, or improper fit-up. Simply depositing filler metal into the opening is rarely enough.
Heat control, weld sequencing, and proper amperage settings all play a critical role in creating a sound repair while preserving the surrounding metal.
Whether you’re using MIG, TIG, stick welding, or a backing method, understanding the right approach can improve weld quality, reduce rework, and produce a stronger, cleaner finished repair.
Image by welderamazing
Assessing the Hole and Material Before Welding
Hole Size, Location, and Accessibility Considerations
Evaluate hole diameter and surrounding metal thickness first. Holes under 1/4 inch in thin sheet (18-16 gauge) suit direct filling with short bursts. Larger holes (3/8 inch+) often require plug patches for strength and minimal buildup.
Access to the backside determines options. Restricted areas demand no-backer techniques; open access allows copper or dissimilar metal backing for easier puddle control and heat sinking. Location near edges, curves, or heat-sensitive components (wiring, upholstery) requires staggered welding to manage distortion.
Material type drives process choice: mild steel tolerates more heat; aluminum demands oxide removal and faster travel to avoid burn-through.
Material Thickness and Weldability Factors
Thickness dictates wire/rod size and amperage. For 18-20 gauge steel (~0.035-0.048 inch), use 0.023-0.030 inch MIG wire to limit heat input. Thicker plate (1/8 inch+) allows 0.035 inch wire or standard TIG rods.
Check for contamination: rust, paint, oil, or mill scale causes porosity. Grind or wire-brush both sides thoroughly. On aluminum, stainless steel brushing or chemical cleaners remove the oxide layer immediately before welding.
MIG Welding Techniques for Filling Holes
Backing Methods for Controlled Deposition
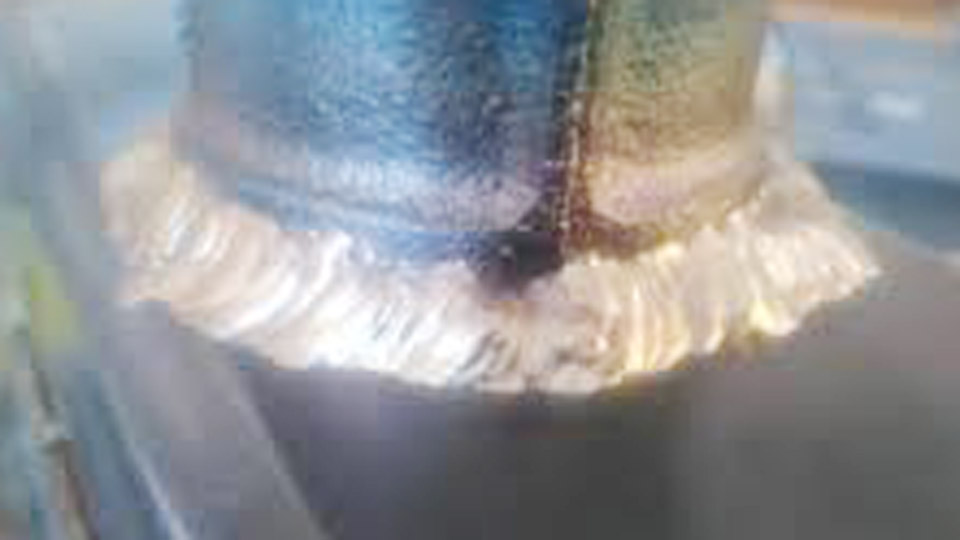
Copper backing plates provide the most reliable results for sheet metal. Copper does not fuse with steel filler, acting as a mold and heat sink. Clamp a flat copper bar or plate tightly behind the hole. Set MIG to short-circuit or pulse mode with low voltage (around 15-18V for thin metal) and wire speed matched for short bursts.
Start at the edge, circling inward with quick trigger taps (0.5-1 second). The puddle bridges to the copper without burning through. Release the backer once cooled; the weld drops out flat.
Without backing, build progressively: deposit small tacks around the perimeter, allowing cooling between passes. Work in a crescent pattern, using prior deposits as starting points to bridge the hole gradually. Short stickout (3/8 inch) and 75/25 Ar/CO2 gas improve control.
Parameter Settings and Heat Management
Typical settings for 18-gauge mild steel with 0.023-0.030 inch ER70S-6 wire: voltage 14-17V, wire speed adjusted for stable arc without burn-through. Practice on scrap to achieve full penetration without excessive convexity. Use pulse MIG if available for thinner materials to reduce average heat.
Alternate sides or skip around multiple holes to distribute heat. Pause when the metal reaches dull red to prevent warping. For larger holes, consider plug welding a cut disc: bevel edges slightly, tack in place, then fill the annular gap with stringers.
TIG Welding for Precision Hole Filling
Torch and Filler Techniques for Clean Results
TIG excels for cosmetic or thin aluminum repairs due to superior control. Use AC for aluminum (balance 60-75% EN for cleaning, frequency 100-200 Hz for focus) and DCEN for steel.
For small holes: dab filler rod (e.g., ER70S-2 for steel, 4043 or 5356 for aluminum) around the edge, working inward. Add filler to the leading edge of the puddle for stacked-dime appearance or minimal buildup. Hold tungsten 1/8-3/16 inch away, using a #5-7 cup with 15-20 CFH argon.
Amperage rule of thumb for aluminum: ~1 amp per 0.001 inch thickness. For 1/8 inch material, start around 100-125 amps, foot-pedal modulated. Preheat heavy aluminum sections to 200-300°F if needed to reduce cracking risk.
Plug and Patch Strategies with TIG
For larger holes, fit a contoured patch. Bevel edges for better fusion, tack at 90-degree intervals, then weld segments, peening lightly while hot to relieve stress. On aluminum, back-purge if possible to prevent oxidation on the root side.
Post-weld, grind minimally with 60-80 grit flapper discs, using light pressure and cooling air to avoid thinning or heat distortion.
Stick Welding Approaches for Field Repairs
Stick (SMAW) works for thicker materials or outdoor conditions but demands skill on thin stock. Use small-diameter rods (3/32 inch 7018 or 6013) at low amperage (45-70A for sheet).
Techniques include “Texas TIG” style: strike on thicker adjacent metal or a filler rod, then dab molten metal into the hole. Work in short arcs, pausing frequently. Slag removal between passes is critical. For thin tubing or panels, prioritize fast-freeze rods to minimize heat.
Stick suits deeper holes in plate where MIG/TIG access is limited, but expect more post-weld cleanup.
Post-Weld Finishing and Quality Assurance
Grinding, Blending, and Distortion Correction
Grind welds flush using progressive grits, never removing more parent metal than necessary. Hammer and dolly on the back side while warm corrects minor warpage. For bodywork, apply filler primer and block sand for undetectable repairs.
Inspect for defects: porosity appears as pinholes; cracks from rapid cooling. Address by grinding out defects completely before rewelding.
Strength and Durability Testing
Visual and dye penetrant checks suffice for non-critical repairs. Load-test structural patches. Proper fusion yields joints stronger than the base metal when done correctly.
Challenges and Solutions for Specific Scenarios
Aluminum-Specific Issues
Aluminum’s high thermal conductivity and oxide layer complicate filling. Thorough cleaning, dedicated stainless brushes, and immediate welding prevent porosity. Use 5356 filler for strength or 4043 for easier flow and lower cracking sensitivity. Lower amperage and faster travel speeds are essential.
Preventing Common Defects
Porosity: Caused by contaminants, poor gas coverage, or moisture. Solutions include clean surfaces, proper gas flow (20-25 CFH MIG), and dry storage of consumables.
Cracking: From high restraint or rapid cooling. Use skip welding, peening, and controlled preheat/interpass temperatures.
Burn-Through and Warpage: Mitigated by low heat input, backing, short passes, and clamping.
Decision Factors: MIG vs TIG vs Stick
Choose MIG for speed on steel sheet; TIG for precision and aluminum; stick for portability on thicker or dirty material. Hybrid approaches (TIG tacks + MIG fill) combine advantages.
Final Thoughts
Mastering how to fill holes in metal with welding comes down to matching process, parameters, and technique to the specific material and constraints. Prioritize heat control and preparation over speed.
In pro fabrication, the difference between an invisible repair and obvious rework often lies in these details—selecting the right backing, modulating amperage precisely, and finishing with restraint. Apply these principles consistently for welds that perform and disappear under paint.
FAQ
What is the best way to fill small holes in thin sheet metal without warping?
Use MIG with copper backing and short trigger bursts, or TIG with minimal filler addition and skip welding. Keep heat input low and allow cooling between passes.
Can you fill holes in aluminum with MIG or is TIG required?
TIG is preferred for control and appearance, but pulsed MIG works with proper settings and cleaning. Direct MIG on aluminum often leads to more porosity and distortion.
How do I avoid porosity when filling holes?
Clean surfaces aggressively, ensure adequate shielding gas, use dry consumables, and maintain proper torch angles/gas flow. Preheat if moisture is suspected.
Should I weld a patch or fill directly for larger holes?
For holes over 3/8 inch, weld a properly fitted patch for better strength and less buildup. Direct filling works for smaller diameters but risks excessive convexity.