Wire that stops mid-bead, stutters, bird-nests at the drive rolls, or refuses to exit the contact tip ruins production and forces rework. When the question “Why is my welder not feeding wire?” appears, the cause is almost always mechanical restriction somewhere in the wire path rather than a failed power source.
Correct diagnosis restores consistent wire delivery, stable arc length, and predictable penetration. Ignoring the path and simply raising drive-roll tension or wire-feed speed usually creates more shavings, liner contamination, and repeated burnbacks.
Systematic isolation of tip, liner, rolls, spool brake, and trigger circuit returns reliable feed without unnecessary part replacement.
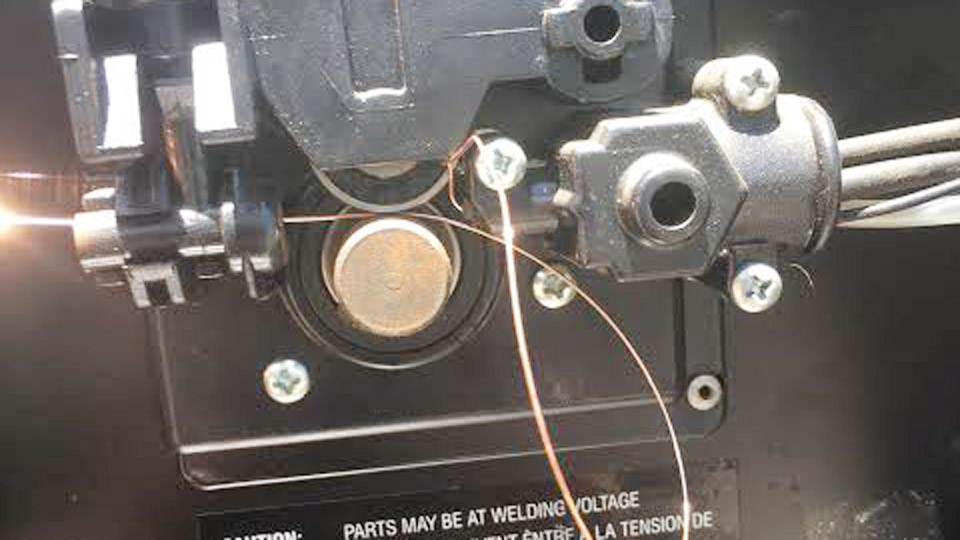
Image by r/Welding
Contact Tip Restrictions That Stop Wire Cold
The contact tip is the final restriction point and the most frequent source of complete feed failure.
Burnback and Spatter Packing
When wire melts back into the tip bore, the fused metal blocks further movement. Spatter that packs inside an already worn tip produces the same result. The motor may still turn while the wire remains locked.
Clip the wire close to the tip, remove the nozzle, unscrew the tip, and clear the fused section before installing a new tip matched exactly to wire diameter and gun series.
Worn or Oversized Bore
A tip that has worn oval or enlarged loses guidance and electrical contact. Wire begins to stick intermittently, then seizes. Replace any tip whose bore is no longer round or that shows arc marks and heat discoloration. Undersized tips create immediate friction; oversized tips allow the wire to wander and arc inside the bore.
Stick-Out and Heat Soak Effects
Excessively short stick-out drives heat into the tip and accelerates burnback. Long stick-out increases the chance of the wire melting before it reaches the puddle under restricted feed conditions. Maintain manufacturer-recommended tip-to-work distance once the mechanical path is clear.
Drive Roll Groove, Tension, and Alignment Failures
Drive rolls push the wire. Any mismatch here produces slipping, shaving, or bird-nesting.
Wrong Groove Type or Size
Solid steel wire requires smooth V-groove rolls. Flux-cored and metal-cored wires need knurled V-groove rolls that grip under lower pressure. Soft aluminum wire needs U-groove rolls. Using the wrong groove lets the wire walk out, slip under load, or flatten. Confirm the groove marking matches both wire diameter and construction before adjusting pressure.
Tension Too Low or Too High
Insufficient tension allows the rolls to spin while the wire stays stationary, especially once arc load appears. Excess tension flattens the wire, generates copper and steel shavings, and packs the liner with debris.
Set tension only high enough that the wire feeds without slipping when the tip is removed and the cable is straight. For flux-cored wire the required pressure is noticeably lower than for solid wire of the same diameter.
Inlet and Outlet Guide Misalignment
If the wire does not track centered through the inlet guide, groove, and outlet guide, it rides the edge of the roll and sheds metal.
Open the feeder, jog wire slowly, and verify the wire stays in the center of the groove and enters the outlet guide without side loading. Misalignment often appears after a gun change or liner replacement.
Liner Drag, Kinks, and Incorrect Length
The liner is a consumable that accumulates wire lubricant, copper particles, and oxidation until friction exceeds drive-roll capacity.
Contaminated or Scored Liner
Debris builds gradually. Symptoms begin as stuttering that worsens when the gun cable is bent, then progress to complete stoppage. Remove the contact tip, straighten the cable, release the drive rolls, and pull wire by hand.
Heavy resistance with the tip off points directly to the liner. Replacement is almost always more reliable than attempting to clean a scored liner.
Incorrect Liner Diameter or Trimming
A liner sized for a larger wire allows the electrode to buckle and bind. A liner cut too short leaves a gap between the outlet guide and the gas diffuser where the wire can wander and jam.
A liner cut too long can bottom out and kink. Always seat both ends fully and trim to the gun manufacturer’s specified length or gauge.
Cable Routing and Kink Damage
Sharp bends or coiled cable increase liner friction dramatically. Feed that improves only when the lead is laid straight indicates either a kinked liner or permanent cable damage. Avoid routing the gun under heavy objects or around tight corners during use.
Spool Brake and Wire Condition Problems
Resistance at the spool end forces the drive rolls to fight continuous drag.
Hub Tension Too Tight or Too Loose
Excessive spindle or hub brake tension requires the motor to pull against constant resistance; the result is slipping or motor stall under load.
Too little tension lets the spool overrun when the trigger is released, creating loops that later tangle. Adjust so the spool stops promptly after feed ceases but turns freely by hand with moderate effort.
Tangled or Contaminated Wire
Crossed wraps on the spool or wire that has rusted from moisture create intermittent stops and bird-nests. Poor-quality wire with inconsistent diameter or heavy surface lubricant accelerates liner contamination. Discard severely tangled or heavily oxidized spools rather than forcing them through the system.
Electrical and Trigger Circuit Failures
When the mechanical path is clear, the problem may be that the feed motor never receives the signal to run.
Drive Rolls Do Not Turn
If the trigger is pulled and the rolls remain stationary, check the gun plug connection, trigger switch continuity, and control leads inside the cable. A loose gun connector or broken trigger often produces this exact symptom.
Many machines include a cold-wire jog button on the feeder; if that button feeds wire while the trigger does not, the fault is isolated to the gun circuit.
Motor Runs but Wire Does Not Advance
Confirm that the pressure arm is engaged, the wire is seated in the correct groove, and the spool brake is not locked. Only after these mechanical items are verified should internal feeder relays or motor brushes be considered.
Systematic Isolation Sequence That Locates the Fault
Begin every diagnosis with power off and the contact tip removed. Straighten the gun cable and attempt to pull wire by hand through the liner. Smooth movement isolates the restriction to the tip or diffuser area. Persistent drag moves attention to the liner and cable.
Next, reinstall a correct tip, engage the drive rolls at minimal tension, and jog wire. Observe whether the rolls turn, whether the wire advances, and whether shavings appear. Adjust spool brake last.
Only when the entire mechanical path feeds cleanly under no-load conditions should weld parameters be rechecked. This order prevents the common error of increasing drive tension to overcome a blocked tip or liner, which only multiplies debris and shortens component life.
Wrapping Up
Consistent wire feed depends on matching every element of the path—tip bore, liner size and condition, drive-roll groove and pressure, and spool brake—to the specific wire diameter and type in use. Once that path is unrestricted, arc voltage and wire-feed speed can be dialed for the joint without fighting mechanical resistance. Advanced operators further reduce downtime by logging liner hours and tip change intervals against the specific wire and duty cycle, replacing consumables on a preventive schedule rather than waiting for the next bird-nest or burnback.
FAQs
Why does my MIG wire keep bird-nesting at the drive rolls?
Bird-nesting occurs when the drive rolls continue pushing against a downstream restriction (blocked tip, kinked or dirty liner, or excessive spool brake). Clear the restriction, reduce drive tension, and verify correct groove size before rethreading.
How do I know if the liner is the problem?
Remove the contact tip, straighten the gun cable, release the drive rolls, and pull the wire by hand. Significant resistance indicates liner drag, wrong size, or damage. Replace rather than clean a scored liner.
What drive roll tension is correct for .035 solid wire?
Tighten only until the wire feeds without slipping when the tip is removed and the cable is straight. Excess pressure flattens the wire and generates shavings that contaminate the liner.
Can a bad ground cause wire feed problems?
A poor ground can cause the wire to stub into the work instead of arcing, creating sudden resistance that leads to bird-nesting at the rolls. Clean bare-metal contact and tight clamp connections eliminate this secondary cause.