Soldering galvanized sheet metal requires more than simply heating and joining two pieces of metal. The zinc coating that protects galvanized steel from corrosion can interfere with solder adhesion and create challenges if the surface is not properly prepared.
Understanding how to solder galvanized sheet metal is important for HVAC fabrication, flashing repairs, ductwork assembly, and other applications where a watertight, corrosion-resistant joint is required.
In real fabrication and repair work, poor surface preparation or incorrect flux selection can lead to weak bonds, premature joint failure, leaks, and costly rework. Because galvanized coatings react differently than bare steel, following the correct soldering procedure helps ensure reliable performance while minimizing damage to the protective layer.
I’ll explain the key preparation steps, materials, and techniques needed to produce clean, durable soldered joints on galvanized sheet metal.
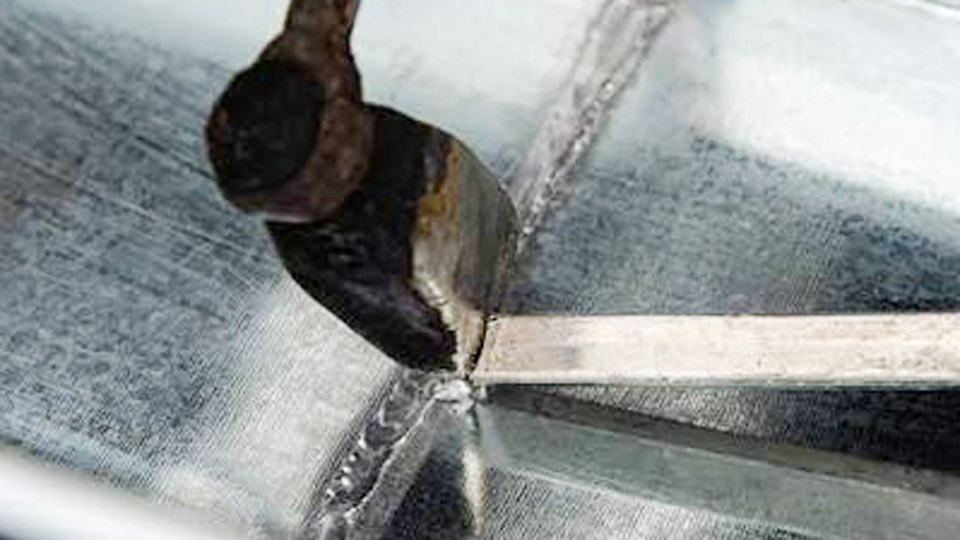
Image by stellartechnical
Understanding the Metallurgical Challenges
Galvanized sheet metal features a zinc layer metallurgically bonded to the steel substrate, typically 0.5–2.5 oz/ft² depending on coating grade. Zinc melts at approximately 787°F (419°C), far below typical soldering temperatures for many alloys, and its oxide forms rapidly when heated, impeding solder wetting.
Solder must form an intermetallic bond with both the zinc coating and underlying steel without excessive heat that vaporizes zinc or causes dewetting. Traditional tin-lead solders (50/50 or 60/40) alloy well with zinc when paired with aggressive fluxes, while modern lead-free options require precise temperature control to avoid compromising the coating.
Key Differences from Soldering Mild Steel
Mild steel allows broader flux choices and higher heat tolerance. Galvanized surfaces demand chloride-based fluxes to break through zinc oxides. Overheating by even 100–200°F beyond the solder’s liquidus point can degrade the coating beyond the joint, reducing corrosion resistance in adjacent areas.
Joint design must incorporate mechanical strength (e.g., lap seams or rivets) because solder itself has lower tensile strength under thermal cycling.
When Soldering Beats Welding or Brazing
Soldering operates at 350–600°F for many applications, minimizing zinc fume generation and base metal distortion compared to welding (which often exceeds 2,000°F and requires coating removal). This makes it ideal for thin-gauge material (24–30 gauge) in roofing vents, gutters, or enclosures where structural fusion isn’t needed.
Surface Preparation Techniques
Effective preparation determines joint integrity more than heat application.
Mechanical Cleaning Methods
Start by removing surface contaminants, oils, and heavy oxides. Use 80–120 grit emery cloth or a stainless steel wire brush to abrade the joint area lightly. Avoid aggressive grinding that removes excessive zinc; the goal is to expose a clean, active surface without penetrating deeply into the steel.
For field repairs on weathered material, follow with a degreaser wipe (acetone or isopropyl alcohol) to eliminate residues.
ASTM A780 guidelines recommend wire brushing or light abrasive blasting for repair areas, ensuring the surface remains dry before fluxing.
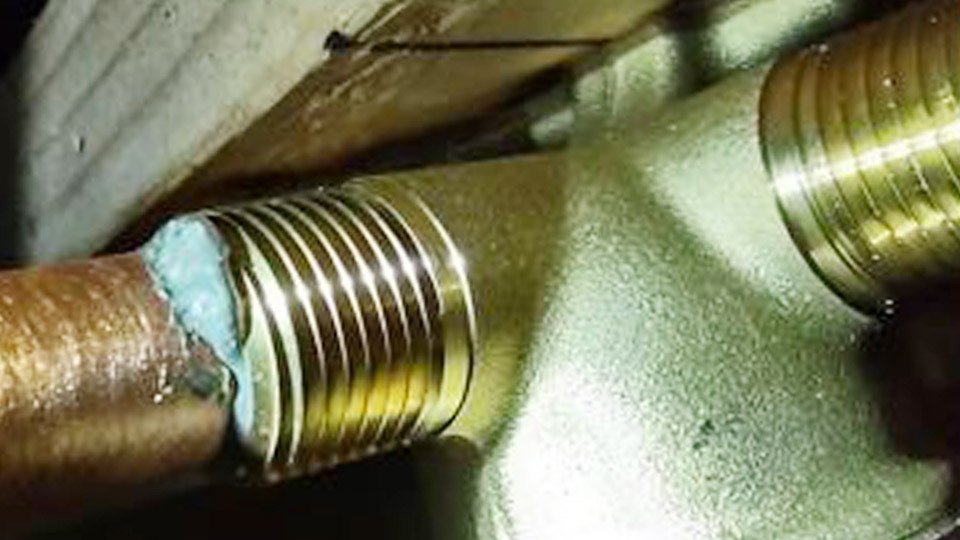
Chemical Flux Application and Dwell Time
Apply an inorganic acid flux, such as zinc chloride or hydrochloric acid-based formulations (e.g., Johnson’s Galvanized Steel Flux or similar chloride fluxes). Brush it generously on both mating surfaces and allow 1–2 minutes dwell time for the acid to etch the zinc oxide. This step is non-negotiable—rosin fluxes fail here due to insufficient activity.
For high-volume work, pre-mix muriatic acid (hydrochloric) diluted with zinc to create a custom “killed acid” flux, but neutralize residues thoroughly afterward to prevent ongoing corrosion.
Selecting Solder Alloys and Tools
Solder Composition Choices
- 60/40 Tin-Lead: Lower melting point (~370°F solidus, 460°F liquidus) offers excellent flow and wetting on zinc. Preferred for traditional sheet metal work due to workability.
- 50/50 Tin-Lead: Slightly higher melting range, better for applications needing more fillet buildup.
- 95/5 Tin-Silver: Lead-free option with higher strength and melting point (~450–550°F range); requires more heat control but complies with modern regulations.
- Specialty Low-Temp Alloys (e.g., cadmium-bearing or proprietary like Super Alloy 1): Melt as low as 350°F, preserving more zinc coating by minimizing heat input.
Match solder diameter (1/8″–1/4″ bar or wire) to joint size—thicker for larger laps.
Tool Selection for Heat Delivery
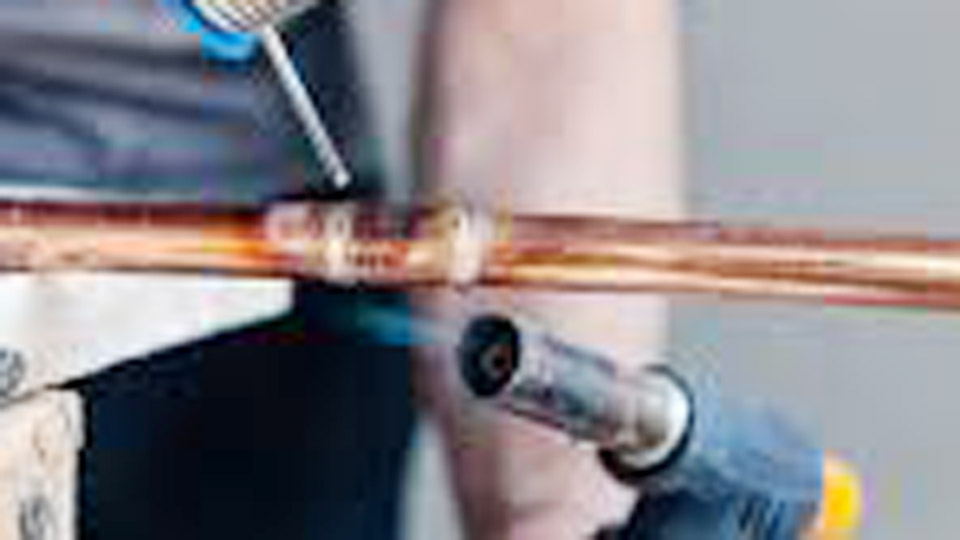
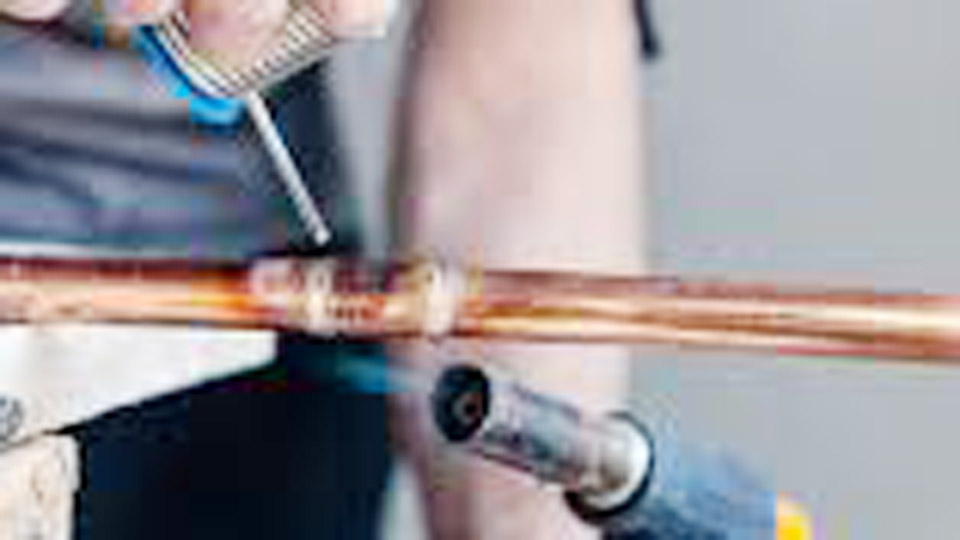
Large soldering coppers (1–3 lb heads) heated in propane pots or gas-fired irons provide consistent heat mass for sheet metal seams, reducing hot spots. Electric irons (200W+) suit smaller repairs.
Avoid small pencil irons; they lack thermal capacity for even flow on galvanized material. Propane torches work for tack work but demand skilled distance control to prevent localized overheating.
Tin the iron tip thoroughly with solder and flux before use for optimal heat transfer.
Soldering Execution for Different Joint Types
Lap Seam Soldering Process
- Align sheets with a minimum 1/2–1″ overlap, securing with rivets or clamps for mechanical strength.
- Flux both inner and outer surfaces along the seam.
- Preheat the iron and apply it to one end of the seam while feeding solder adjacent to the tip.
- Move steadily (1–2 inches per 5–10 seconds) as solder flows into the capillary gap. Maintain iron contact to drive flow without dragging.
- Build a small fillet if needed for watertightness, shaping while in the pasty range.
For vertical seams, work bottom-up to leverage gravity.
Edge and Corner Joint Considerations
Corners require slower heat application to avoid distortion in thin gauges. Pre-form lock seams where possible for added strength before soldering. On 24–26 gauge roofing, combine soldering with mechanical folding for hybrid integrity under wind loads.
Temperature Monitoring and Control
Target base metal at 500–650°F for standard solders—verify with tempilstick or infrared if precision matters. Flux color change (to brown) signals readiness for many low-temp alloys. Exceeding 700°F risks zinc volatilization; underheating causes cold joints with poor adhesion. Practice on scrap to calibrate your iron-torch combination.
Post-Soldering Cleanup and Protection
Remove flux residues immediately with hot water, baking soda neutralizer, or dedicated cleaners, followed by a dry wipe. Residual acid promotes pitting corrosion. Inspect for continuity—voids appear as dull spots or gaps. For exposed applications, apply a zinc-rich cold galvanizing spray or paint over the joint to restore coating integrity.
Applications in Real-World Projects
Galvanized sheet soldering excels in:
- HVAC duct sealing for airtight, low-leak systems.
- Roofing flashings and valley seams requiring decades of weather resistance.
- Custom enclosures, automotive panels, and agricultural equipment repairs.
- Model-making or light fabrication where minimal distortion is essential.
In architectural work, soldered flat-seam roofs demand rigorous quality checks due to thermal expansion stresses.
Advanced Techniques and Decision Factors
Minimizing Coating Damage
Use the lowest effective temperature and shortest heat cycles. Low-melt alloys allow soldering without significant zinc loss, maintaining cathodic protection. For critical corrosion environments, consider partial mechanical abrasion only in the joint while leaving surrounding coating intact.
Troubleshooting Poor Flow or Cracking
- No wetting: Increase flux dwell or abrade more aggressively.
- Porosity: Ensure full cleaning; trapped oxides cause gas pockets.
- Joint cracking: Add mechanical fasteners; solder alone fatigues under cyclic loads.
- Distortion: Use heat sinks (copper bars) or sequence welding/soldering in small sections.
Safety and Ventilation Specifics
While lower heat reduces zinc oxide fumes compared to welding, maintain excellent ventilation. Wear appropriate PPE; acid fluxes are corrosive. Neutralize and dispose of waste per local regulations.
Decision-Making Summary for Optimal Results
Selecting the correct flux-solder-iron combination for your gauge and environment determines success far more than general skill. Prioritize 60/40 or equivalent with chloride flux for most DIY and professional sheet metal tasks on galvanized material, always reinforcing with mechanical features for load-bearing applications. Test on scrap matching your exact material thickness and coating weight.
In high-performance architectural or industrial settings, treat soldering as a system—joint geometry, thermal mass management, and post-coating restoration integrate to achieve joints that outlast the base metal’s expected service life under thermal cycling and moisture exposure.
FAQ
Can you solder galvanized sheet metal without removing the zinc coating?
Yes. Aggressive acid fluxes and proper heat control allow direct soldering to the zinc layer. Complete removal is unnecessary and counterproductive for corrosion performance in many cases.
What flux works best for soldering galvanized steel?
Inorganic acid fluxes like zinc chloride or hydrochloric-based (e.g., specialized galvanized fluxes) provide the necessary oxide removal and wetting. Avoid rosin or mild organic fluxes.
Is lead-free solder suitable for galvanized sheet metal?
Yes, 95/5 tin-silver or similar works but requires higher temperatures and tighter technique. Tin-lead alloys remain easier for traditional applications where permitted.
How do you prevent corrosion after soldering galvanized metal?
Neutralize and remove all flux residues immediately, then apply zinc-rich paint or spray over the joint. This restores sacrificial protection.