Stainless steel relies on a thin protective oxide layer to resist corrosion, but welding, grinding, and fabrication can damage or contaminate that surface. Understanding How to Passivate Stainless Steel at Home is important when fabricating, repairing, or finishing stainless components because surface contamination can lead to premature rust, discoloration, failed inspections, and costly rework.
Proper passivation removes free iron and helps restore the material’s corrosion-resistant properties without altering the base metal.
For welders and metal fabricators, passivation is more than a finishing step—it directly affects long-term durability and appearance, especially in environments exposed to moisture, chemicals, or outdoor conditions.
Using the correct cleaning and passivation methods can improve corrosion performance, reduce maintenance requirements, and help ensure the finished work meets quality expectations.
Knowing when and how to passivate stainless steel allows you to protect welded assemblies and maintain the material’s intended performance after fabrication.
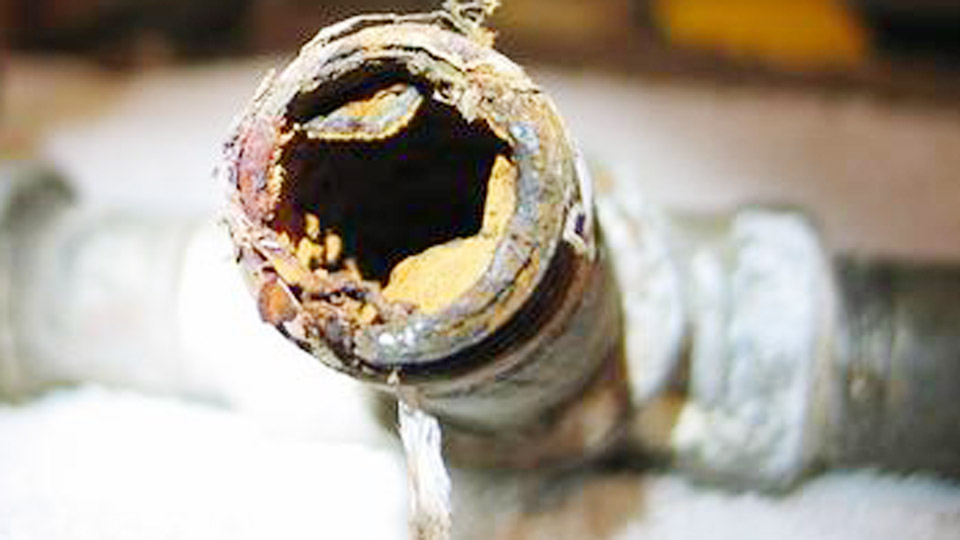
Image by electromax-inc
Why Passivation Matters After Welding and Fabrication
Stainless steel relies on a thin, self-healing chromium oxide layer for its corrosion resistance. Welding heat input, mechanical abrasion, or cross-contamination from carbon steel tools embeds free iron particles that initiate pitting and rust. Without passivation, even premium grades lose performance rapidly in chloride-rich or humid conditions.
Home methods allow DIY welders and small shops to address this immediately after fabrication, avoiding costly outsourcing while achieving ASTM A967-compliant results through controlled citric or nitric acid treatments.
Passivation differs from cleaning or pickling: it specifically targets free iron removal and oxide layer optimization rather than just scale dissolution. For home users, this means selecting accessible, safer alternatives like citric acid while understanding alloy-specific responses.
Understanding Stainless Steel Grades and Passivation Needs
Austenitic grades like 304 (18/8) and 316 (with molybdenum) respond well to standard home passivation but require tailored approaches based on carbon content and weld heat input. Low-carbon variants (304L, 316L) resist sensitization better during welding but still need surface treatment to eliminate embedded iron.
Duplex and martensitic grades demand stricter controls due to differing chromium levels and microstructures.
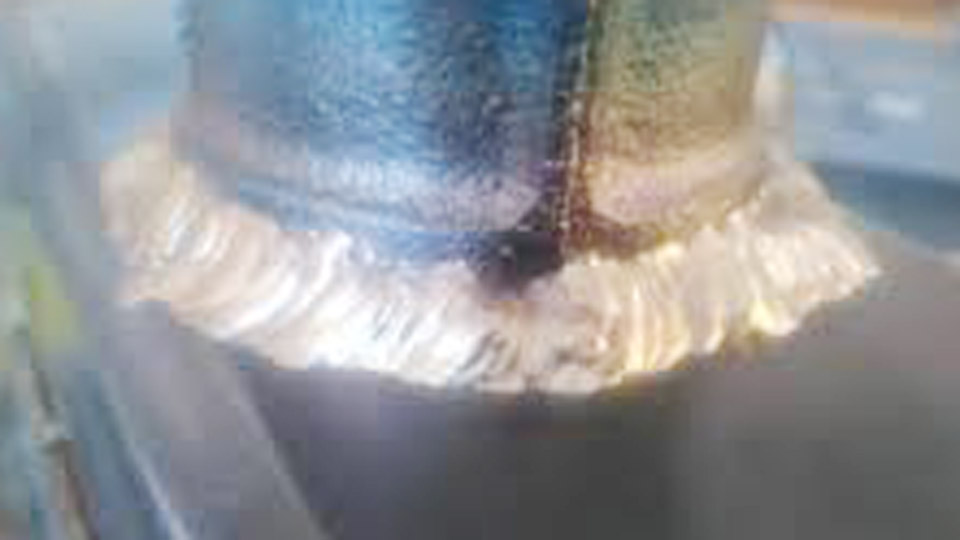
Weld zones suffer the most because of heat tint—chromium-depleted zones beneath the oxide scale. Grinding removes visible scale but often smears iron across the surface, worsening contamination. Home passivation must address the entire part, with extra attention to heat-affected zones (HAZ).
Common Contaminants That Undermine Passivation
Free iron from tools, wire brushes, or shop dust represents the primary threat. Heat tint from TIG or MIG welding creates thick, non-protective oxides. Oils, fingerprints, and polishing compounds also inhibit oxide formation. Effective pre-treatment removes these entirely before acid exposure, as residual organics can cause uneven passivation or staining.
Pre-Passivation Surface Preparation Techniques
Thorough cleaning determines success more than the acid choice itself. Contaminated surfaces yield poor results regardless of bath parameters.
Mechanical Cleaning Methods for Welded Parts
Start with dedicated stainless steel tools only—never carbon steel wire brushes or abrasives that embed iron. Use non-metallic Scotch-Brite pads or 316 stainless brushes for initial scale removal. For heavy weld discoloration, grinding with aluminum oxide or silicon carbide abrasives works, followed by thorough rinsing to remove debris. Avoid sandblasting, which can embed contaminants deeply.
Electrolytic weld cleaners or specialized brushes (like TIG Brush systems) combine cleaning and partial passivation in one step, ideal for larger fabrications where full immersion proves impractical. These tools apply electrolytic fluids with current to dissolve oxides and promote chromium enrichment simultaneously.
Chemical Degreasing and Initial Oxide Removal
Apply alkaline degreasers or heavy-duty detergents in hot water to strip oils and coolants. For stubborn residues, acetone or isopropyl alcohol wipes help, but avoid chlorinated solvents that may leave films. Pickling pastes or gels target heat tint effectively on welds but require careful neutralization afterward to prevent acid residue issues.
Rinse thoroughly with deionized or distilled water—tap water minerals can deposit and interfere. Dry parts completely to prevent water spots that compromise the subsequent passivation bath.
Choosing the Right Passivation Method for Home Use
Home setups favor citric acid for its safety, biodegradability, and effectiveness across most applications. Nitric acid remains viable for specific needs but demands greater precautions.
Citric Acid Passivation: The Preferred Home Option
Citric acid (4-10% by weight) effectively removes free iron while being food-safe and easier to handle than mineral acids. Solutions perform best at 120-160°F (49-71°C), with immersion times varying by temperature: 4 minutes at higher heat or up to 30 minutes at lower ranges.
This method suits 304, 316, and many other grades, producing excellent corrosion resistance without hazardous fumes.
Prepare the bath using distilled water and anhydrous citric acid powder, available from suppliers or brewing stores. Heat gently in a non-reactive container (plastic or stainless). Monitor temperature closely—overheating beyond recommendations reduces effectiveness or risks etching.
Citric acid excels in removing iron without overly attacking the base metal, making it forgiving for hobbyists. Post-treatment rinsing and air drying allow the chromium oxide layer to form naturally in oxygen-rich environments.
Nitric Acid Passivation: When and How to Use It Safely
Traditional nitric acid baths (20-50% concentration) at 120-140°F for 20-30 minutes provide robust passivation, particularly for highly contaminated surfaces.
However, its oxidizing power requires ventilation, PPE (gloves, goggles, respirator), and proper neutralization/disposal protocols. Home users should opt for diluted, pre-mixed solutions only if experienced with hazardous chemicals.
Nitric offers faster action on certain alloys but generates more fumes and waste concerns. Many modern fabricators switch to citric for equivalent performance with reduced risk.
Comparing Citric vs. Nitric Acid Performance
| Parameter | Citric Acid (4-10%) | Nitric Acid (20-50%) |
|---|---|---|
| Temperature | 120-160°F | 120-140°F |
| Immersion Time | 4-30 min (temp dependent) | 20-30 min |
| Safety | High (biodegradable) | Lower (fumes, strong oxidizer) |
| Effectiveness on Welds | Excellent | Excellent |
| Environmental Impact | Low | Higher |
| Cost for Home Use | Low | Moderate |
Citric generally matches or exceeds nitric in corrosion testing for most home applications, especially with proper pre-cleaning.
Step-by-Step Home Passivation Process
For parts small enough to immerse fully:
- Clean and degrease as detailed earlier.
- Prepare the bath to specified concentration and temperature.
- Immerse the part completely, agitating gently for even exposure.
- Time the process precisely based on solution and temperature.
- Rinse thoroughly with copious distilled water immediately upon removal.
- Dry in a clean, warm air stream or allow natural drying in a dust-free area.
- Allow 24-48 hours for full passive film development before exposure to service conditions.
For large welded structures, apply gelled citric acid formulations or use electrolytic methods locally on weld zones.
Test passivation effectiveness with copper sulfate or water immersion tests per ASTM A967 guidelines. A clean surface shows no rust after 24 hours in humid conditions.
Post-Passivation Care and Maintenance
Rinse and dry parts immediately after treatment to avoid flash rusting. Store in clean, dry conditions. Avoid contact with carbon steel tools post-passivation. For ongoing protection in service, periodic cleaning with mild detergents maintains the oxide layer. In aggressive environments, re-passivation may become necessary after repairs or heavy soiling.
Advanced Considerations for Welded Stainless Fabrications
Handling Heat Tint and Sensitization
High heat input during welding depletes chromium in the HAZ, increasing susceptibility to intergranular corrosion. Passivation alone may not fully restore this; combining with proper welding parameters (low heat, backing gas) and post-weld treatments yields optimal results.
For critical applications, consider electropolishing, which smooths the surface and enhances passivation uniformly.
Alloy-Specific Adjustments
Higher-alloy grades (e.g., 2205 duplex) may require adjusted citric concentrations or longer times. Always verify with material data sheets. For 316 in chloride environments, molybdenum enhances resistance, but surface integrity remains critical.
Testing and Validation at Home
Simple tests include:
- Water break test: Clean surface should sheet water evenly.
- Copper sulfate test: No copper plating indicates successful iron removal.
- Humidity exposure: Monitor for rust over days.
Professional labs offer salt spray or electrochemical testing for high-stakes projects.
Equipment and Safety Setup for Home Passivation
Use dedicated plastic or 316 stainless tanks for baths. Heating options include immersion heaters with temperature controls. Ventilation, spill containment, and neutralizing agents (baking soda for acids) are mandatory. Dispose of spent solutions per local regulations—citric is easier to neutralize and dilute.
Protect surrounding areas from splashes. Wear appropriate PPE and never mix acids indiscriminately.
Common Challenges and Technical Solutions
Uneven coloration post-treatment often indicates incomplete cleaning or temperature fluctuations. Address by improving pre-rinse steps and using agitation. Pitting during passivation signals excessive acid strength or time—dial back parameters for delicate parts. Embedded abrasives require more aggressive initial mechanical cleaning.
For extremely large or fixed installations, spot treatments with citric gels or electrolytic pens provide localized passivation without full disassembly.
Wrapping Up
Proper home passivation transforms vulnerable welded stainless into durable, corrosion-resistant components. By prioritizing thorough cleaning, selecting citric acid for most applications, and following temperature/time guidelines aligned with ASTM A967, welders achieve professional-level protection without industrial infrastructure.
The key decision lies in matching the method to your alloy, part size, and environment—citric acid immersion for versatility, supplemented by electrolytic tools for efficiency on complex welds. This technical foundation ensures your stainless projects perform reliably for decades.
FAQ
Can I passivate stainless steel with household products?
Lemon juice or vinegar offers limited effect but falls short of proper citric acid concentrations and controlled conditions. Use dedicated food-grade citric acid powder for reliable results matching industrial standards.
How often should I passivate stainless steel welds?
Passivate after every major fabrication or repair that disturbs the surface. In normal indoor use, the layer lasts years; re-treat if rust appears or after exposure to chlorides/acids.
Is nitric acid necessary for home passivation of 316 stainless?
No. Citric acid delivers comparable or superior performance for most home and small-shop needs with far better safety and handling characteristics.
What’s the best way to test if passivation worked?
Perform the ASTM copper sulfate test or simple 24-hour humidity exposure. No discoloration or rust confirms success.