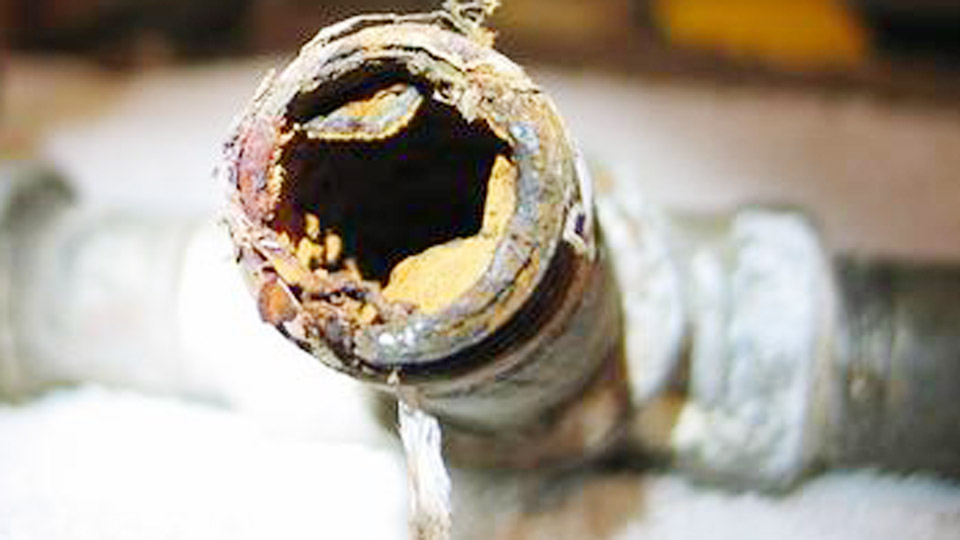
Welders often face a common frustration: a freshly TIG-welded stainless steel joint looks solid, but within weeks or months, surface rust appears around the heat-affected zone (HAZ), compromising both appearance and structural integrity.
This issue stems from heat tint—discoloration caused by oxidation during welding—that depletes chromium near the surface and destroys the protective passive layer.
Learning how to clean stainless steel and prevent corrosion is essential for maintaining the alloy’s corrosion resistance in real-world applications like food processing equipment, marine fabrications, architectural work, or pressure vessels.
Proper post-weld cleaning restores the chromium oxide layer, ensuring long-term performance under exposure to moisture, chemicals, or chlorides. Skipping this step leads to pitting, crevice corrosion, or premature failure, especially in 304/316 grades.
Image by reddit
Why Heat Tint Forms and Its Impact on Corrosion Resistance
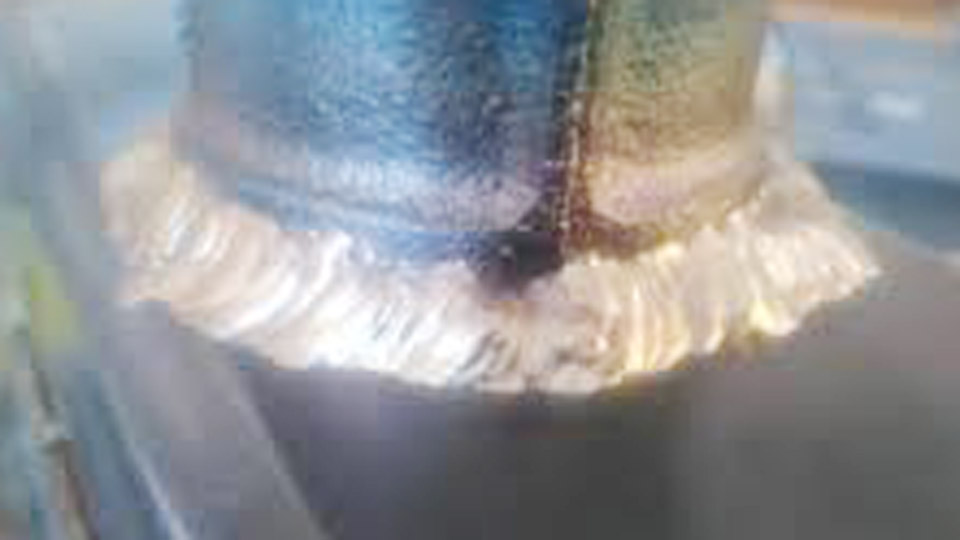
Heat from the welding arc (typically 3000–6000°F in TIG) causes rapid oxidation on stainless steel. Chromium migrates to the surface to form thicker oxide layers, visible as straw, gold, blue, purple, or black tints depending on temperature and oxygen exposure. This process depletes subsurface chromium, reducing the steel’s ability to self-passivate in the presence of oxygen.
In aqueous or chloride-rich environments, these areas become anodic sites prone to pitting. For critical applications like potable water systems, guidelines mandate removal of all but the lightest pale yellow tint, followed by acid treatment. Even in general fabrication, visible heat tint signals compromised performance.
Key Factors Influencing Tint Severity:
- Shielding gas quality and back-purging effectiveness.
- Heat input (amperage, travel speed, pulse settings).
- Base material grade (higher Mo/N grades like 316L tolerate more but still require cleaning).
- Ambient oxygen during welding.
Minimizing tint through technique reduces cleaning effort, but complete removal and repassivation remain necessary for optimal results.
Pre-Cleaning Preparation: Essential Steps Before Any Method
Remove all slag, spatter, and gross contaminants first. Use dedicated stainless steel tools to avoid iron cross-contamination, which embeds rust starters.
Degrease surfaces with acetone or alkaline cleaners. Organic residues interfere with chemical or electrochemical processes. Inspect the HAZ thoroughly—tint can extend 1–2 inches from the weld toe.
For internal welds or pipes, ensure access for cleaning; back-purging with argon during welding helps but rarely eliminates the need for post-treatment.
Mechanical Cleaning Methods: When and How to Use Them
Mechanical approaches provide fast surface leveling but often require follow-up chemical treatment for full passivation.
Grinding and Brushing:
Dedicated stainless flap discs or grinding wheels (aluminum oxide or zirconia, 80–120 grit) remove heavy scale. Follow with finer grits (up to 320) for aesthetics. Stainless steel wire brushes (non-ferrous) work for light tint but embed less effectively than abrasives. Avoid carbon steel tools entirely.
Grit Blasting:
Glass bead or aluminum oxide media at 60–80 psi cleans large areas uniformly without iron contamination. This exposes fresh metal but does not fully restore the passive layer alone. Combine with pickling for best corrosion results.
Mechanical methods suit visible structural welds where appearance matters, but they risk work-hardening the surface or leaving micro-crevices if not followed by acid treatment. Studies show mechanical cleaning alone yields lower critical pitting temperatures than combined approaches.
Chemical Pickling: The Most Effective for Corrosion Resistance
Pickling uses aggressive acids to dissolve heat tint, oxides, and free iron, restoring chromium-rich surfaces. Nitric-hydrofluoric acid blends (typically 10–20% HNO3 / 2–5% HF) are industry standards.
Brush-On Pastes and Gels:
Products like pickling paste (e.g., containing nitric/HF) apply directly to welds. Dwell time: 10–60 minutes depending on tint darkness and temperature (warmer accelerates). Rinse thoroughly with water, then neutralize with alkaline solution (sodium bicarbonate or proprietary). These excel for field repairs and localized areas.
Immersion and Spray Pickling:
For shop work, full immersion ensures uniform results on complex fabrications. Spray systems suit larger vessels. Follow with thorough rinsing and passivation.
Safety and Environmental Notes:
HF is highly hazardous—use PPE, ventilation, and proper disposal. Alternatives like citric acid-based solutions offer safer profiles for lighter duty but may need longer contact or heat.
Pickling not only removes discoloration but etches away depleted layers, allowing a robust passive film to form. It outperforms mechanical methods in pitting resistance tests.
Electrochemical Weld Cleaning: Efficient One-Step Solution
Electrochemical methods apply a mild electrolyte and low-voltage current (typically 10–30V) via a brush or pad. This removes oxides while simultaneously passivating through oxygen evolution at the surface.
Advantages:
- Cleans and passivates in one pass.
- Minimal material removal.
- Safer than strong acids for operators.
- Portable units ideal for site work.
Process Parameters:
- Use dedicated stainless electrolytes.
- Positive polarity on the tool, workpiece grounded.
- Multiple light passes on dark tints.
- Rinse and dry immediately.
This method suits TIG welds on 304/316 and provides excellent results on food-grade or architectural stainless. Commercial systems (e.g., TIG Brush style) integrate well into fabrication workflows.
Passivation Techniques: Restoring the Protective Layer
Passivation follows cleaning (especially after pickling or mechanical work) using milder oxidizers to promote chromium oxide formation without heavy etching.
Nitric Acid Passivation:
Standard 20–40% nitric acid at room temperature or slightly elevated (120–140°F) for 20–60 minutes. Effective but requires handling precautions.
Citric Acid Alternatives:
Safer, environmentally friendlier option (4–10% citric acid solutions). Often used at elevated temperatures or with applied current. Suitable for many applications and increasingly preferred.
Test passivation effectiveness with copper sulfate or ferroxyl tests—free iron presence indicates incomplete treatment.
For high-purity or pharmaceutical work, follow ASTM A380/A967 standards for validation.
Grade-Specific Considerations and Advanced Alloys
Austenitic Grades (304, 316):
Standard pickling or electrochemical works well. 316’s molybdenum enhances resistance, but cleaning remains critical in chlorides.
Duplex and Super Duplex:
Higher strength but sensitive to improper heat input and cleaning. Use controlled procedures to avoid sigma phase; nitric/HF pickling effective but monitor exposure times.
Martensitic (e.g., 17-4):
Requires careful post-weld heat treatment alignment with cleaning. Heat tint removal essential before final aging.
Precipitation-Hardening Alloys:
Balance cleaning aggressiveness with distortion risks.
Always match cleaning intensity to alloy composition and service environment.
Preventing Corrosion: Welding Best Practices and Long-Term Maintenance
During Welding:
- Use pure argon or Ar/He mixes with proper flow (15–25 CFH).
- Back-purge thoroughly until oxygen <50 ppm.
- Control heat input: lower amps, faster travel, pulsing.
- Employ trailing shields for extended protection.
Post-Weld:
- Clean within hours of welding when possible.
- Avoid contact with carbon steel during handling/storage.
- Apply protective coatings or passivating oils for temporary storage.
In Service:
- Regular inspection for early pitting.
- Clean with mild detergents or citric solutions for maintenance.
- Avoid abrasive pads that embed contaminants.
For demanding environments (offshore, chemical), consider electropolishing after cleaning for superior smoothness and corrosion resistance.
Comparing Cleaning Methods: Decision Guide
| Method | Best For | Corrosion Restoration | Speed | Cost | Safety/Env. Impact |
|---|---|---|---|---|---|
| Mechanical (Grind/Blast) | Appearance, heavy scale | Moderate (needs follow-up) | Fast | Low | Low |
| Pickling Paste/Gel | Field welds, localized | Excellent | Medium | Medium | High |
| Immersion Pickling | Large fabrications | Excellent | Medium | Medium-High | High |
| Electrochemical | Shop & field, efficiency | Excellent | Fast | Medium-High | Low |
| Citric Passivation | Light duty, eco-friendly | Good | Variable | Low-Medium | Low |
Choose based on part size, access, quantity, and required performance level. Combined mechanical + chemical often yields optimal results.
Common Challenges and Troubleshooting
Dark black scale resists light treatments—pre-grind or use stronger pickling. Uneven results often trace to incomplete degreasing or poor rinsing. Residual acid causes flash rust; always neutralize and rinse with deionized water when possible.
In cold environments, warm solutions accelerate reactions. For large projects, batch processing in controlled shops outperforms field work.
Real-World Application: Choosing the Right Approach
In a food-grade tank fabrication, electrochemical cleaning followed by citric passivation delivers consistent results with minimal downtime and regulatory compliance. For architectural railings, mechanical finishing plus light pickling balances aesthetics and durability. High-pressure vessels demand full immersion pickling and validated passivation per code.
Final Thoughts
Proper post-weld cleaning and passivation decisions directly determine whether a stainless fabrication delivers decades of service or fails prematurely. Prioritize methods that fully restore the passive layer—often a combination of mechanical prep and chemical/electrochemical treatment—tailored to the alloy, environment, and code requirements.
For demanding applications, electrochemical cleaning paired with citric passivation offers a modern, efficient balance of performance and practicality, pushing the limits of what welded stainless assemblies can achieve in corrosive conditions. (Word count: approx. 2,250)
FAQ
How long should pickling paste sit on stainless steel welds?
Dwell time varies from 10–30 minutes for light tint to 60+ minutes for dark scale, depending on ambient temperature and product instructions. Monitor color change and test a small area first. Over-exposure risks pitting.
Can I use vinegar to clean stainless steel welds?
White vinegar helps with very light heat tint or maintenance cleaning due to mild acidity, but it lacks effectiveness for heavy oxides or proper passivation compared to dedicated pickling or electrochemical methods. Use it as a supplement only.
Does electropolishing replace pickling for weld cleaning?
Electropolishing provides superior finish and corrosion resistance but works best after initial oxide removal. It removes minimal material while smoothing. Combine with prior cleaning for heavily tinted welds.
How do I know if my stainless steel is properly passivated?
Perform a copper sulfate test (no pink/red color indicates success) or ferroxyl test. Visual uniformity and absence of rust after humidity exposure also confirm results. Follow relevant ASTM standards for critical work.