Stainless steel is valued in welding and fabrication for its corrosion resistance, clean appearance, and long-term durability. However, discoloration, oxidation, and surface tarnish can develop after welding, fabrication, storage, or environmental exposure.
If you’re wondering how do you clean tarnished stainless steel, the answer depends on the type of contamination and the condition of the metal surface.
Proper cleaning is more than a cosmetic concern. Tarnish, heat tint, and surface contaminants can affect corrosion resistance, create inspection issues, and compromise the finished appearance of fabricated components.
In industries where weld quality and surface integrity matter, using the correct cleaning method helps prevent unnecessary rework and ensures the stainless steel performs as intended.
Understanding the causes of tarnish and the most effective cleaning techniques will help you restore the surface safely while protecting the material’s durability and professional finish.
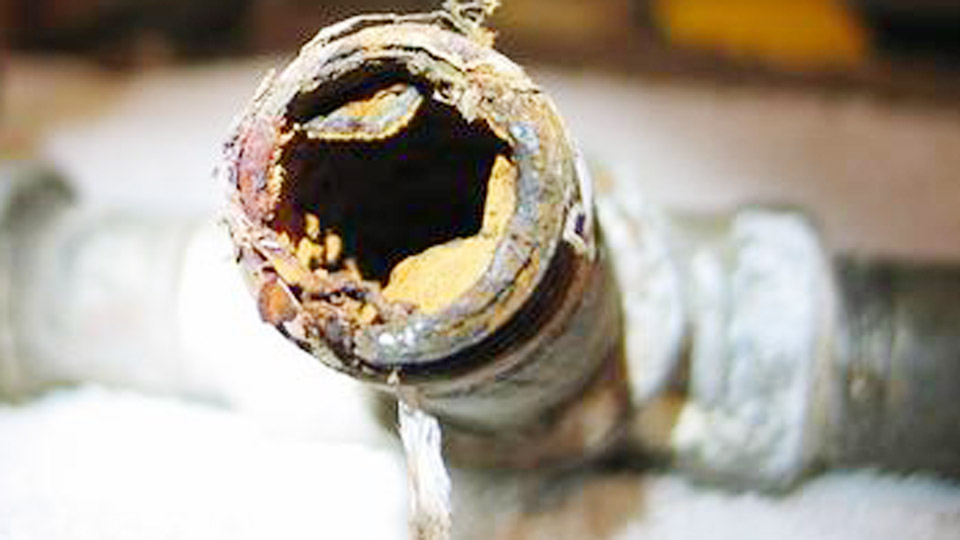
Image by rocheindustry
Understanding Heat Tint Formation in Stainless Steel Welds
Causes of Tarnish and Oxidation During Welding
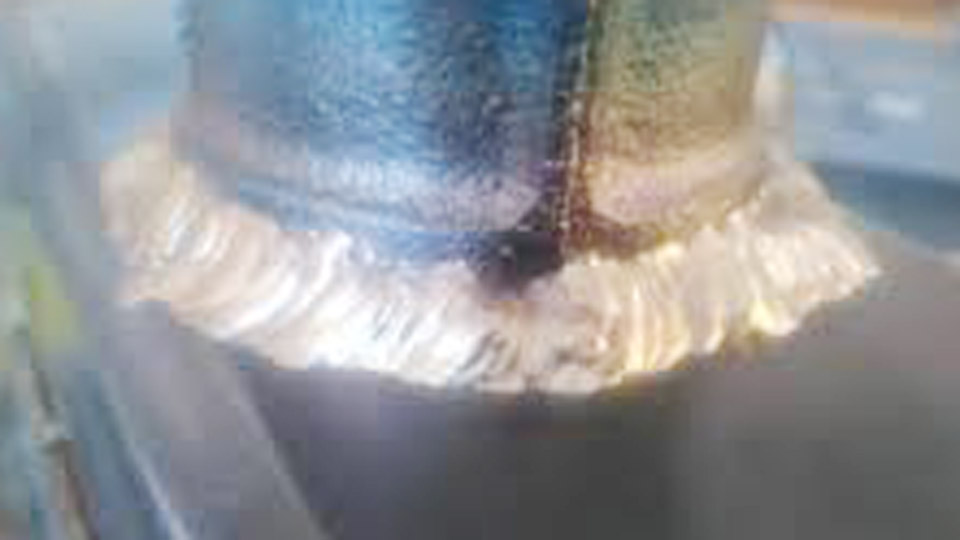
Heat tint develops when high temperatures (typically above 400°C) cause oxygen to react with chromium on the stainless surface, forming thicker oxide layers.
The color progression—straw yellow, gold, purple, blue, to black—corresponds to increasing oxide thickness and temperature exposure. In the HAZ, this process depletes subsurface chromium, leaving the metal vulnerable.
Key contributors include insufficient shielding gas coverage, high heat input, poor back purging (especially on the root side), and contamination from tools or grinding dust.
TIG welding 304 stainless often shows more pronounced tinting than 316 due to differences in alloy composition, though both require attention for optimal performance.
Impact on Corrosion Resistance and Material Properties
Visible heat tint beyond pale yellow indicates a compromised passive layer. In chloride-rich or moist environments, this leads to pitting corrosion initiation at chromium-depleted zones. Standards like those for drinking water applications mandate removal of tints deeper than pale yellow, followed by acid treatment, to restore full resistance.
Mechanically removing tint without addressing the depleted layer provides cosmetic improvement but limited corrosion benefit. Chemical or electrochemical methods that remove oxides and promote repassivation yield superior results, often restoring or exceeding base metal performance.
Mechanical Methods for Removing Tarnish
Grinding and Abrasive Techniques
Grinding effectively removes heavy scale and deep tints by abrading the affected surface layer. Use dedicated stainless steel abrasives (aluminum oxide or silicon carbide) with grit 60-120 for initial removal, progressing to 180-360 for blending. Always grind in the direction of the grain to minimize visible scratches.
This method suits large fabrications or thick sections where speed matters. However, it removes base metal (typically 0.01-0.05 mm per pass) and can embed contaminants if wheels are contaminated. Follow with passivation to restore the oxide layer, as grinding alone does not address subsurface depletion.
Wire Brushing and Scotch-Brite Finishing
Stainless steel wire brushes (dedicated, non-carbon) or non-woven Scotch-Brite pads (maroon or green) provide lighter mechanical cleaning for moderate tints. Brush perpendicular to the weld or use powered tools with low pressure to avoid work-hardening the surface.
These tools excel for field touch-ups and root-side cleaning inside pipes. They remove surface oxides without significant material loss but rarely eliminate the chromium-depleted zone fully.
Combine with chemical cleaning for critical applications. Limit to austenitic grades like 304L and 316L to avoid cross-contamination risks.
Chemical Cleaning Approaches
Pickling Pastes and Gels for Heat Tint Removal
Pickling pastes, often containing nitric and hydrofluoric acids, dissolve oxides and the depleted layer effectively. Apply with an acid-resistant brush, allow 5-30 minutes dwell time depending on tint darkness and ambient temperature, then rinse thoroughly with water or neutralizing solution.
Products like Avesta or similar gels work well on 304 and 316 welds. Dark blue/black tints may require multiple applications or mechanical pre-cleaning.
Always follow manufacturer instructions, as over-exposure risks pitting, especially on thin materials. Dispose of waste per local regulations due to hazardous components.
Nitric vs. Citric Acid Passivation
Passivation restores the protective chromium oxide layer after oxide removal. Nitric acid (10-15% with HF additions) is traditional and aggressive, effective across many grades but requires ventilation, PPE, and careful handling due to toxicity.
Citric acid (typically 4-10% solutions) offers a safer, biodegradable alternative with comparable or better performance on most alloys.
It operates at room temperature, shorter times (5-20 minutes), and simplifies waste disposal. Many fabricators prefer citric for in-house use, especially on 316 grades. Test per ASTM A967 to verify results.
| Method | Key Acids | Typical Time | Safety Notes | Best For |
|---|---|---|---|---|
| Nitric Pickling | Nitric + HF | 10-60 min | High hazard, ventilation required | Heavy scale, industrial |
| Citric Passivation | Citric acid | 5-30 min | Lower risk, biodegradable | Most shop/field uses |
Electrochemical Weld Cleaning Systems
How Electrochemical Cleaning Works
Electrochemical (electrolytic) cleaning uses a mild phosphoric or citric-based electrolyte, a conductive brush, and low-voltage DC current. The brush applies fluid to the weld while current flows, selectively dissolving oxides and contaminants without significant base metal removal. It simultaneously cleans and passivates.
Systems like those from Cougartron, Walter SURFOX, or TIG Brush are portable and effective on light to dark tints. Brush the area systematically; the reaction is visible as the tint disappears rapidly, often in seconds per pass.
Advantages for Professional and DIY Welders
This method offers speed, minimal material loss, and superior passivation compared to mechanical or paste-only approaches. It reaches complex geometries and root passes easily, produces no scratches, and improves corrosion resistance beyond the parent metal in many tests. Electrolytes are milder, reducing safety risks.
For hobbyists and small shops, entry-level units provide cost-effective performance. Professionals value repeatability and time savings on large projects. Neutralize and rinse per instructions to avoid residues.
Limitations and Best Practices
Electrochemical cleaning may require multiple passes on very heavy tints and works best after light mechanical pre-cleaning for slag. Initial equipment cost is higher than pastes, though long-term efficiency offsets this. Train operators on proper current settings and brush technique to prevent uneven results.
Preventing Tarnish in Future Welds
Optimizing Welding Parameters and Gas Shielding
Minimize heat input with lower amperage, pulsed TIG, and proper travel speed. Use larger gas cups (#12 or higher) and trailing shields for extended coverage. Pure argon or argon-helium mixes provide excellent shielding; maintain 10-20 CFH flow.
For root passes, back purge with argon to under 50 ppm oxygen, maintaining flow until the root cools below 250°C. This dramatically reduces underside tinting on pipes and tanks.
Material Preparation and Grade Selection
Clean surfaces thoroughly before welding—remove oils, mill scale, and contaminants with acetone or dedicated solvents. Dedicate tools (brushes, clamps) to stainless to prevent iron contamination. Consider low-carbon L grades (304L, 316L) for better weldability and reduced sensitization risk.
Choosing the Right Cleaning Method for Your Project
Match the method to project requirements: mechanical for quick cosmetics on non-critical parts; chemical pickling/passivation for code-compliant corrosion resistance; electrochemical for balanced speed, safety, and performance in shops or field work. Combine approaches—e.g., light grinding followed by electrolytic cleaning—for optimal results on demanding fabrications.
Test cleaned surfaces with water wetting or copper sulfate tests to confirm passivation. Document procedures for quality control, especially in regulated industries.
Real-World Application Insights
In practice, electrochemical systems shine for repetitive production or repair work, delivering consistent, high-quality finishes that mechanical methods struggle to match without extensive labor.
For one-off hobby projects, pickling paste plus citric passivation offers an accessible, effective route. Always prioritize restoring the passive layer over mere appearance to ensure long-term durability in corrosive service.
In high-purity or cyclic thermal applications, electropolishing after cleaning further enhances smoothness and corrosion resistance by removing micro-peaks and embedding sites, often extending service life significantly beyond standard passivation.
FAQ
How long should pickling paste sit on stainless steel welds?
Dwell time varies from 5-30 minutes depending on tint severity, temperature, and product. Dark tints need longer or reapplication; check manufacturer guidelines and test a small area to avoid over-etching.
Can you clean tarnished stainless steel without chemicals?
Yes, using dedicated stainless wire brushes, Scotch-Brite pads, or grinding. These provide cosmetic results but may not fully restore corrosion resistance without a subsequent passivation step.
Is electrochemical cleaning better than pickling for stainless welds?
It often is for speed, safety, and simultaneous passivation with less material removal and milder fluids. Pickling remains effective and cheaper for very heavy scale or large immersion jobs.
Does heat tint always need removal on stainless steel?
Not always for high-temperature oxidation service, but yes for most aqueous, food, or corrosion-critical applications to prevent pitting. Remove tints deeper than pale yellow per industry guidelines.