
Rusty cab corners on pickup trucks create a common dilemma for owners who spot bubbling paint or perforations along the rear cab sections. Many assume welding is the only permanent fix, yet heat distortion, equipment costs, and skill requirements push the repair out of reach for many DIYers.
Learning how to replace cab corners without welding opens practical, structurally viable options using modern adhesives, mechanical fasteners, and composite reinforcements that deliver reliable results on moderate rust damage.
These methods preserve the cab’s integrity without introducing warpage risks or requiring a full shop setup. They suit hobbyists restoring square-body Chevys, OBS trucks, or classic Fords where full panel replacement exceeds time or budget.
Proper execution yields repairs that handle road vibration and weather exposure for years when surfaces are prepared correctly and sealed thoroughly.
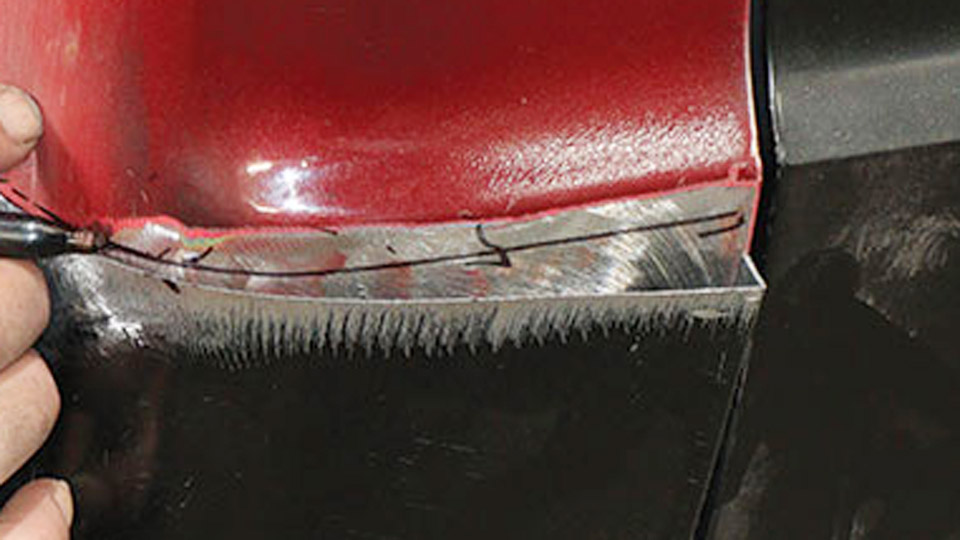
Image by inthegaragemedia
Assessing Rust Severity Before Choosing a Non-Weld Repair
Determining Repair Feasibility by Damage Extent
Cab corners bear exposure to road salt, mud, and moisture trapped near rocker panels and door jambs. Start with a thorough inspection using a pick tool or screwdriver to probe for soft metal.
Surface scale or light pitting allows simpler treatments, while through-holes larger than 1-2 inches or compromised structural supports often demand welded patches for safety.
Measure the affected area precisely. Repairs spanning under 6-8 inches in height suit adhesive or riveted patches best. Larger sections risk flex that adhesives alone cannot counter long-term. Check inner wheelhouse and floor connections, as hidden rust behind the visible corner undermines any surface fix.
When Non-Weld Methods Outperform Traditional Welding
Non-weld approaches excel on vehicles with thin factory metal prone to burn-through or where heat could damage nearby wiring, trim, or glass. They minimize downtime—no need for fire blankets or extensive post-weld grinding.
In regions with strict emissions or noise regulations around welding, adhesives and rivets provide compliant alternatives. Structural adhesives like 3M 08115 or equivalent two-part epoxies reach tensile strengths near 3,700 psi, approaching weld performance in shear loads typical for cab corners.
Tools and Materials Inventory for Non-Weld Cab Corner Work
Core tools include a 4.5-inch angle grinder with cutoff wheels, flap discs (40-80 grit), and wire wheels for cleaning. A drill with 1/8-inch bits, clamps (C-clamps and panel clamps), and a flanging tool support riveting. For adhesives, use a caulking gun and mixing nozzles.
Essential supplies: 18-20 gauge sheet metal for patches, 50-220 grit sandpaper, rust converter, epoxy primer, seam sealer, and high-quality panel bonding adhesive. Fiberglass mat or cloth pairs with resin for composite builds. Budget $50-150 in materials per side for moderate repairs.
Panel Bonding Adhesive Method: Strong, Heat-Free Patch Installation
Surface Preparation for Maximum Bond Strength
Cut out the rusted section with a cutoff wheel, extending 1 inch into solid metal for overlap. Create a cardboard template of the removed area, then trace onto new sheet metal.
Grind both the cab edge and patch to bare metal, removing all paint, rust, and mill scale. Sand with 50-grit for mechanical tooth—critical for epoxy adhesion. Wipe with isopropyl alcohol or acetone to eliminate contaminants. Any residue weakens the bond dramatically.
Cutting and Fitting Custom Patch Panels
Select 18-20 gauge steel matching factory thickness. Overlap edges by at least 1 inch for load distribution. Test-fit the patch dry, ensuring it follows body contours without gaps. Minor hammer and dolly work may adjust curvature. For complex bends near door jambs, make small relief cuts and dress edges smoothly.
Adhesive Application and Clamping Techniques
Mix the two-part adhesive precisely per manufacturer ratios—typically 1:1. Apply a continuous bead around the perimeter and in a zigzag pattern across the overlap. Position the patch and clamp firmly every 4-6 inches.
Use wooden blocks or spreader clamps to distribute pressure evenly without dimpling thin metal. Cure times range 10-30 minutes for handling strength, with full cure in 24 hours. Avoid disturbing the assembly during initial set.
Post-Bond Finishing and Sealing
Once cured, grind high spots flush and feather edges. Apply epoxy primer immediately to bare metal. Use seam sealer along all joints to block moisture. Multiple thin layers of body filler (if needed) build contour, followed by block sanding. This method produces a repair nearly invisible after paint when executed with care.
Riveting Patch Panels: Mechanical Strength with Minimal Equipment
Edge Preparation and Flanging for Flush Fit
After cutting rust, flange the cab opening inward using a dedicated tool or hammer and dolly. This creates a recessed lip for the patch to sit flush. Drill 1/8-inch holes every 1.5-2 inches along the overlap. Clean and prime all surfaces before riveting.
Rivet Selection, Spacing, and Installation Sequence
Use aluminum or steel pop rivets with sufficient grip range for the combined material thickness. Start at corners and work outward to control alignment. Set rivets in a staggered pattern for even load distribution.
Countersink heads slightly if planning heavy filler work. Riveting delivers immediate mechanical security that adhesives develop over time.
Hybrid Adhesive-Rivet Approaches for Enhanced Durability
Combine both: apply adhesive first, then rivet while wet for hybrid strength. This counters vibration and shear forces effectively. Seal rivet heads thoroughly with epoxy primer or seam sealer to prevent capillary rust entry.
Aesthetic Blending After Rivet Installation
Fill rivet dimples and overlap steps with body filler or glazing putty. Long-board sanding ensures smooth transitions into surrounding panels. This method suits visible areas where appearance matters as much as function.
Fiberglass and Epoxy Composite Repairs for Moderate Damage
Layering Techniques for Structural Reinforcement
Clean to bare metal and apply rust converter. Cut fiberglass mat to size, saturating with epoxy resin. Build 3-5 layers, alternating mat orientations for isotropic strength. Embed wire mesh in larger voids for added rigidity. Work in temperatures 60-80°F for proper resin cure.
Combining Fiberglass with Metal Patches
Use fiberglass over smaller perforations and as reinforcement behind adhesive-bonded metal patches. This hybrid restores contour and prevents flex cracking. Cure fully before sanding—resin hardness allows aggressive shaping with 80-grit discs.
Long-Term Durability Considerations
Fiberglass repairs resist moisture well but expand and contract differently from steel. Thorough sealing and paint protection are non-negotiable. Periodic inspection under the cab prevents hidden failures.
Slip-On Covers and Cosmetic Filler Solutions
Installing Pre-Formed Plastic or Metal Covers
Quick Covers or similar slip-on panels offer fast cosmetic fixes. Clean and treat existing rust, then adhere with 3M double-sided tape or adhesive. These work best for light damage where structure remains sound. Paint matching hides the repair effectively for daily drivers.
Strategic Use of Body Filler and Rust Encapsulators
For shallow pitting, apply rust converter, then high-build primer and filler in thin layers. Never rely on filler over unsupported areas. Encapsulators like POR-15 seal interior surfaces, halting progression without full replacement.
Comparing Non-Weld Methods: Strength, Cost, and Longevity
| Method | Tensile/Shear Strength | Cost per Side | Durability (Years) | Skill Level | Best Application |
|---|---|---|---|---|---|
| Panel Bonding Adhesive | ~3700 psi | $40-80 | 8-15+ | Beginner-Intermediate | Moderate rust, structural needs |
| Riveting | Mechanical + Seal | $30-60 | 7-12 | Beginner | Visible patches, quick repairs |
| Fiberglass/Epoxy | Good composite | $50-100 | 5-10 | Intermediate | Perforations, contour building |
| Slip-On Covers | Cosmetic | $20-50 | 3-7 | Novice | Light surface rust |
Adhesive bonding generally offers the best balance for most DIY scenarios. Always prioritize complete rust removal and sealing over speed.
Common Challenges and Technical Solutions
Managing Panel Fit on Warped or Previously Repaired Cabs
Older trucks often have distortion from prior bodywork. Use adjustable panel clamps and temporary screws to pull alignment before final bonding. Relief cuts in the patch allow contour matching without buckling.
Preventing Future Rust in Repaired Areas
Apply cavity wax or undercoating inside the cab after repair. Ensure drain holes remain open or add new ones. Epoxy primers outperform standard etch primers for long-term adhesion on repaired zones.
Paint and Finish Matching Considerations
Feather edges extensively into original paint. Use guide coats during sanding to reveal highs and lows. Base/clear systems demand precise blending, especially on metallic colors.
Decision-Making Framework for Your Specific Truck
Evaluate vehicle use: daily driver versus show truck influences finish expectations. Budget, available time, and local climate (salt roads accelerate recurrence) guide method choice. Test small patches on scrap to verify adhesive compatibility with your metal and existing coatings.
For trucks with extensive underbody rust, combine non-weld corner repairs with full rocker and floor treatments for holistic protection. Document measurements and techniques for future reference on the opposite side or other panels.
Wrapping Up
Replacing cab corners without welding delivers practical, high-value repairs when matched to damage levels and executed with precision. Focus on preparation and sealing elevates results beyond cosmetic patches.
Advanced insight: the strongest non-weld repairs treat the joint as a engineered composite system—metal for structure, adhesive for continuous load transfer, and coatings for environmental isolation—mirroring modern OEM unibody assembly techniques. This approach maximizes longevity without traditional fusion.
FAQ
Can adhesive-bonded cab corners handle off-road use?
Yes, when using high-strength structural adhesives on properly prepared surfaces with adequate overlap. Reinforce with rivets or fiberglass for heavier abuse, and maintain undercoating.
How long do non-weld cab corner repairs typically last?
Well-executed adhesive or riveted repairs last 8-15 years or more with good sealing. Environmental exposure and maintenance quality are the primary variables.
Is it possible to weld over a previously glued cab corner later?
Generally no—adhesives contaminate weld areas. Remove the bonded patch completely and start with clean metal for any future welded repair.
What gauge metal works best for DIY patch panels?
18-20 gauge matches most factory cab corners, providing strength without excessive weight or welding (if needed later) difficulty. Thicker material is harder to form by hand.


