
Exhaust leaks create immediate problems: loud noise, fumes entering the cabin, failed emissions tests, and progressive rust that enlarges the opening. Many DIY welders and fabricators reach for a quick seal instead of cutting and welding a new section, especially on older vehicles or hard-to-access pipes.
Learning how to use JB Weld exhaust wrap correctly turns a temporary patch into a functional, heat-resistant repair that holds under normal operating temperatures.
The product is a resin-impregnated fiberglass wrap rated to 1100 °F, designed for holes, cracks, and breaks anywhere in the exhaust system.
Proper surface prep, layer density, and cure method determine whether the repair lasts weeks or months. Incorrect application produces peeling, blowouts, or incomplete sealing that wastes both time and material.
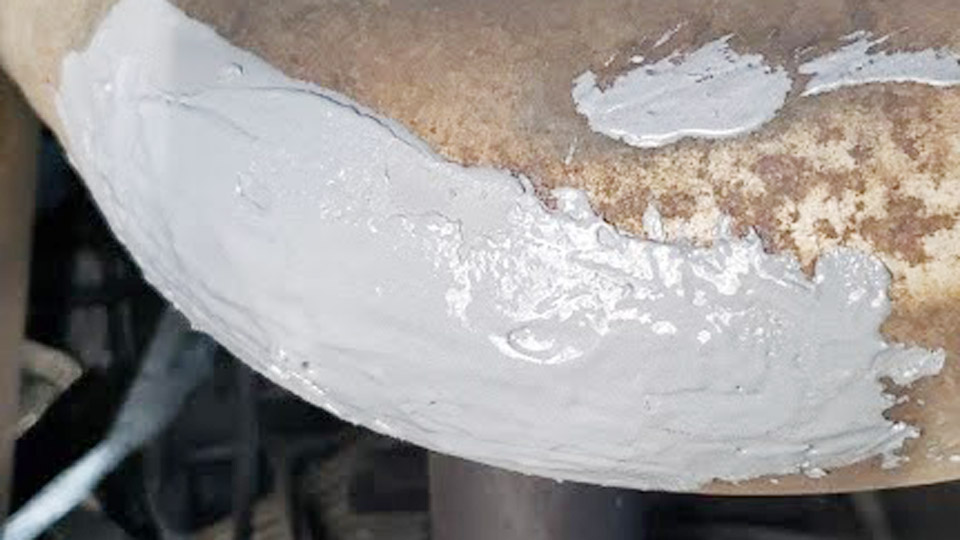
Image by @charlescoushaine
Surface Preparation Decisions That Control Bond Strength
Surface condition dictates adhesion more than any other single factor. Residual oil, road grime, or loose scale prevents the resin from locking into the metal.
Cleaning Methods for Contaminated Exhaust Surfaces
Remove all oil, grease, and dirt with a solvent that evaporates cleanly. Brake cleaner or acetone works on most pipes. Wire-brush or sand the immediate area until bright metal appears around the damage and 2–3 inches beyond it.
Roughening creates mechanical keying for the resin. On heavily rusted sections, remove loose flakes first; leaving scale under the wrap creates a failure plane once heat cycles begin.
Handling Irregular Shapes and Flanges
Flanges, bends, and welds require extra attention. Clean into crevices with a small brush or abrasive pad. If the damage sits next to a flange, extend the cleaned zone onto the flange face so the wrap can overlap both surfaces. Avoid applying the product over thick undercoating or heat shields that cannot be cleaned thoroughly.
Kneading and Saturation Technique Before Opening the Pouch
The wrap arrives sealed in a foil pouch filled with resin. Incomplete saturation leaves dry fiber that never hardens properly.
Why Full Kneading Matters
Knead the unopened pouch for several minutes until the resin is evenly distributed through the entire length of fiberglass. The material should feel uniformly wet and pliable.
Skipping this step produces dry spots that delaminate under exhaust heat and vibration. Gloves supplied in the kit keep the resin off skin; the compound is messy once the pouch is opened.
Working Time Considerations
Once the pouch is opened the resin begins to react with ambient moisture and heat. Apply the wrap promptly. In hot shop conditions the working window shortens; cooler ambient temperatures give slightly more time. Plan the wrap path before cutting open the pouch so the material can be applied in one continuous motion.
Layer Count and Overlap Requirements by Damage Severity
The official instruction calls for using the entire 2-inch by 72-inch roll, with a minimum of five layers directly over the break and 2–4 inches of support on each side.
Minimum Layers for Small Holes and Cracks
A hole the size of a quarter or a short crack needs at least five full wraps centered on the damage. Each successive layer should overlap the previous one by half the tape width.
This builds wall thickness that resists internal pressure and external vibration. Extending 2–4 inches past the edges anchors the repair into sound metal.
Building Support on Larger Breaks or Separated Joints
When the pipe is nearly severed or a joint has pulled apart, more layers and longer side support become necessary. Use the full length of the roll, concentrating extra thickness at the gap.
The wrap can bridge small gaps, but large openings require the resin-saturated fiber to form a continuous sleeve. Overlapping onto adjacent undamaged pipe provides the mechanical strength the repair needs.
Technique Around Bends and Tight Clearances
On curved sections keep tension consistent so the wrap does not slip or bunch. Start wrapping from one side of the damage and work continuously around the circumference. In tight spots under the vehicle, pre-form the first few turns by hand before applying full tension.
The aluminum tape included in the kit holds the layers in place during cure without fully encapsulating the wrap; leave some surface exposed so heat and air can reach the resin.
Curing Options and Temperature Effects on Final Hardness
JB Weld ExhaustWeld cures two ways: 20 minutes with heat or approximately 2 hours at ambient temperature.
Heat-Assisted Cure Using Engine Exhaust
After securing the wrap with the supplied aluminum tape, start the engine and let it idle or drive gently for 20 minutes. Exhaust gas temperature accelerates the resin reaction and drives off residual moisture.
This method produces a harder, more heat-resistant finish in the shortest time. Use a heat gun as an alternative if the vehicle cannot be started safely.
Ambient Cure for Shop or Overnight Repairs
When engine heat is impractical, allow the repair to sit undisturbed for 2 hours at room temperature. Full hardness continues to develop over the following hours.
Ambient curing works well in controlled environments but leaves the wrap softer initially, so avoid driving until the full period has elapsed. Remove the aluminum tape once the wrap has set; leaving it in place can trap moisture or create a weak outer layer.
Post-Cure Inspection and Load Testing
After curing, inspect for voids, loose edges, or incomplete saturation. A properly cured wrap is rigid and dark gray. Light tapping should produce a solid sound rather than a hollow or soft response. Road-test at moderate speeds first; listen for residual leaks and check under the vehicle after the first heat cycle for any softening or movement.
When Exhaust Wrap Is the Correct Choice Versus Welding or Component Replacement
The wrap is engineered for sealing and insulating, not for restoring full structural integrity on high-stress or large-diameter failures.
Suitable Applications
Holes and cracks in mufflers, tailpipes, resonators, and mid-pipe sections respond well. Flex-pipe areas and light flange leaks can also be sealed if the underlying metal still provides support.
The 1100 °F rating covers normal gasoline and diesel exhaust temperatures downstream of the manifold. Temporary roadside repairs and older vehicles destined for limited additional service are ideal candidates.
Situations That Require Welding or New Parts
Exhaust manifolds, catalytic converters, and high-pressure turbo plumbing experience temperatures and thermal cycling beyond the practical limit of a wrap repair. Completely severed pipes, collapsed sections, or damage that removes more than half the circumference need cutting, new tubing, and proper welding.
In these cases the wrap can serve only as a short-term seal until permanent work is performed. Structural hangers and mounts that have failed should be replaced rather than wrapped.
Combining Wrap with Other Exhaust Sealants
For irregular gaps or pinholes too small for effective wrapping, a high-temperature paste such as JB Weld ExtremeHeat or Exhaust System Sealant can fill the void first. Apply the paste, then wrap over it for mechanical reinforcement.
This hybrid approach improves sealing on pitted or irregular surfaces but still relies on clean metal and proper layer count.
Diagnosing Post-Application Failures and Corrective Actions
Most failures trace back to incomplete cleaning, insufficient layers, or premature loading before full cure.
Blowouts and Separation at the Edges
If the wrap peels or blows out at the edges, the side support was too short or the surface under the outer turns was still contaminated. Cut away the failed section, re-clean a wider zone, and reapply with greater overlap onto sound metal. Adding a second roll for extra thickness is often more reliable than attempting to patch over a failed first attempt.
Soft Spots and Incomplete Hardening
Soft or gummy areas indicate either insufficient kneading or incomplete cure. Ambient-cured repairs left in cold or damp conditions may never reach full hardness.
Re-heating the area with a heat gun or running the engine for an extended period can sometimes finish the reaction. If the material remains soft, remove it and start over with a fresh wrap after thorough cleaning.
Vibration-Induced Cracking
Exhaust systems vibrate continuously. Thin or uneven layers crack along the grain of the fiberglass. Prevent this by maintaining consistent tension and building the required five-layer minimum.
On high-vibration applications such as trucks or performance vehicles, consider adding a stainless band clamp over the cured wrap for mechanical backup.
Wrapping Up
Selecting the correct approach begins with accurate damage assessment: measure the size of the opening, evaluate remaining wall thickness, and confirm that surrounding metal can support the wrap.
When those conditions are met and the application sequence is followed exactly—clean, knead, wrap tightly with full coverage, secure, and cure—the JB Weld exhaust wrap delivers a functional seal rated for normal exhaust temperatures.
Advanced fabricators treat the wrap as one tool among many: use it for rapid, low-cost sealing on secondary sections, then schedule proper welding or component replacement when structural integrity or long-term durability is required.


