
Learning how to plastic weld polyethylene is essential when repairing or fabricating parts made from HDPE, LDPE, or other polyethylene materials. Unlike metal welding, polyethylene relies on controlled heat and compatible filler material to create a strong molecular bond.
Using the wrong temperature, welding rod, or surface preparation can result in weak joints, incomplete fusion, leaks, or premature failure, leading to costly rework and unreliable repairs.
Whether you’re fixing a plastic fuel tank, water container, pipe, or industrial component, understanding the correct welding process directly affects joint strength and long-term durability.
By applying the proper techniques and equipment, you can produce cleaner, more dependable welds while avoiding common mistakes that compromise the finished repair. I’ll explain the fundamentals of polyethylene plastic welding so you can achieve consistent, professional-quality results.
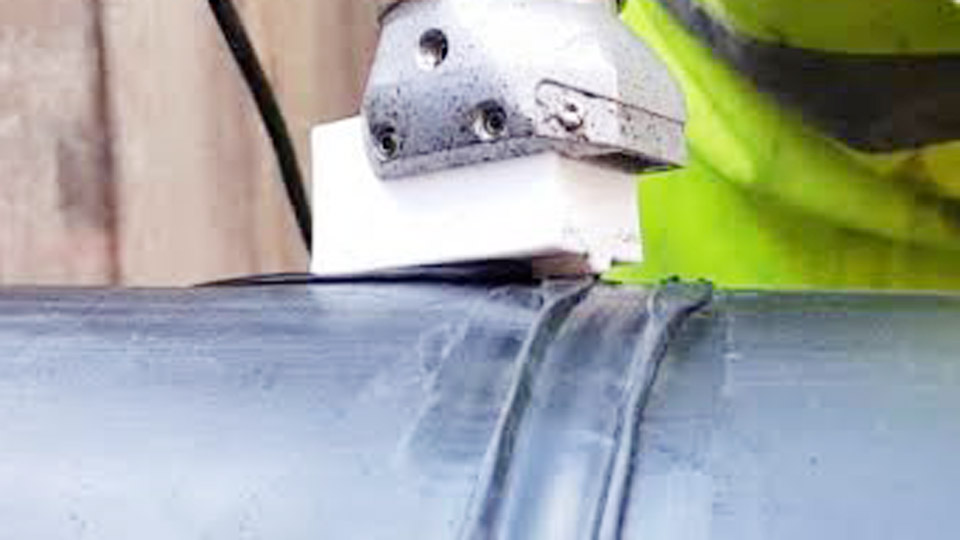
Image by industrialplastics
Understanding Polyethylene Types for Welding
HDPE vs. LDPE: Material Behavior in Welding
High-density polyethylene (HDPE) offers higher rigidity, chemical resistance, and melting points around 130–135°C, suiting structural tanks, pipes, and geomembranes. Low-density polyethylene (LDPE) is more flexible with a lower melt range, ideal for liners or flexible repairs but prone to distortion under heat.
Weld parameters differ: HDPE tolerates slightly higher preheat and extrusion temperatures for deeper fusion, while LDPE requires gentler settings to avoid excessive flow or burn-through. Mismatching densities in the same joint often produces weak interfaces due to differing melt viscosities and crystallization rates.
Identifying Compatible Grades and Additives
Check for material codes or perform a burn test and rod compatibility trial. Virgin HDPE rods match best for high-stress applications; recycled material introduces variability in melt index and contaminants.
Black UV-stabilized PE absorbs heat differently than natural grades, requiring speed or temperature adjustments. Always verify melt flow index (MFI) compatibility—typically 0.1–0.5 g/10min for extrusion-grade HDPE—to ensure even flow without voids.
Essential Tools and Equipment for Polyethylene Welding
Hot Air Welders and Nozzles
Select a temperature-controlled hot air welder (e.g., Leister-style) with adjustable airflow (40–55 l/min) and precise digital readout. Speed tips (5–7mm) accelerate linear seams; tacking nozzles secure alignment; pendulum or round nozzles suit complex geometries. Nitrogen shielding reduces oxidation on sensitive applications.
Extrusion Welders and Accessories
Handheld extrusion welders deliver consistent filler deposition for thick sections (>6mm) or structural repairs. Look for models with independent preheat air and extrudate temperature control. Preheat nozzle, rod feed mechanism, and pressure shoe are critical. Granular or rod feed options depend on job scale.
Supporting Tools and Preparation Gear
Include wire brushes, scrapers, isopropyl alcohol, 80–120 grit sandpaper or rotary burrs for V-grooves, clamps/jigs, rollers for consolidation, and thickness gauges. Digital thermometers or infrared pyrometers verify surface temperatures. Test welds on scrap validate full setup.
Surface Preparation Techniques That Determine Weld Success
Cleaning and Contaminant Removal
Remove oxidation, oils, dirt, and mold release with isopropyl alcohol and lint-free cloths immediately before welding—HDPE oxidizes quickly after abrasion. Mechanical cleaning with stainless steel brushes or scrapers follows solvent wipe. Avoid household cleaners that leave residues. For field repairs on used tanks, grind back to fresh material.
Joint Design and Beveling
Create single or double V-grooves (60–70° included angle) with a small root land (1/32″) for penetration without burn-through.
Bevel depth matches material thickness: 50–60% for single V on thinner stock, full double V on thicker. Proper alignment limits misalignment to <10% of wall thickness. Tack joints sparingly with low heat to maintain gap control.
Welding Parameters and Temperature Control
Recommended Settings by Process
For hot air/hand welding HDPE: hot gas 300–320°C, airflow 40–50 l/min, welding speed 70–90 mm/min (3mm rod), force 8–10N. LDPE runs cooler at ~270°C.
For extrusion welding: extrudate 210–230°C, preheat air 210–300°C, speed ~300 mm/min. Adjust based on ambient temperature and thickness.
Butt fusion (pipes/sheets): heater plate 200–220°C, interfacial pressure ~0.15 N/mm² (low-pressure method), with timed heat soak and cooling phases scaled to thickness.
Temperature Monitoring and Adjustment
Use contact probes or IR on the weld zone. Watch for glossy, tacky surface without browning or excessive sagging. Ambient conditions (cold shop or wind) require +10–20°C or slower speeds. Always perform test welds and destructive testing (peel/shear) to calibrate.
Hot Air Welding Process for Repairs and Fabrication
Technique and Hand Positioning
Hold gun at ~90° to surface, rod at 45° trailing. Preheat base and rod simultaneously until both melt and blend. Apply steady forward pressure while feeding rod into the groove. Maintain consistent speed to produce uniform bead with wash ripples at edges indicating good fusion.
Multi-Pass and Speed Welding
For deeper joints, build layers with slight cooling between passes. Speed nozzles allow continuous rod feeding for longer seams, increasing productivity while maintaining quality. Consolidate with roller immediately behind the torch.
Extrusion Welding for Structural Joints
Setup and Execution
Preheat joint with hot air nozzle, then deposit molten extrudate while maintaining forward motion and downward pressure. The shoe shapes and consolidates the bead.
Target full groove fill without voids or notches between layers. Extrusion suits tank fabrication, pipe boots, and thick sheet seams where hot air lacks filler volume.
Parameter Optimization for Thickness
Thicker materials (>10mm) need wider grooves, higher preheat, and slower travel. Monitor extrudate temperature at the outlet. Pre-drying rods prevents moisture bubbles. Test shear strength on sample beads.
Butt Fusion Welding for Pipes and Panels
Procedure Overview
Align and face pipe ends square, heat against plated mirror at 200–220°C until proper melt bead forms, remove heater, and join under controlled pressure.
Critical phases: bead-up, heat soak (drag pressure), changeover (< few seconds), and pressurized cooling. Times scale with wall thickness—e.g., thicker walls require longer soaks.
Pressure and Timing Decisions
Follow standards like DVS 2207-1 (low pressure) or regional variants. Interfacial pressure, not just machine gauge, determines fusion quality. Allow full cooling under pressure to minimize residual stresses and voids.
Quality Control and Testing Methods
Visual and Destructive Testing
Inspect for uniform bead, no cold laps, notches, or discoloration. Perform bend, peel, or tensile tests on sample welds. For geomembranes, air channel or vacuum box testing detects leaks. Shear strength should reach 80–95% of base material.
Non-Destructive Approaches
Ultrasonic or spark testing for larger fabrications. Document parameters, ambient conditions, and welder qualifications for traceability, especially in pressure or containment applications.
Common Welding Challenges and Solutions
Achieving Strong Fusion Without Defects
Cold welds result from insufficient heat/speed; address with calibration and test beads. Overheating causes degradation—reduce temperature or increase travel speed. Contamination remains the top failure cause; enforce rigorous cleaning protocols. Misalignment or poor pressure leads to incomplete fusion.
Environmental and Material Variables
Wind, humidity, and temperature swings affect cooling rates—use shelters or adjust parameters. Different PE formulations (e.g., PE80 vs PE100) have subtle melt differences; qualify rods and base material together. For field repairs on aged material, remove oxidized layers thoroughly.
Advanced Considerations for Professional Results
Joint efficiency depends on molecular interdiffusion, influenced by heat input, pressure, and cooling. Pro welders track interfacial pressure precisely and use data-logging equipment. For critical applications, consider post-weld annealing to relieve stresses.
Material-specific nuances, such as HDPE’s crystallization behavior, reward experience with parameter fine-tuning over generic settings.
Real-world Application Insight
Selecting the right process—hot air for quick repairs, extrusion for strength in fabrication, butt fusion for pipes—combined with rigorous surface prep and parameter validation, consistently delivers leak-free, load-bearing polyethylene welds.
The advanced pro insight is mastering heat balance and pressure timing to achieve weld strength that exceeds the parent material under real service stresses, turning potential failure points into the most reliable sections of the assembly.
FAQ
What temperature is best for welding polyethylene?
Hot air welding typically uses 260–320°C depending on HDPE/LDPE and process; extrusion around 210–240°C melt temperature. Always calibrate with test welds on the specific material.
Can you weld HDPE to LDPE?
It is not recommended for structural joints due to differing melt and crystallization behaviors that create weak interfaces. Stick to matching types.
How do I fix a failed polyethylene weld?
Grind out the defective area to sound material, re-prepare surfaces, and re-weld following qualified parameters. For cracks, drill stop holes and V-groove before repair.
What equipment is essential for beginners?
A temperature-controlled hot air welder, matching PE welding rods, cleaning tools, and scrap material for practice. Start with hot air before advancing to extrusion.


