A crack in a plastic bumper that has already been “repaired” with epoxy or filler often reopens the first time the panel flexes over a speed bump or curb. That failure happens because most modern bumpers are low-surface-energy thermoplastics that refuse to form a permanent bond with ordinary adhesives.
Learning how to fix a crack in your car bumper by plastic welding solves the problem at the molecular level: matching filler rod is melted into a prepared groove so the base material and the new plastic fuse into one continuous piece.
The repair restores nearly the original flexibility and tensile strength, which is why professional collision shops rely on it for structural tears and broken mounting tabs. Correct heat, proper preparation, and material matching decide whether the weld holds or fails under vibration and impact.
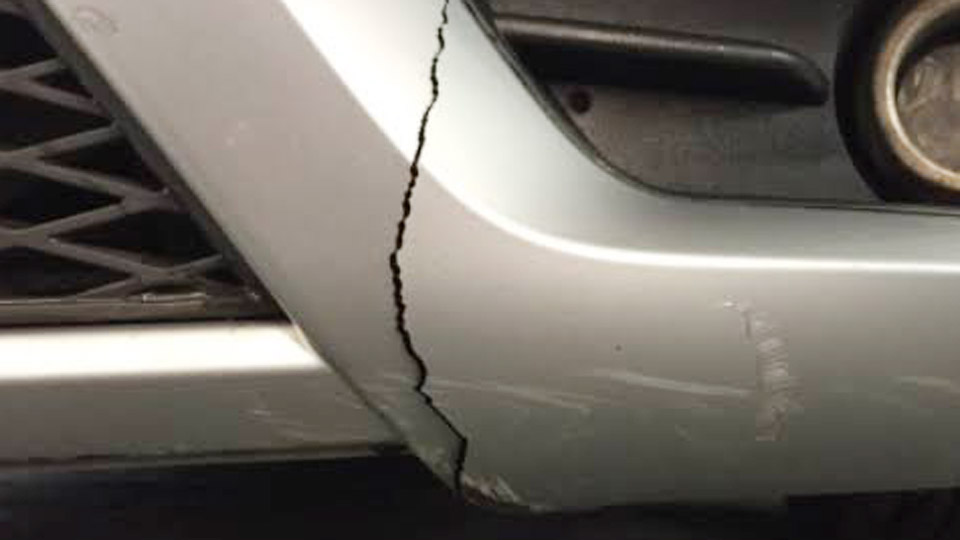
Image by racingjunk
Identifying the Bumper Plastic Before Any Heat Is Applied
Most late-model bumper covers carry a molded identification code on the reverse side near the edges or mounting points. The codes determine both the filler rod and the temperature window.
Reading Common Stamps and What They Mean
PP, PP+EPDM, and TPO (or TEO) dominate current production and account for the large majority of covers. These are thermoplastics that can be fusion-welded. ABS appears less often on exterior covers but is still weldable with the correct rod.
PUR (polyurethane) is a thermoset; it cannot be fusion-welded and requires adhesive methods only. Xenoy (PC/PBT blends) is rare on bumpers and needs polycarbonate rod if welding is attempted.
Quick Field Tests When the Stamp Is Missing or Illegible
A small shaving that floats in water and smells like candle wax when burned is almost always PP or TPO. Rigid, non-floating material that chars or produces black smoke is more likely ABS or a different engineering plastic. Never rely solely on color or feel; the wrong rod produces a cold joint that cracks under load.
When Plastic Welding Outperforms Adhesive Repairs
Adhesive systems work for minor surface splits or mixed-substrate repairs, but they leave a distinct interface that can delaminate under repeated flex. Welding eliminates that interface.
Structural Cracks Longer Than Four Inches
Full-thickness tears, especially those running into mounting tabs or high-stress corners, demand the continuous polymer chain created by fusion. Welding restores a higher percentage of original strength and retains the panel’s designed flexibility.
Broken Tabs and Edge Tears
These locations experience concentrated bending forces during installation and normal driving. Embedding matching rod plus reinforcement mesh creates a composite section that resists pull-out far better than adhesive alone.
Preparing the Crack for Full Penetration
Surface cleanliness and geometry control weld quality more than any other single factor.
Cleaning and Paint Removal
Degrease with a plastic-safe solvent or isopropyl alcohol. Grind or sand paint, primer, and any mold-release residue at least 10–20 mm beyond the crack on both sides until virgin plastic is exposed. Contaminants prevent molecular intermixing and produce porosity or weak fusion lines.
Stop-Drilling and V-Grooving
Drill a 3 mm hole at each visible end of the crack to arrest further propagation. Use a rotary tool with a tapered burr to cut a V-groove along the entire length, typically to half the material thickness on the side that will be welded first (usually the back).
The groove provides volume for the rod and increases surface area for fusion. Extend the groove slightly past the visible crack ends because internal splits often continue farther than the surface shows.
Alignment and Temporary Stabilization
Bring the crack edges into natural alignment without forcing the panel into a twisted position. Aluminum body tape on the exterior face holds the edges while allowing heat to pass. Hot staples or plastic welding staples driven across the crack from the back add mechanical lock during the main weld passes.
Hot-Air and Nitrogen Welding Techniques for Bumper Covers
Temperature, rod feed pressure, and travel speed must stay inside narrow windows for each polymer.
Temperature Windows by Material
PP and TPO typically weld in the 260–315 °C (500–600 °F) range on hot-air equipment; nitrogen systems often run the gas stream higher (approximately 370–430 °C / 700–800 °F) because the inert atmosphere reduces oxidation. ABS requires slightly higher settings near 290–320 °C.
Always verify on scrap from the same bumper or an identical part; nozzle distance, air flow, and ambient temperature shift the effective heat at the work surface.
Rod Selection and Feed Technique
Use only rod of the identical polymer family—PP rod for PP/TPO covers. Round or triangular profiles 3–6 mm are common. Hold the rod at roughly 90° to the surface and the welder tip at 35–45°. Preheat both the base plastic and the rod tip until a glossy “wash” appears, then apply light downward pressure (under 0.5 kg) while advancing at 100–150 mm per minute.
The rod should melt into the groove and form a small molten bead at the edges; if the rod simply sits on top or chars, heat or speed is incorrect.
Backside-First Sequence
Weld the reverse side first to establish structural integrity. Multiple overlapping passes build thickness. Once the back is solid and cooled, remove temporary tape or staples, re-groove the front if needed until the backside weld is visible, and complete the cosmetic face weld. This order prevents the front surface from carrying the primary load.
Reinforcing High-Stress Areas on the Backside
Long cracks and locations near mounting points benefit from internal bracing.
Embedding Stainless or Aluminum Mesh
Cut mesh to overlap the crack by at least 25 mm on each side. Soften the surrounding plastic with the welder, press the mesh into the molten surface, and immediately cover it with additional matching rod so the mesh becomes fully encapsulated. The mesh acts as distributed reinforcement that spreads bending loads and stops crack re-initiation.
Hot Staples as Supplementary Lock
In high-tension zones, heat-drive stainless or plastic staples across the crack before or after the main weld. The staples provide immediate mechanical interlock while the polymer fusion develops full strength during cooling.
Finishing the Weld for Paint-Ready Results
A strong weld still requires surface work before refinishing.
Cooling and Initial Leveling
Allow the weld to return to room temperature naturally or with light water cooling. Aggressive metal files or rotary tools remove high spots faster than sandpaper alone because both the base plastic and the rod abrade at similar rates. Grind slightly below the surrounding surface so subsequent filler sits in a shallow depression.
Flexible Body Filler and Sanding Sequence
Apply a plastic-compatible flexible filler only over properly abraded weld metal. Block-sand through 80–180–320 grit, then finish with finer papers as required by the paint system. The filler must remain flexible; rigid automotive fillers will crack when the bumper flexes.
Paint and Clear-Coat Considerations
Most PP/TPO surfaces need an adhesion promoter before primer. Follow the refinish manufacturer’s process for flexible substrates. A correctly executed weld disappears under a proper paint job and survives the same impacts that would reopen an adhesive repair.
Decision Framework for Choosing Welding Over Replacement
Remove the bumper when access or alignment is restricted; many covers unbolt with a handful of fasteners and push pins. Short surface cracks in low-stress areas can still be handled with quality two-part plastic adhesives if welding equipment is unavailable, but any crack that compromises a mounting tab or runs longer than roughly 100 mm justifies the welding approach.
Match the rod, control heat so the polymer flows without burning, and build strength from the back first. The resulting joint retains the original flexibility of the bumper cover and eliminates the delamination risk inherent in glued repairs.
Advanced technicians further improve longevity by combining nitrogen shielding with multiple thin passes rather than a single heavy bead, minimizing residual stress and oxidation at the fusion line.
FAQs
Can you plastic weld a cracked bumper without removing it?
Yes for accessible rear or lower sections, but full removal usually improves alignment, cleaning, and backside access, producing a stronger and cleaner result.
What temperature should I use for PP bumper plastic welding?
Start in the 260–315 °C (500–600 °F) range on hot-air equipment and adjust on scrap until the rod and base material form a glossy molten wash without charring or excessive smoke.
Will plastic welding work on every car bumper?
It works on the thermoplastic covers (PP, TPO, ABS) that make up the large majority of modern bumpers. Thermoset PUR covers cannot be fusion-welded and require adhesive methods.
How long does a properly welded bumper crack last?
When the rod matches the substrate, the groove is fully penetrated, and reinforcement is added in high-stress zones, the repair routinely outlasts the rest of the panel under normal driving loads.