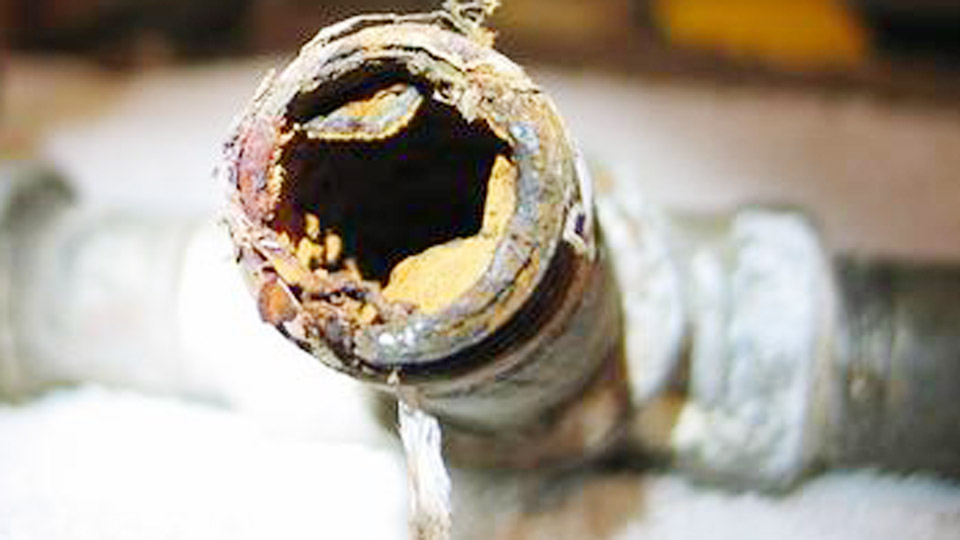
Rust and corrosion on copper pipes can interfere with brazing, soldering, and other metalworking tasks by preventing proper filler metal flow and creating weak, contaminated joints.
Knowing how to remove rust from copper pipes is essential before making repairs or permanent connections, especially when joint reliability and leak prevention matter.
Surface contamination can also increase rework, reduce bond strength, and lead to failed pressure tests or premature joint failure. The right cleaning method depends on the severity of the corrosion and whether you need to preserve the pipe for soldering, brazing, or general maintenance.
Understanding the correct approach helps restore clean metal without damaging the copper or creating additional preparation problems.
With proper rust removal techniques, you can achieve cleaner surfaces, stronger joints, and more consistent results in both DIY and professional metalworking applications.
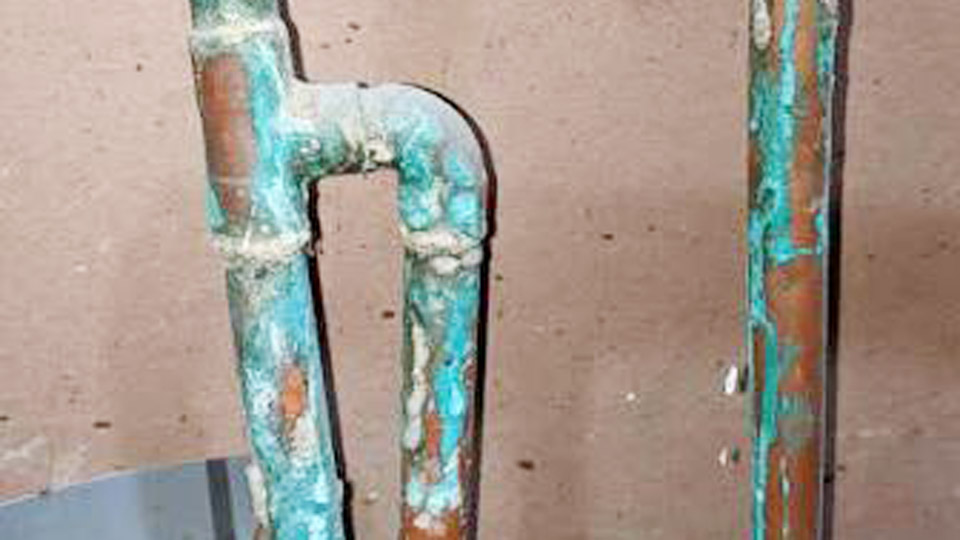
Image by stackexchange
Understanding Copper Corrosion in Welding Contexts
Copper forms protective oxides and basic copper carbonate (verdigris) rather than traditional iron rust. Exposure to moisture, oxygen, and contaminants accelerates this. In welding shops, mill scale, oils from handling, and old flux residues compound the issue.
Why Oxidation Matters for Brazing and Soldering
Oxide layers block capillary action in the 0.004-inch joint gap essential for solder or braze filler flow. Unremoved oxides cause incomplete penetration, reduced strength, and premature failure under pressure or thermal cycling. For refrigerant lines, internal contamination also risks system efficiency and compressor damage.
Common Contaminants on Copper Pipe
- Light tarnish: Thin oxide film on new or stored pipe.
- Green patina: Stubborn verdigris on aged installations.
- Oils and grease: From manufacturing or shop handling.
- Internal debris: Burrs, shavings, and scale from cutting.
Each requires targeted removal to reach bright, shiny copper.
Mechanical Cleaning Methods for Copper Pipes
Mechanical approaches provide immediate visual confirmation of clean metal and suit most shop environments.
Wire Brushing and Abrasive Tools
Start with a stainless steel or bronze wire brush dedicated to copper to avoid cross-contamination. Carbon steel brushes embed particles that cause galvanic issues later. Brush in one direction with firm pressure until bright metal appears.
For external surfaces, wrap emery cloth (120-180 grit) or use nylon abrasive pads around the pipe and rotate. Clean at least 1 inch beyond the joint area. For fittings, matching internal wire brushes remove oxides inside cups efficiently.
Power tool options: Rotary tools with wire brush attachments speed production but demand light pressure to prevent wall thinning on thin copper tubing.
Sanding and Flap Disc Techniques
On larger diameter pipes or heavy scale, progress from coarser (80-120 grit) to finer abrasives. Avoid aggressive grinding that removes excessive material and weakens the pipe. For curved sections, flexible abrasive pads conform better than rigid discs.
Deburring after cutting is non-negotiable. Use dedicated deburring tools or reamers to remove internal burrs that create turbulence or trap contaminants.
Internal Pipe Cleaning Challenges
Long runs or fixed installations complicate access. Flexible shaft brushes, pull-through rags on string, or compressed air flushing help. For refrigerant or high-purity lines, ensure no debris remains inside.
Chemical and Hybrid Cleaning Approaches
Chemical methods dissolve oxides where mechanical action falls short, especially on intricate fittings or heavy patina.
Vinegar-Based Solutions
White vinegar (acetic acid) with salt is a workshop staple. Mix equal parts vinegar and water, add salt for mild abrasion. Soak small sections or apply soaked rags for 15-30 minutes, then scrub and rinse thoroughly.
This approach works well for green oxidation without aggressive acids that risk pitting copper.
Lemon, Salt, and Other Household Options
Cut lemon halves dipped in salt provide citric acid scrubbing. Ketchup (acids and salts) offers a quick paste for moderate tarnish. These suit spot cleaning but require complete rinsing before welding.
Commercial copper cleaners or pickling solutions accelerate heavy jobs but follow manufacturer rinse protocols strictly to avoid residue.
Degreasing as the Critical First and Final Step
Oils defeat all other cleaning. Wipe with acetone, isopropyl alcohol, or brake cleaner before mechanical work and again immediately before fluxing or welding. Fingerprints reintroduce oils—use clean gloves after final cleaning.
Preparation for Specific Welding Processes
Cleaning for Soldering vs. Brazing
Soldering (lower temperatures) relies heavily on flux to handle minor residues, but mechanical cleaning to bright copper remains essential. Brazing demands cleaner surfaces due to higher heat and different filler chemistry.
Clean both pipe exterior and fitting interior to matching standards. Apply flux immediately after cleaning for soldering to prevent re-oxidation.
TIG Welding Copper Requirements
TIG offers no flux protection, so surfaces must be pristine. Combine mechanical abrasion to bright metal, thorough degreasing, and sometimes a final stainless wire brush pass. Test cleanliness with a tack weld on scrap—if the bead flows smoothly without porosity, proceed.
Post-clean protection: Store prepared pipes in dry conditions or cover ends if not welding immediately.
Tool Selection and Shop Efficiency
Dedicated copper tools prevent contamination. Maintain separate brushes, cloths, and abrasives for copper work. Power wire brushes and rotary cleaners excel for production but generate dust—use ventilation.
Comparison of Common Methods:
| Method | Best For | Speed | Cost | Effectiveness on Patina |
|---|---|---|---|---|
| Emery Cloth/Pads | External pipe | Medium | Low | Good |
| Wire Brushes | Fittings & light tarnish | Fast | Low | Moderate |
| Vinegar/Salt Soak | Moderate oxidation | Medium | Very Low | Very Good |
| Flap Disc/Grinder | Heavy scale, large pipes | Very Fast | Medium | Excellent |
| Commercial Cleaners | Heavy or production work | Fast | Medium | Excellent |
Choose based on pipe condition, joint type, and volume. Hybrids (mechanical + chemical) deliver the most reliable results.
Inspection and Quality Control
After cleaning, the surface should appear uniformly bright pink-copper with no dull spots, green residue, or discoloration. Run a clean cloth over it—no black transfer indicates success. For critical applications, use visual magnification or perform a test joint.
Check internal surfaces with borescopes or by flushing and inspecting effluent. Wall thickness verification prevents over-thinning from aggressive cleaning.
Re-oxidation begins quickly—weld or protect within minutes of final cleaning for best outcomes.
Advanced Considerations for Professional Welders
In high-spec applications like pressure vessels or refrigeration, follow standards such as those in the Copper Tube Handbook for cleaning depth and verification. Consider surface passivation treatments post-cleaning for extended shelf life before welding.
For dissimilar metal joints involving copper, account for galvanic risks in cleaning and post-weld treatment. In field repairs on live systems, techniques like vinegar-soaked rags allow preparation without full disassembly.
Final Thoughts
Effective copper pipe preparation boils down to matching cleaning intensity to the contamination level and welding process while prioritizing contamination control.
Professionals achieve consistent high-quality joints by treating cleaning as a precision step equal in importance to parameter selection and technique.
Mastering these decisions separates reliable fabrications from rework-prone work. The next-level insight: View surface prep as creating the ideal metallurgical interface—bright, oil-free copper that allows filler metal to form a true metallurgical bond rather than a mechanical one.
FAQ
Can you weld copper pipes without cleaning the oxidation?
No. Residual oxides prevent proper wetting and capillary flow, resulting in weak, leaky joints. Always clean to bright metal.
What is the fastest way to clean copper pipes for brazing?
Mechanical abrasion with emery cloth or dedicated brushes followed by degreasing. For heavy patina, add a brief vinegar soak.
How do you clean the inside of copper pipes effectively?
Use internal wire brushes on flexible shafts, pull-through methods, or chemical flushes with thorough rinsing and drying. Compressed air helps remove debris.
Does vinegar damage copper pipes during cleaning?
Properly diluted and rinsed vinegar is safe and effective. Avoid prolonged exposure or strong mineral acids that can pit the surface.