
Clear coat failure on carbon fiber is more than a cosmetic issue. If you’re searching for How to Fix Peeling Clear Coat on Carbon Fiber, the goal is usually to restore the protective finish before UV exposure, moisture, and contamination damage the underlying composite.
In fabrication, automotive, and motorsports applications, carbon fiber components are often used alongside welded metal assemblies, where surface durability and appearance both matter. Ignoring peeling clear coat can lead to costly refinishing, reduced part value, and unnecessary replacement.
The correct repair method depends on the extent of the damage, the condition of the resin beneath the coating, and proper surface preparation.
I’ll explain how to assess the damage, choose the right repair approach, and achieve a durable, professional-quality finish while avoiding common mistakes that can compromise the carbon fiber surface.
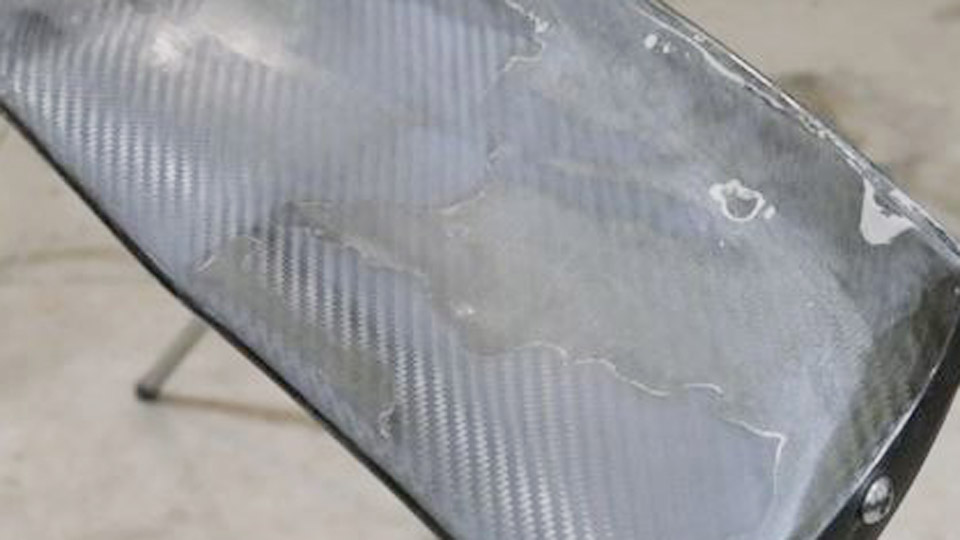
Image by kangamotorsports
Why Clear Coat Fails on Carbon Fiber
Primary Causes of Peeling and Degradation
UV radiation breaks down resins and clear coats through photodegradation, forming chromophores that cause yellowing and micro-cracking. Cheap UV-cured coatings, common in budget parts, prioritize fast production gloss over outdoor durability and fail faster under sunlight, thermal cycling, and moisture.
Moisture penetration at edges or through chips accelerates delamination. Contaminants like road debris, harsh cleaners, or improper initial surface prep weaken adhesion. Physical damage from impacts starts peeling that spreads if ignored.
Assessing Damage Severity
Inspect for flaking edges, cloudy or yellow haze, rough texture, or lifting sheets. Light surface oxidation may need only sanding and polishing. Moderate peeling with exposed resin requires full removal and recoating. Deep issues reaching the weave or showing delamination (bubbling, hollow sounds) may need resin reinforcement before clear coat.
Test adhesion by gently lifting flakes. If the underlying weave is intact and flat, DIY repair succeeds. Black dust during sanding signals fiber damage—stop and consider professional structural repair.
Tools and Materials for Effective Repair
Essential Supplies and Grit Progression
Gather these for controlled work:
- Sandpaper: 400, 600-800, 1000, 1500, 2000-3000 grit (wet/dry preferred).
- Wax and grease remover or isopropyl alcohol (IPA) for degreasing.
- Microfiber cloths, masking tape, plastic sheeting.
- Automotive-grade 2K clear coat (aerosol with hardener or spray gun mix) with UV inhibitors.
- Optional: Clear epoxy resin for minor weave exposure, polishing compounds, DA polisher.
Use progressive grits to remove damage without cutting into fibers. 2K clear coats outperform single-component options due to chemical crosslinking for better adhesion and weather resistance.
Choosing the Right Clear Coat System
Select 2K polyurethane or acrylic clear with HALS (hindered amine light stabilizers) and UV absorbers for exterior parts. Aerosol 2K cans suit small areas for DIY convenience. For larger panels like hoods, an HVLP spray gun with proper mixing ratios (follow technical data sheet, often 2:1 or 4:1 with hardener and reducer) yields professional flow and build.
Avoid furniture or UV-cured clears; they lack durability on composites. High-solids formulas build thicker films (aim for 2-4 wet coats) for better protection.
Step-by-Step Repair Process
Surface Preparation and Cleaning
Wash the part with pH-neutral shampoo to remove dirt and contaminants. Dry completely. Mask surrounding areas thoroughly to prevent overspray. Wipe with wax/grease remover using the two-cloth method (apply, wipe dry) to eliminate silicones and residues that cause fish-eyes or poor adhesion.
Sanding the Failed Clear Coat
Wet sand starting with 400-600 grit to remove peeling layers and feather edges for seamless blending (extend 3-4 inches beyond damage). Maintain flat pressure and straight lines or circular motions; keep the surface wet to minimize heat and scratches. Progress to 800-1000 grit for smoothing, then 1500-2000+ for refinement.
Goal: Level the surface without exposing or damaging the carbon weave. White sanding dust is normal; black indicates fibers—back off immediately. For severe cases, remove all old coating to the resin interface before recoating.
Repairing Underlying Issues (If Needed)
If minor weave exposure or voids appear, apply thin clear epoxy resin designed for carbon fiber. Spread evenly with a squeegee or applicator, work into fibers, and cure per instructions. Lightly sand level afterward. This step restores structural integrity before clear coating.
Applying New Clear Coat
Work in a dust-free, well-ventilated area (ideal 64-77°F, 40-60% humidity). Apply light mist coat first, flash 5-10 minutes, then 2-3 heavier wet coats with 6-8 inch distance and 50-70% overlap. For spray guns, follow mixing ratios and gun settings for even atomization.
Allow full cure (24-48 hours minimum; longer for hardness). Multiple thin coats build durability better than one heavy pass.
Finishing and Polishing for Showroom Results
Wet Sanding and Compounding
After cure, wet sand with 1500-3000 grit to level orange peel or imperfections. Follow with cutting compound on a DA polisher (soft foam pad) to remove haze, then finishing polish for depth. This reveals the weave’s true contrast and gloss.
Protection and Maintenance
Apply a quality SiO2 ceramic coating or graphene sealant for extended UV and chemical resistance (12-24+ months). Avoid harsh solvents, automatic car washes, and abrasive tools. Regular gentle washing preserves the finish.
Common Challenges and Pro-Level Decisions
Environmental and Technique Variables
Temperature and humidity affect cure and flow—cold slows curing and risks moisture entrapment; heat speeds solvent flash but can cause blushing. Test spray on scrap for your conditions. For large parts, section work to maintain wet edges.
When to Go Pro vs. DIY
Small parts (mirrors, trim) suit aerosol DIY. Full hoods or high-visibility areas benefit from spray booth control for color match and dust-free results. If structural delamination exists, consult composite specialists.
Preventing Future Failure
Choose or specify parts with quality 2K clears from the start. Store vehicles indoors or use covers. Reapply protectants annually. Proper initial prep (degrease, abrade lightly) during manufacturing or repair is the biggest longevity factor.
Real-World Application Insights
Successful repairs on carbon fiber demand patience in prep and precision in application, mirroring decisions in TIG welding aluminum or stainless where surface cleanliness dictates outcomes. Prioritize 2K systems with UV stabilizers and feather transitions for invisible blends.
These choices extend part life significantly beyond factory budget coatings, maintaining performance and appearance in demanding environments.
Advanced insight: In high-heat areas like near exhausts, consider high-temperature-resistant clear epoxies or additional thermal barriers—the interplay between resin chemistry, thermal expansion, and UV load determines true longevity in composite fabrication.
FAQ
Can I fix peeling clear coat on carbon fiber without a spray gun?
Yes. Use quality 2K aerosol clear coats with hardener. Follow the same sanding, cleaning, and multi-coat process. Results are excellent for smaller areas with proper technique.
How long does repaired carbon fiber clear coat last?
With 2K UV-resistant clear and ceramic protection, 5-10+ years under normal exposure. Budget coatings fail faster; maintenance is key.
Will sanding damage the carbon fiber weave?
Not if done wet with progressive grits and light pressure. Stop at resin level—black dust means you’ve gone too far.
Is polishing enough or do I need full recoat?
Polishing and compounds restore light oxidation. Peeling or lifting requires removal and new clear coat for lasting adhesion.


