Aluminum melts or loses strength while copper is still absorbing heat, leaving many operators with a melted tube, a cold joint, or a brittle intermetallic layer that cracks under pressure or vibration.
Learning how to braze aluminum to copper correctly solves that problem by matching a low-melting zinc-aluminum filler, controlled heat distribution, and tight joint design so the filler flows by capillary action before the aluminum base metal softens.
The resulting joint handles HVAC refrigerant pressures, electrical transitions, and repair work when the process stays inside the narrow temperature window of roughly 900–1000 °F.
Incorrect heat, oxide, or clearance produces leaks or early failure; the right sequence produces a strong, leak-tight bond that survives thermal cycling.
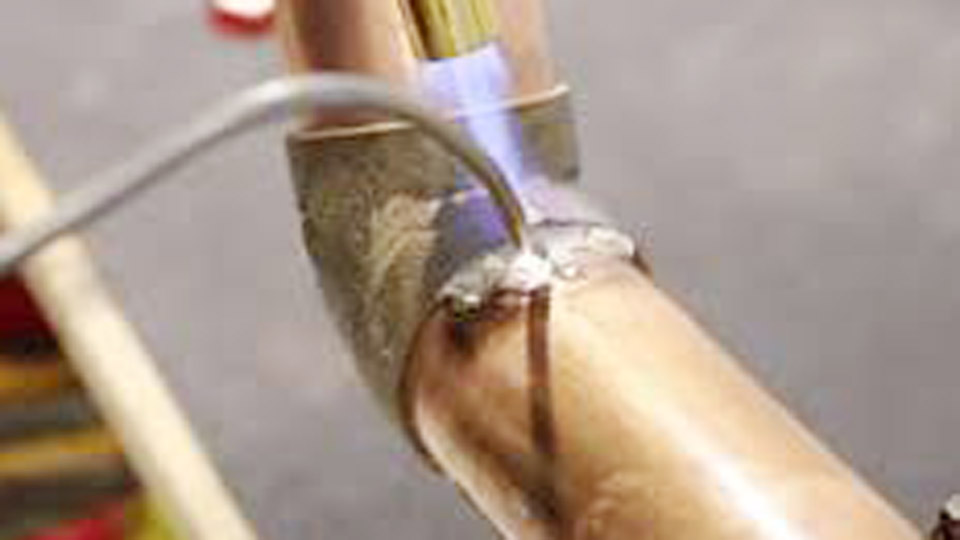
Image by chinahhowelder
Why Standard Copper or Aluminum Brazing Fails on Dissimilar Joints
Copper conducts heat roughly four times faster than aluminum and melts near 1984 °F, while pure aluminum melts near 1220 °F and common alloys begin to soften well below that. The aluminum oxide layer reforms in seconds after cleaning and prevents wetting.
When ordinary silver-phosphorus or aluminum-silicon fillers are used, the copper side never reaches flow temperature before the aluminum collapses, or prolonged heat grows thick layers of brittle Al₂Cu and Cu₉Al₄ intermetallics that reduce ductility and raise electrical resistance.
Melting-Point and Conductivity Mismatch
Heat applied equally to both sides overheats the aluminum first. Preferential heating of the copper side transfers energy into the aluminum gradually, keeping the aluminum below its solidus while the joint reaches the filler’s liquidus.
Oxide and Intermetallic Risks
Mechanical abrasion with a dedicated stainless-steel brush removes the oxide immediately before fluxing or heating. Excessive time above the filler liquidus thickens the intermetallic zone beyond 2–5 µm, the threshold at which shear strength and conductivity drop sharply.
Selecting the Correct Filler Metal and Flux System
Zinc-aluminum alloys with approximately 78 % zinc and 22 % aluminum provide the best combination of low melting range, wetting, and strength for aluminum-to-copper. Flux-cored versions eliminate a separate fluxing step and use non-corrosive cesium-based flux that does not require aggressive post-cleaning.
Zinc-Aluminum Fillers and Working Ranges
Typical commercial products (AL 822, Al-Cop Braze and equivalents) show:
| Property | Value |
|---|---|
| Solidus | 800–826 °F (427–441 °C) |
| Liquidus | 900–905 °F (482–471 °C) |
| Recommended braze range | 900–1000 °F (482–538 °C) |
| Ideal joint clearance | 0.003–0.006 in per side |
Higher-zinc formulations wet both metals more readily and produce higher shear strengths (often above 18 000 psi with proper design) than higher-aluminum or tin-based alternatives.
Flux-Cored versus Separate Flux
Flux-cored rods release measured cesium fluoroaluminate as the coating or core melts. Separate non-corrosive aluminum fluxes can be brushed on when solid rods are used; corrosive chloride fluxes require thorough removal to avoid later corrosion. Non-corrosive residues are preferred for HVAC and sealed assemblies.
Joint Design Decisions That Determine Strength and Flow
Capillary action fills only a narrow gap. Clearances outside 0.003–0.006 in per side leave flux voids or incomplete fill. Lap joints or short copper sleeves over aluminum tubing increase bond area and compensate for the lower strength of the dissimilar interface.
Clearance and Overlap Requirements
Target radial clearance of 0.003–0.006 in. Longer overlaps improve mechanical strength but require careful heat distribution to avoid incomplete fill at the far end. Copper-on-the-outside configurations generally give more consistent results because the higher-conductivity copper equalizes temperature around the joint.
Tube-to-Tube and Socket Orientations
Flare or expand the copper end slightly to accept the aluminum tube, or use a short copper coupler. Mechanical clamping during heating prevents movement that would open the gap as the metals expand at different rates.
Surface Preparation That Allows Wetting
Any residual oil, oxide, or dirt blocks capillary flow. Aluminum oxide reforms within minutes, so cleaning must occur immediately before heating.
Mechanical Cleaning Sequence
Use a stainless-steel brush dedicated exclusively to aluminum; copper-bristle brushes contaminate the surface. Follow with 80–120 grit abrasive if needed, then a non-flammable degreaser. Clean copper to bright metal with a separate brush. Wipe both surfaces dry.
Timing Relative to Heating
Apply flux (if not flux-cored) and begin heating within a few minutes of cleaning. Delaying allows fresh oxide to reform and defeats the flux.
Heat Source Selection and Flame Control
Propane, MAPP/propylene, air-acetylene, or a soft oxy-acetylene flame all work. Oxy-acetylene requires reduced oxygen to keep a soft, reducing or neutral flame that does not oxidize the joint further. Large tips or rosebud styles spread heat on thicker sections or coils that act as heat sinks.
Preferential Heating Sequence
Direct the flame primarily at the copper. Move in continuous circles or sweeps so heat soaks into the aluminum by conduction.
Watch the copper for color change (dull red) while periodically testing the joint with the end of the filler rod. When the rod melts on contact and the flux becomes clear or changes color, the assembly is at temperature.
Avoiding Aluminum Melt-Through
Never dwell the flame on the aluminum. Once filler begins to flow, pull the flame back or reduce intensity so the joint stays just above the liquidus. Overheating erodes the aluminum and thickens intermetallics.
Execution of the Braze Cycle
With surfaces clean, clearance correct, and heat applied preferentially to copper, the filler is introduced only when the base metals themselves melt it.
Feeding the Filler
Touch the rod to the joint line, not into the flame. Capillary action draws the molten alloy into the gap. Feed additional rod as needed to form a continuous fillet on both sides of a socket or lap. For flux-cored rod, orient the flux channel toward the joint so flux enters first.
Cooling and Residue Handling
Allow the joint to air-cool completely. Quenching creates differential contraction stresses that crack the aluminum or the intermetallic layer. Non-corrosive flux residues normally need no removal; if desired, warm water and a soft brush suffice. Corrosive fluxes must be washed thoroughly.
Managing Galvanic Corrosion After the Braze
Aluminum and copper form a strong galvanic couple in the presence of moisture or electrolyte. The aluminum becomes the anode and corrodes preferentially.
Protection Strategies
Coat the completed joint with a zinc-rich compound, rubberized sealant, or adhesive-lined heat-shrink tubing to exclude moisture. In critical electrical or outdoor service, factory explosion-bonded or friction-welded transition fittings eliminate the direct aluminum-copper interface and are preferred over field brazes.
Service Environment Limits
Joints exposed to condensate, road salt, or high humidity require the protective barrier. Dry, sealed refrigeration circuits experience slower attack but still benefit from isolation when possible.
When Factory Transition Fittings Outperform Field Brazing
For production HVAC assemblies or high-reliability electrical bus connections, pre-made copper-aluminum transition pieces bonded under controlled pressure avoid intermetallic growth and galvanic exposure entirely.
Field brazing remains the practical choice for repairs, custom one-offs, and coil-to-line connections where a transition fitting cannot be installed.
Wrapping Up
Successful aluminum-to-copper brazing rests on three non-negotiable decisions: use a zinc-aluminum filler that flows between 900 and 1000 °F, maintain 0.003–0.006 in clearance, and heat the copper preferentially so the aluminum never approaches its melting range.
When those conditions are met, capillary fill produces a strong, leak-tight joint suitable for refrigerant pressure and moderate mechanical loads.
Advanced operators further limit intermetallic thickness by minimizing time above liquidus and by protecting the finished joint from electrolyte, extending service life well beyond unprotected assemblies.
FAQs
What temperature do you braze aluminum to copper?
Most zinc-aluminum fillers (AL 822 type) flow between 900 and 1000 °F. Keep the joint in that window; aluminum itself begins to soften near 1100–1200 °F depending on alloy.
Can you braze aluminum to copper with a propane torch?
Yes. A large-tip propane or MAPP torch supplies adequate heat for tubing and small fittings when the flame is kept soft and directed primarily at the copper.
Do you need flux to braze aluminum to copper?
Flux-cored zinc-aluminum rods contain non-corrosive cesium flux and require no additional flux. Solid rods need a compatible aluminum brazing flux applied to both surfaces.
Why does the aluminum melt before the filler flows?
Heat was applied equally or held too long on the aluminum. Always heat the copper first and test temperature by touching the filler rod to the joint rather than relying on visual color change of the aluminum.