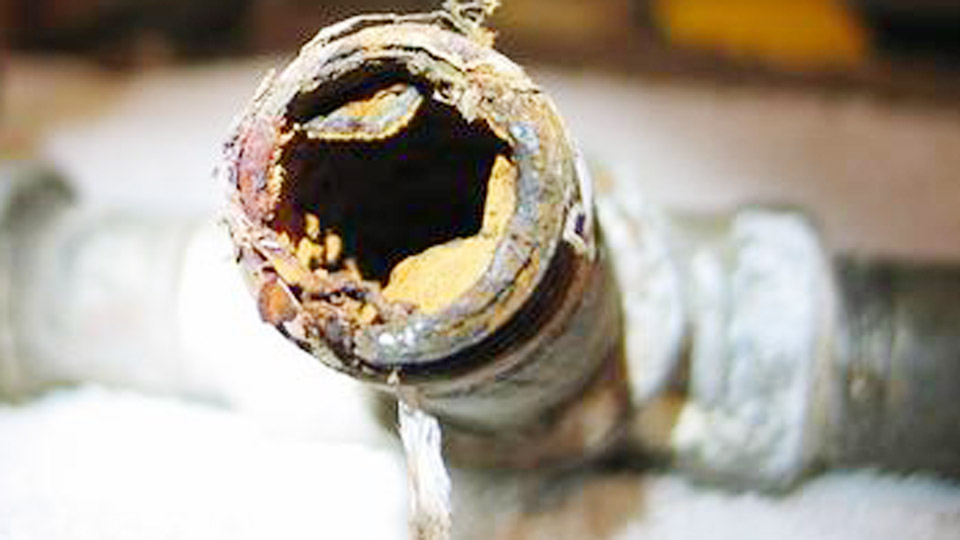
A broken tap locked in a stainless hole is one of the most frustrating failures in a fabrication shop. The electrode or drill may have cut cleanly, yet the moment the tap enters 304 or 316 the torque spikes, the flutes pack, and the tool snaps.
Learning how to tap stainless steel without breaking taps is essential because stainless work-hardens rapidly under rubbing pressure, produces tough continuous chips, and generates far higher cutting forces than mild steel.
Incorrect pilot size, dull geometry, inadequate fluid, or any interruption in the cut turns a routine thread into a scrap part or an expensive extraction job.
Correct process control—hole preparation, tool selection, lubrication, and continuous cutting pressure—keeps the tap cutting rather than rubbing and delivers reliable threads on the first attempt.
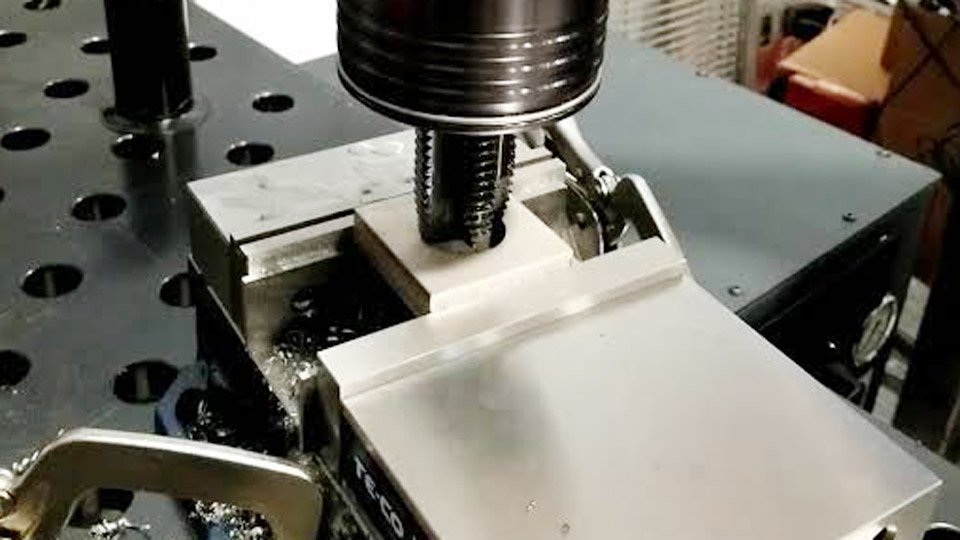
Image by metal.fabrication.tips
Why Stainless Steel Breaks Taps So Easily
Austenitic grades such as 304 and 316 combine high ductility with rapid work-hardening. When a cutting edge rubs or dwells instead of shearing metal, the surface layer hardens in place and the next flute encounters a much tougher surface.
Work Hardening Mechanism
Any loss of continuous feed allows the material under the cutting edge to deform plastically and raise its hardness. Once that layer forms, torque climbs sharply and the tap either stalls or fractures. This is why stainless must be cut, never burnished.
Chip Behavior and Torque Spikes
Stainless produces long, stringy chips that pack tightly in the flutes. Packed chips increase friction, heat, and radial pressure on the tap core. Blind holes amplify the problem because chips have nowhere to go except back up the flutes.
Through holes allow better evacuation but still demand the correct geometry to push chips forward rather than let them recirculate.
Selecting the Right Tap Geometry and Material
Tool choice determines whether chips leave the cutting zone or jam it.
Spiral Point vs Spiral Flute Decision
Spiral-point (gun) taps push chips forward ahead of the cutting edges. They are the first choice for through holes because the chips exit the far side and the core remains relatively strong. Spiral-flute taps pull chips back toward the hole entrance and are required for blind holes.
Using a spiral-point tap in a blind hole packs chips at the bottom and almost guarantees breakage. Straight-flute hand taps remain usable for shallow holes but demand more frequent reversal and careful chip clearing.
Cobalt and Coated Taps
Standard M2 high-speed steel loses hardness quickly under the heat generated by stainless. M35 or M42 cobalt taps retain edge strength longer and resist the abrasive action of work-hardened chips. TiN, TiCN, or AlTiN coatings further reduce friction and galling.
For production volumes, a coated cobalt spiral-point or spiral-flute tap designed specifically for stainless is the practical baseline.
Critical Pilot Hole Size and Surface Condition
Hole diameter controls the volume of metal the tap must remove and therefore the peak torque.
Adjusting Engagement Percentage
Standard charts target approximately 75 % thread engagement. In stainless, that percentage often produces excessive torque.
Reducing engagement to 60–70 % (by selecting the next larger standard drill size when the drawing permits) lowers cutting load significantly while still delivering adequate joint strength for most structural and fixture applications. Always verify the resulting minor diameter against the required thread class.
Drilling Without Hardening the Walls
Use a sharp cobalt or carbide drill with a 135° point and positive feed. Avoid dwelling at the bottom or on breakthrough. Measure the finished hole diameter and roundness before tapping; an undersized or work-hardened hole multiplies torque before the first full thread is cut. A light chamfer at the entrance reduces starting friction and helps the tap center itself.
Lubrication and Speed That Keep the Edge Cutting
Heat and friction are the two fastest routes to a broken tap.
Cutting Fluid Choices
Sulfurized or extreme-pressure tapping fluids formulated for stainless are mandatory. Light machine oil or general-purpose coolant is insufficient. Apply fluid liberally to both the hole and the tap flutes before entry and re-apply during pecking cycles. The fluid must stay present at the cutting edge; once it is cooked away, friction rises and work hardening begins.
Calculating Practical RPM
Surface speeds for 304/316 with cobalt taps typically fall in the 10–25 SFM range. Convert with the formula
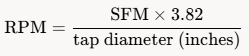
A ¼-20 tap at 20 SFM runs near 300 RPM; a ½-13 tap at the same SFM runs near 150 RPM. Start at the lower end of the range for blind holes or less rigid setups and increase only if chips evacuate cleanly and torque remains stable.
Hand Tapping Technique That Prevents Fracture
Hand work demands rigid alignment and deliberate chip management.
Alignment and Starting Square
A crooked start places bending loads on the fragile core of the tap. Use a tap guide, a drill-press chuck with the spindle locked, or a machinist’s square checked in two planes. Once the first two or three threads are established, the alignment is locked; any correction after that point risks breakage.
Forward-Reverse Chip Breaking Sequence
Advance one to two full turns under steady pressure, then reverse approximately half a turn to fracture the chip. Clear the flutes, re-lubricate, and repeat.
Never force the tap when resistance rises; back it out, clean the chips, and resume. Continuous forward pressure without rubbing is the difference between a clean thread and a seized tool.
Machine and Rigid Tapping Considerations
CNC or power tapping removes operator variability but introduces its own requirements.
Feed Synchronization and Chip Clearance
Rigid tapping requires exact matching of feed per revolution to the thread pitch. Any mismatch causes the tap to pull or push against the spindle and raises tensile or compressive loads on the core.
For blind holes, program a safe bottom clearance and a peck cycle that retracts far enough to clear chips. Through holes can often run continuous with a spiral-point tap and flood coolant directed at the cutting zone.
Rigidity and Runout Limits
Excessive tool overhang or spindle runout multiplies side loads. Keep the tap as short as practical and verify runout is under 0.0005 in before starting a production run. A tapping head with axial float can compensate for minor synchronization errors on older machines, but modern rigid tapping on a stiff spindle is preferred.
Wrapping Up
Choosing the correct pilot diameter, matching tap geometry to hole type, maintaining continuous cutting pressure, and using a high-pressure stainless fluid together eliminate the majority of broken taps.
Once those variables are controlled, the remaining decisions—cobalt versus coated geometry, 60 % versus 75 % engagement, hand versus rigid machine—are simply optimization for thread quality, tool life, and production volume.
Advanced shops further reduce risk by measuring actual hole diameter after drilling and by treating each stainless grade (304, 316, 17-4 PH) as a separate cutting condition rather than a single “stainless” recipe.
FAQs
What size drill should I use for tapping 1/4-20 in stainless steel?
For reduced torque use a #6 or 13/64 drill (approximately 70 % engagement) instead of the standard #7 when the drawing allows. Measure the hole before tapping.
Can I use a regular HSS tap on 304 stainless?
Standard M2 HSS will work for occasional holes if speeds are kept very low and lubrication is excellent, but cobalt (M35/M42) taps last longer and resist work-hardened chips far better.
How often should I reverse the tap when hand tapping stainless?
Advance 1–2 full turns, then reverse about half a turn to break the chip. Clear and re-lubricate before continuing. Frequency increases with hole depth and chip toughness.
Is it better to machine-tap or hand-tap stainless steel?
Rigid machine tapping with synchronized feed and proper coolant gives more consistent results and lower breakage rates once the setup is dialed in. Hand tapping remains practical for one-off or field work when alignment and chip clearing are carefully controlled.