Welders frequently struggle with square tubing because thin walls distort easily, corners create fit-up gaps due to manufacturing radii, and uneven heat input leads to weak joints or burn-through.
Learning how to weld square tubing correctly delivers strong, square frames for trailers, furniture, roll cages, or structural projects while minimizing rework.
Proper preparation, process selection, parameter settings, and sequencing balance penetration with heat control. This matters for load-bearing strength, appearance, and avoiding post-weld straightening that wastes time and compromises integrity.
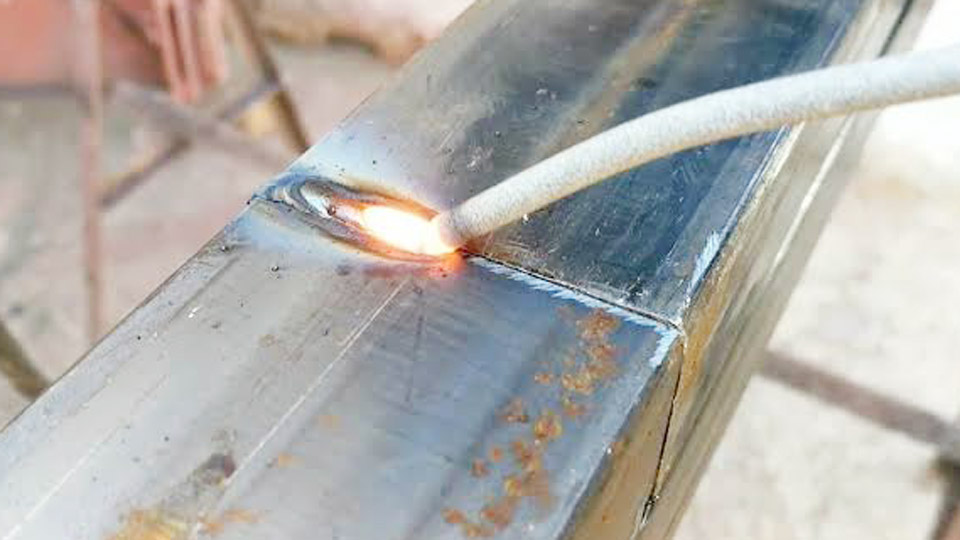
Image by r/Welding
Material Selection and Joint Preparation
Choosing Wall Thickness and Grade
Square tubing thickness dictates nearly every downstream decision. 16-gauge (0.065″) suits lightweight frames but demands low heat input. 14-gauge (0.083″) offers a practical balance for general fab work. 11-gauge (0.120″) and 1/8″ (0.125″) walls handle structural loads with more forgiveness on heat.
For mild steel, A500 Grade B is common and welds reliably with standard fillers. Stainless (304/316) or aluminum (6061/6063) tubing requires process and gas changes to avoid sensitization or oxide issues.
Always verify actual wall thickness with calipers—nominal sizes vary slightly by supplier. Thicker walls (3/16″+) behave more like plate but still need corner-specific techniques to prevent twisting along length.
Cutting and Fit-Up Strategies
Precise cuts prevent gaps that force excessive filler or heat. Use a cold saw or abrasive chop saw with a fine-tooth carbide blade for square ends. For 45-degree miter joints in frames, employ a fixture or miter saw setup to maintain exact angles—deviations compound across assemblies.
Cope or notch ends for better corner fit instead of simple butt joints. This increases weld surface area and reduces bridging needs. Leave a 1/32″ to 1/16″ root gap on butt joints to accommodate shrinkage without pulling the structure out of square.
Test-fit every joint by rocking pieces; gaps larger than 1/16″ at radii require grinding the mating end to match the radius or buttering with weld metal.
Cleaning and Edge Preparation
Contaminants cause porosity and lack of fusion. Degrease with acetone, then grind or wire-brush 1″ back from edges using a 40-grit flap disc to remove mill scale, rust, or galvanization. For thicker tubing (>1/8″), bevel edges at 30-45 degrees for V-groove preparation on butt joints.
Slight chamfers on corner joints reduce undercut risk. Clean aluminum oxide removal must occur within 30 minutes of welding due to rapid reformation.
Choosing the Right Welding Process
MIG (GMAW) for Most Applications
MIG provides speed, low spatter, and ease for production or hobby work on mild steel square tubing. Short-circuit transfer excels on thin walls; pulsed spray or globular works on thicker sections. It handles shop environments well with proper gas shielding.
TIG (GTAW) for Precision and Appearance
TIG delivers superior control, clean beads, and minimal distortion on thin or exotic materials like stainless and aluminum. Use DCEN for steel/stainless with pure argon (20-25 CFH) and a gas lens for corner coverage. Pulse settings (1.5-2.5 Hz, 40-60% peak) help manage heat.
Stick (SMAW) for Portability and Dirty Conditions
Stick works outdoors or on contaminated metal but inputs more heat, making it challenging for thin walls. Reserve for thicker tubing or repairs where gas shielding is impractical.
MIG Welding Square Tubing: Parameters and Technique
Recommended Settings by Wall Thickness
Dial parameters on scrap first. Use ER70S-6 wire, 75% argon/25% CO2 (C25) at 20-25 CFH, and 3/8″-5/8″ stickout. Short-circuit transfer dominates thin material.
| Wall Thickness | Wire Diameter | Voltage | Wire Feed Speed (ipm) | Approx. Amps | Travel Speed (ipm) |
|---|---|---|---|---|---|
| 0.065″ (16 ga) | 0.030″ | 16.5-18.5 | 220-320 | 90-130 | 14-20 |
| 0.083″ (14 ga) | 0.030″ | 17.5-19.5 | 260-380 | 110-150 | 12-18 |
| 0.120″ (11 ga) | 0.030″/0.035″ | 19-21 | 280-420 | 140-200 | 10-16 |
| 0.188″+ (3/16″+) | 0.035″ | 21-24 | 320-480 | 180-240 | 8-14 |
Start at the lower end and adjust voltage 0.5V or wire speed 20-30 ipm based on arc sound and puddle behavior. Reduce settings on vertical sections to control sag.
Torch Technique and Joint-Specific Approaches
Maintain a 10-15° push angle for horizontal fillets to push shielding gas ahead of the puddle. For corners, start beads 1/8″ inside and wrap around radii, pausing briefly at toes for wetting without undercut.
On miter joints, begin outside corners first. Use a 1/4″ weave on larger fillets with 1/2-second pauses. Keep travel steady—watch the puddle, not the gun tip.
For thin tubing, employ stitch welding (1-2″ segments) and skip patterns, alternating sides. Backstepping (welding toward the start) counters pull.
TIG Welding Square Tubing
Electrode, Filler, and Pulse Settings
Use 3/32″ or 1/8″ 2% lanthanated tungsten sharpened to 20-30°. Filler rod diameter matches wall thickness (1/16″ for thin, 3/32″ for thicker); ER70S-2 for mild steel, 308L for stainless. Peak amperage roughly follows 1A per 0.001″ rule, with background at 40-50% for controlled cooling.
Heat Management and Technique
Pedal control is essential. Maintain short arc length and add filler as needed for root passes on open joints. On square profiles, focus heat on thicker members first and wrap corners carefully. TIG excels for zero-spatter cosmetic work but requires slower travel and more passes on gaps.
Stick Welding Square Tubing
Electrode Selection and Parameters
Choose based on thickness and conditions:
- 6010/6011: Deep penetration on dirty metal (70-125A).
- 6013: Thin tubing, smooth beads (40-90A).
- 7018: Structural strength (90-150A).
- 7024: High deposition in flat positions.
Run short arc length (electrode diameter width) and dragging technique for penetration. Use downhill on thin walls for better control with smaller rods (1/16″ at low amps ~40A). Limit to thicker walls where possible to avoid burn-through.
Joint Types and Welding Sequences
Butt and T-Joints
Bevel for multi-pass on thicker material. Tack thoroughly, then weld in balanced passes. Direct heat to the thicker member.
Miter and Corner Joints
Mitered 45° joints provide clean aesthetics. Tack outside first, then fill. For corners, weld inside fillets before outside where possible, or sequence to balance pull. Wrap beads around corners to avoid start/stop defects at high-stress points.
Use magnetic squares, corner clamps, or strongbacks during tacking. Place four small tacks (≤1/4″) per joint on all faces before full welding.
Controlling Distortion and Warping
Heat input causes expansion/contraction imbalances in thin sections. Combat this with:
- Balanced sequencing: Weld opposite corners like tightening lug nuts (e.g., top-left outside, bottom-right inside).
- Stitch and skip welding with cooling intervals.
- Fixturing and clamping to rigid tables or strongbacks.
- Backstepping and alternating sides.
- Pre-cambering slight arches that pull straight upon cooling.
Check diagonals and squareness frequently with a framing square. For large frames, weld in stages and flip if accessible.
Post-Weld Inspection and Finishing
Visually inspect for undercut, porosity, or incomplete fusion. Grind high spots flush if needed for aesthetics or fit. For structural work, consider dye penetrant or other NDT. Clean slag (stick) or spatter thoroughly. Apply protective coatings promptly, especially on mild steel.
Decision-Making for Strong, Distortion-Free Results
Successful square tubing welds come down to matching process and parameters to material thickness, prioritizing fit-up and sequencing over speed.
MIG with short-circuit and stitch patterns handles most mild steel jobs efficiently, while TIG provides precision where cosmetics or thin exotic alloys matter. Always test settings on scrap, clamp securely, and balance heat input across the assembly.
In high-performance fab, treat each corner radius as a variable joint requiring tailored heat direction—biasing the arc toward the radius side during fill passes compensates for geometry and produces consistently fused, crack-resistant transitions that outperform simple edge-to-edge welds under cyclic loading.
FAQ
What is the best MIG setting for 16-gauge square tubing?
Use 0.030″ ER70S-6 wire at 16.5-18.5V, 220-320 ipm wire speed (90-130A), with C25 gas at 20-25 CFH. Stitch weld and test on scrap for your machine.
How do you prevent warping when welding square tubing frames?
Tack all joints on multiple faces first, then weld in alternating opposite-corner sequences with short stitches. Clamp to a strongback and allow cooling between passes.
Is TIG or MIG better for square tubing?
MIG is faster and more forgiving for general mild steel work. TIG offers better heat control, cleaner results, and lower distortion on thin stainless or aluminum.
Can you stick weld thin square tubing effectively?
It is possible but difficult—use small-diameter rods like 1/16″ 6013 at very low amps (~40-60A), downhill technique, and excellent fit-up. MIG or TIG is usually preferable for thin walls.