JB Weld ends up on your hands more often than most welders admit. One moment you are mixing the two-part epoxy for a cast-iron repair or a temporary metal bond, and the next the resin has already started to set on your skin.
Knowing how do you get JB Weld off your hands becomes urgent because the material transitions from workable paste to near-permanent bond within minutes.
Delayed action turns a simple cleanup into a multi-hour scraping and soaking process that risks skin irritation and lost shop time. Proper removal protects both your hands and the integrity of the repair you just completed.
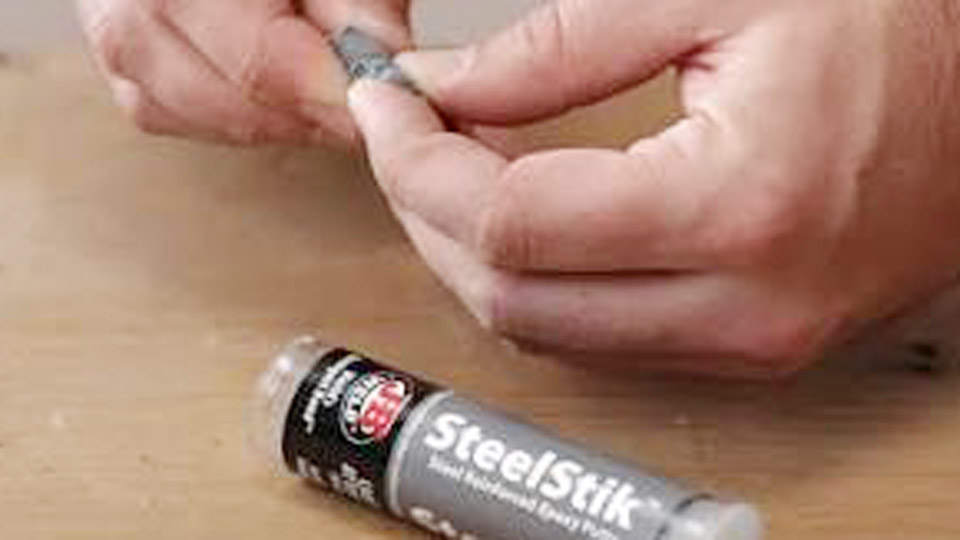
Image by jbweld
Chemical Behavior of JB Weld on Skin
Resin and Hardener Reaction Timeline
JB Weld consists of an epoxy resin and a hardener that initiate a cross-linking reaction the moment they contact each other. On skin the reaction accelerates because body heat raises the local temperature above the typical 70 °F shop ambient.
Within 4–6 minutes the mixture reaches a gel state; full hardness arrives in roughly 15–20 minutes under warm conditions. Once the polymer network forms, ordinary solvents lose effectiveness and mechanical force becomes the only practical option.
Surface Adhesion Factors
Skin oils, residual flux, and microscopic roughness give the epoxy multiple attachment points. The resin component is hydrophobic, so water alone cannot displace it. Any delay allows the hardener to lock the resin into pores and under cuticles, increasing removal difficulty by an order of magnitude.
Immediate Action for Fresh, Uncured JB Weld
Solvent Selection Ranking
Acetone remains the most effective first-line solvent because it dissolves both the resin and the partially reacted hardener before the network fully forms. Isopropyl alcohol (90 % or higher) works as a secondary option when acetone is unavailable, though it requires longer dwell time.
Mineral spirits and paint thinner show limited effect on true epoxy systems and should be reserved for residual stickiness only.
Controlled Application Sequence
Apply a small amount of acetone to a clean shop cloth—never pour solvent directly onto skin. Rub the affected area with firm, circular pressure for 30–45 seconds, then wipe with a fresh cloth. Repeat until the bulk of the material lifts. Follow immediately with soap and warm water to remove solvent residue.
If the epoxy has already begun to tack, work a thin layer of petroleum jelly or vegetable oil under the edges first; the oil weakens the bond and allows the solvent to penetrate more efficiently.
Mechanical Removal After Partial Cure
Tools That Minimize Skin Damage
Once the epoxy reaches the rubbery stage, solvents alone leave a stubborn film. A plastic scraper or the edge of a credit card removes the bulk without abrading epidermis. Metal tools risk cuts and should be avoided. Fine-grit sandpaper (400–600 grit) can be used on larger patches, but only after the area has been softened with oil.
Softening Agents Before Scraping
Warm mineral oil or commercial hand cleaners containing citrus terpenes reduce the shear strength of the partially cured epoxy. Apply a thick coat, wait three to five minutes, then scrape. The combination of heat from friction and the oil’s penetration usually lifts the material in sheets rather than powder.
Dealing with Fully Cured JB Weld on Hands
Why Solvents Fail After Full Cure
Cross-linked epoxy resists acetone, MEK, and most industrial solvents once the reaction is complete. Attempting aggressive chemical attack at this stage only damages skin barrier function without dissolving the polymer. Mechanical abrasion combined with prolonged soaking becomes the realistic path.
Progressive Abrasion Technique
Begin with a pumice stone or coarse hand scrubber under running warm water. Work in short sessions of 60–90 seconds to avoid overheating the skin. Follow with a finer abrasive pad once the high spots are gone.
Between sessions, apply a heavy moisturizer containing urea or lactic acid; these ingredients help lift residual particles from the outer skin layers over the next 24 hours.
Overnight Softening Protocol
Coat the affected areas with a thick layer of petroleum jelly or a commercial epoxy-removal cream, then cover with cotton gloves. The occlusion softens the bond overnight.
In the morning the remaining epoxy usually peels or washes away with mild soap. This method is slower but preserves skin integrity better than aggressive scraping.
Prevention Strategies That Actually Reduce Contact
Mixing and Application Habits
Mix JB Weld on a disposable surface rather than the palm of the hand. Use a plastic spatula or wooden stick exclusively; never finger-mix. Wear disposable nitrile gloves rated for epoxy resistance—standard latex offers almost no protection. Keep a solvent-dampened rag within arm’s reach so any accidental contact can be addressed within the first 60 seconds.
Workspace Layout Adjustments
Position the hardener and resin tubes so that drips fall onto a protected bench surface, not into the working zone. When repairing overhead or vertical surfaces, apply the mixed epoxy with a small applicator stick rather than spreading by hand. These small changes cut accidental skin contact by more than half in most shop environments.
Skin Recovery After Aggressive Removal
Barrier Restoration Steps
Acetone and abrasion strip natural oils and can leave micro-tears. Immediately after cleanup, wash with a pH-neutral cleanser and apply a ceramide-rich moisturizer. Avoid further solvent exposure for at least 12 hours.
If redness persists beyond one day, a short course of over-the-counter hydrocortisone cream reduces inflammation without interfering with normal healing.
When Professional Care Is Required
Persistent cracking, swelling, or signs of chemical burn indicate the need for medical evaluation. Epoxy sensitization can develop after repeated exposures; once it occurs, even minute contact triggers dermatitis. Document the specific product batch if medical attention becomes necessary.
Comparing Removal Methods by Cure Stage
Time-Sensitive Decision Matrix
Uncured material responds best to acetone followed by soap. Partially cured material needs oil softening plus plastic scraping. Fully cured material requires progressive abrasion and overnight occlusion. Matching the method to the exact stage prevents wasted effort and unnecessary skin trauma.
Effectiveness Versus Risk Trade-Off
Acetone delivers the fastest results but carries the highest short-term irritation risk. Oil-and-scrape methods rank lower in speed yet preserve the skin barrier. Overnight occlusion sits at the low-risk end and is preferred when the epoxy has been on the skin for more than an hour.
Shop Practices That Limit Future Incidents
Glove and Tool Discipline
Nitrile gloves change the entire risk profile. Keep multiple pairs staged at the mixing station. Discard any glove that shows pinholes or solvent swelling. Dedicated mixing sticks eliminate the temptation to use fingers for “just a little more.”
Cleanup Station Design
A dedicated cleanup corner stocked with acetone, oil, plastic scrapers, and moisturizer turns an emergency into a routine two-minute task. Placing the station between the workbench and the exit door creates a natural checkpoint that most welders will use without conscious effort.
Advanced Considerations for High-Volume Users
Sensitization Risk Management
Professional fabricators who handle epoxy daily face cumulative exposure. Rotating solvent types and enforcing strict glove protocols delays or prevents allergic responses. Monitoring skin condition weekly and adjusting techniques at the first sign of dryness keeps long-term health intact.
Alternative Adhesives for Skin-Critical Jobs
When a repair must be completed under conditions that make glove use impractical, consider single-component cyanoacrylates or UV-cure adhesives that offer shorter open times and easier cleanup. These options trade some strength for dramatically reduced skin adhesion risk.
Wrapping Up
The correct removal path depends entirely on how far the epoxy reaction has progressed. Act within the first five minutes with acetone and you finish the job in under two minutes. Wait until full cure and you face a multi-hour recovery cycle.
Matching solvent, mechanical force, and recovery steps to the exact cure stage keeps hands functional and the shop schedule intact. Master the timing window and the problem largely disappears.
FAQs
How long does it take for JB Weld to fully cure on skin?
Body heat accelerates the reaction; expect full hardness in 15–20 minutes under normal shop conditions. Cooler ambient temperatures stretch the window slightly, but never rely on that delay.
Can I use WD-40 to remove JB Weld from hands?
WD-40 offers limited solvency on true epoxy systems. It may loosen surface tack on fresh material but fails once any cross-linking occurs. Acetone remains the superior choice.
Is it safe to use a heat gun to soften cured JB Weld on skin?
No. Direct heat risks burns and can drive residual hardener deeper into the skin. Stick to oil occlusion and mechanical methods.
What should I do if JB Weld gets under my fingernails?
Soak the nails in warm soapy water mixed with a few drops of mineral oil for ten minutes, then gently lift the material with a wooden cuticle stick. Avoid metal tools that can damage the nail bed.