I’ve blackened more steel parts than I can count—knife blanks, tool handles, decorative brackets, even small machine components—using nothing more than heat and oil. The process is simple, cheap, and produces a deep, matte-to-satin black surface that resists rust better than bare steel while looking sharp in any shop or finished project.
How to blacken steel with oil is one of the most practical finishing methods available to DIY fabricators, blacksmiths, and hobby machinists, and once you understand the heat, the oil, and the timing, the results become consistent.
This finish matters because untreated steel rusts fast in humid shops or outdoor use. A proper oil-blackened surface creates a thin layer of iron oxide mixed with carbonized oil that slows corrosion, hides fingerprints, and gives a professional appearance without expensive chemicals or plating.
Done right, it also seals minor surface imperfections and requires only occasional maintenance. Done wrong, you end up with uneven color, flaking residue, or—worse—a fire hazard and toxic fumes.
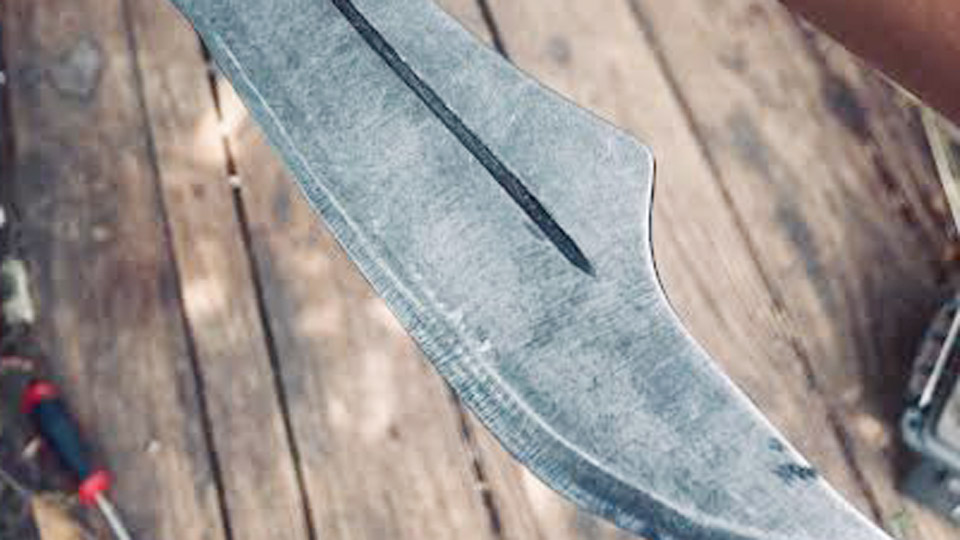
Image by r/Bladesmith
What Is Oil Blackening and How Does It Work?
The Basic Science Behind the Finish
Oil blackening (sometimes called oil quenching or oil burning) is a heat-and-oil process that forms a controlled black oxide layer on the surface of steel. When clean steel is heated and then contacted with oil, the oil breaks down, depositing carbon and creating a thin, adherent black film.
The heat also converts the outer layer of iron into black iron oxide (Fe₃O₄), which is more stable than the red rust (Fe₂O₃) that forms in open air.
How the Process Actually Creates the Color
You heat the steel to roughly 500–600 °F (260–315 °C)—hot enough for the oil to smoke and carbonize but not so hot that you destroy any existing temper on critical parts. The oil (motor oil, vegetable oil, linseed oil, or used engine oil) is either applied to the hot surface or the part is quenched into a bath of oil.
The combination of heat and carbon-rich residue produces the characteristic dark finish. Multiple cycles deepen the color and improve uniformity.
When This Finish Makes Sense
Use oil blackening for mild steel, high-carbon tool steel, and many low-alloy steels when you want a low-cost, attractive, moderately protective coating.
It works especially well on forged items, knife tangs, hardware, and decorative pieces. Skip it or test carefully on parts that must retain full hardness, because the temperatures involved can temper some steels.
Why Oil Blackening Still Beats Many Modern Alternatives for Shop Work
Practical Advantages in Real Fabrication
Chemical hot blackening and cold bluing give excellent results, but they require specialized tanks, hazardous chemicals, and precise temperature control. Oil blackening needs only a torch or oven, a metal container of oil, and basic safety gear.
The materials cost almost nothing if you already have used motor oil or cooking oil on hand. The finish is tough enough for most hand tools and outdoor hardware, and it can be refreshed with a light oil wipe whenever it starts to look dull.
Limitations You Need to Accept
The coating is not as hard or as corrosion-resistant as true gun bluing or commercial black oxide. It will wear on high-friction surfaces and needs periodic re-oiling in wet environments. High-alloy stainless steels often resist the process and stay lighter in color. Still, for the majority of mild-steel projects in a home or small commercial shop, the trade-offs are worth it.
Safety First: What Every Welder and Fabricator Must Know
Fire and Fume Hazards
Oil can catch fire when it contacts hot metal. Always work outdoors or under strong ventilation. Keep a lid nearby to smother flames, and never leave the process unattended. Used motor oil contains heavy metals and other contaminants that produce toxic smoke—avoid breathing it. Food-grade oils (canola, sunflower, linseed) are safer for indoor or semi-indoor work but still produce smoke.
Personal Protective Equipment and Workspace Setup
Wear leather gloves, a face shield or safety glasses, and long sleeves. Have a fire extinguisher rated for oil fires within reach. Place the oil container on a stable, non-flammable surface away from anything that can catch fire. After quenching, keep the part submerged until it is cool enough that residual oil will not re-ignite when exposed to air.
Preparing the Steel for a Uniform Black Finish
Cleaning Is Non-Negotiable
Any oil, grease, rust, scale, or mill scale will prevent even blackening. Wipe the part with acetone or denatured alcohol on a clean rag. For heavier rust, use a wire brush, sandpaper, or light abrasive blast. The cleaner the metal, the deeper and more uniform the final color.
Surface Condition and Fit-Up Notes
A lightly textured surface (from forging, filing, or medium grit sanding) often takes a richer black than a mirror polish. Sharp edges and thin sections heat faster than thick sections, so plan your heating sequence accordingly. If the part has threads or tight clearances, mask them or clean thoroughly afterward so oil residue does not seize the fit.
Choosing the Right Oil for Blackening Steel
Motor Oil vs. Vegetable and Linseed Oils
Used motor oil (especially diesel) produces the deepest black because of its carbon content and contaminants, but the fumes are more hazardous. New motor oil works but is less aggressive. Vegetable oils (canola, sunflower) and boiled linseed oil are cleaner, safer, and still give a solid dark finish.
Boiled linseed oil is particularly good for a hard, durable surface when baked on. Avoid fully synthetic motor oils—they can produce unpleasant fumes and less consistent color.
Practical Oil Selection Table
| Oil Type | Color Depth | Safety / Fumes | Best Use Case | Notes |
|---|---|---|---|---|
| Used motor / diesel | Deepest | Higher toxicity | Outdoor work, max blackness | Toxic smoke; use with care |
| New motor oil | Good | Moderate | General shop use | Less carbon than used oil |
| Canola / sunflower | Medium-dark | Lower toxicity | Indoor or semi-indoor | High smoke point |
| Boiled linseed oil | Rich, durable | Moderate | Final seal or baked finish | Polymerizes into hard film |
Step-by-Step: The Heat-and-Quench Method
Equipment You Will Need
- Propane or oxy-acetylene torch (or a heat-treat oven)
- Metal container large enough to fully submerge the part
- Chosen oil
- Wire brush or abrasive pad for intermediate cleaning
- Heat-resistant gloves and tongs
Detailed Process
- Clean the steel thoroughly and dry it.
- Heat the part evenly until it reaches approximately 500–600 °F. You can judge this by color (dark straw to light blue) or with a temperature stick or infrared thermometer. Avoid bright red heat unless you intend to fully soften the steel.
- Quickly but carefully lower the hot part into the oil bath so it is completely submerged. Hold it under until the oil stops boiling vigorously around the metal.
- Leave the part submerged until it is cool enough to handle safely (usually several minutes).
- Remove, wipe off excess oil with a clean rag, and inspect. If the color is uneven or too light, wire-brush lightly and repeat the heat-and-quench cycle one or two more times.
- After the final cycle, wipe the surface with a thin coat of clean oil or paste wax for extra protection.
Temperature Control Tips
Too cool and the oil will not carbonize properly—color stays grayish. Too hot and you risk tempering the steel or creating a crusty, flaky layer that must be brushed off. Practice on scrap of the same thickness until you can hit the right heat consistently.
Alternative Method: Brush-On and Bake
When Quenching Is Impractical
For large or delicate parts that cannot be quenched easily, heat the steel to about 400 °F, brush or spray a thin coat of oil (or a beeswax–linseed mixture), then return the part to heat until the oil stops smoking and the surface darkens.
Repeat as needed. This method is slower but gives excellent control and is safer for indoor work when using vegetable or linseed oil.
Combining Oils and Waxes for Extra Durability
A classic shop mix is beeswax melted with boiled linseed oil and a little turpentine. Apply the warm mixture to the heated steel, then bake at around 350 °F until set. The result is a darker, more water-resistant finish that many blacksmiths prefer for outdoor hardware.
Common Mistakes Beginners and Experienced Fabricators Make
Beginner Errors
- Skipping thorough cleaning—oil and dirt create blotchy results.
- Heating only one side or unevenly—color ends up patchy.
- Quenching too briefly or with insufficient oil volume—the oil overheats and can ignite.
- Using plastic brushes or containers that melt.
- Expecting chemical-blackening durability from a single oil cycle.
Experienced-Shop Pitfalls
- Applying the process to fully hardened parts without accepting the temper loss.
- Working in poor ventilation and underestimating fume toxicity from used oil.
- Leaving residual oil in threads or tight fits, causing later problems.
- Over-brushing between coats and removing the very layer you just created.
Troubleshooting Uneven or Weak Color
- Light or gray spots: Re-clean, reheat more evenly, and quench again.
- Flaky black residue: You overheated; brush off the loose material and repeat at lower temperature.
- Color fades quickly: Apply a final light oil or wax coat and reapply periodically.
- No blackening on high-alloy steel: The process is less effective; consider chemical blackening or accept a lighter tone.
Amperage Ranges? Wait—Heat and Material Notes for Different Steels
While this is not a welding process, heat input still matters. Mild steel (A36, 1018) blackens easily. High-carbon steels (1095, O1) also take a good finish but will lose hardness if heated too high. Stainless grades often need multiple aggressive cycles or different methods. Always test a scrap piece of the exact alloy before committing a finished part.
Maintenance and Long-Term Protection
Wipe the finished piece occasionally with a light machine oil or paste wax. In high-moisture environments, reapply every few months. The blackened surface will darken further with use and age in an attractive way. Avoid abrasive cleaners that strip the oxide layer.
Real Shop Examples That Worked
I blackened a set of mild-steel drawer pulls for a client using canola oil and three heat-quench cycles. The result was a uniform satin black that still looks good after two years of daily handling.
On a high-carbon knife blank I used used motor oil outdoors for maximum depth, then sealed with boiled linseed oil. The blade edge was protected during the process, and the finish has held up to regular use with only occasional re-oiling.
Pros and Cons of Oil Blackening
Pros
- Extremely low cost
- Uses common shop materials
- Good corrosion resistance for the effort
- Attractive appearance
- Easy to touch up
Cons
- Not as durable as commercial black oxide
- Can temper hardened parts
- Requires careful fire and fume management
- Multiple cycles often needed for best color
Wrapping Up
After running this process on everything from small screws to large forged brackets, I still reach for oil blackening whenever I need a fast, good-looking, protective finish without special chemicals. The key is clean metal, controlled heat, the right oil, and patience for a second or third cycle when the first pass is not perfect.
Treat the process with the same respect you give any hot-work operation, and the results will speak for themselves every time you pull a deep black part from the oil bath.
One pro tip I give every trainee: keep a scrap piece of the same steel next to the real part and run the exact same cycle on both—then you always know what the finished color will look like before you commit the good piece.
FAQ
What temperature should steel reach for oil blackening?
Aim for 500–600 °F for most quenching methods. Lower temperatures (around 400 °F) work for brush-on and bake techniques. Use temperature sticks or color observation until you develop a feel for it.
Can I use cooking oil instead of motor oil?
Yes. Canola, sunflower, or boiled linseed oil work well and produce fewer toxic fumes. The color may be slightly less deep than with used motor oil, but the difference is often acceptable for most projects.
Will oil blackening ruin the hardness of my tool steel?
It can. The temperatures involved are high enough to temper many hardened steels. If hardness is critical, use a lower-temperature bake method or switch to cold chemical blackening.
How many times do I need to repeat the process?
Usually two to three cycles give a rich, uniform black. One cycle can work for light protection; four or more rarely improves results further.
Is the finish waterproof?
It is water-resistant, not waterproof. A final coat of oil or wax improves performance. Reapply periodically in wet conditions for best protection.