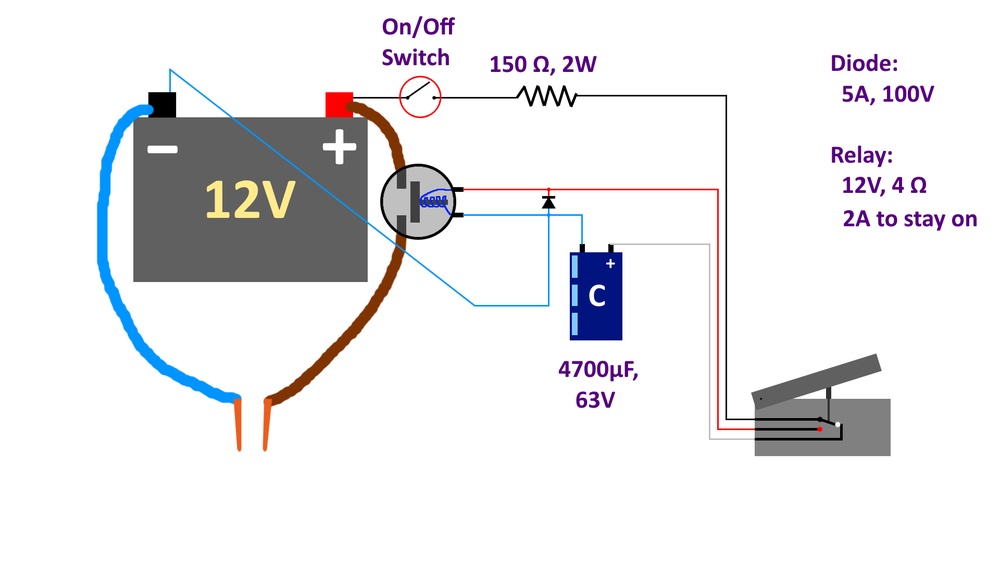
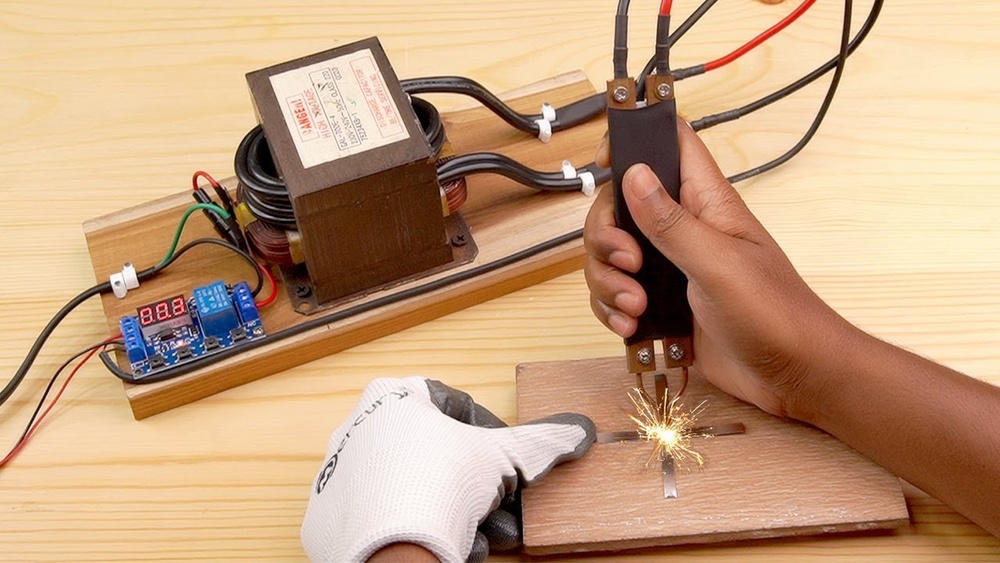
Building your own mini spot welding machine at home is not as difficult as it may seem. If you enjoy DIY projects, electronics, or need a tool for small metalwork, making a spot welder can save money and offer flexibility.
Many people think welding is only for professionals, but a homemade spot welder is practical, safe, and useful for beginners and hobbyists. This guide will help you create a reliable mini spot welding machine using easy-to-find parts, clear steps, and safety advice.
You will learn which materials to choose, how to assemble the device, and how to use it for basic welding tasks. By following this article, you can understand the main concepts behind spot welding, avoid common mistakes, and build a tool that works well for small jobs like battery packs, thin metal sheets, and repairs.
Let’s start by understanding what spot welding is and why homemade machines are popular.
Understanding Spot Welding
Spot welding is a process where two metal pieces are joined by applying heat and pressure at a single point. The heat comes from an electrical current passed between copper electrodes.
This melts the metal at the contact point, forming a strong weld when it cools. Spot welding is mostly used for thin sheet metals and is common in automotive and battery assembly.
Why Make A Mini Spot Welding Machine?
There are several reasons to build your own spot welder:
- Cost savings: Commercial spot welders can be expensive, especially for beginners.
- Customization: You can adjust the machine for your needs, such as working with battery tabs or small metal parts.
- Learning: Building your own machine teaches valuable skills in electronics and metalwork.
- Convenience: Homemade machines are portable and easy to use for small projects.
Many DIY welders use their machines for making battery packs, fixing electronics, and experimenting with metalwork. You do not need advanced skills to start, but you should understand basic electrical safety.
Essential Materials And Tools
Before starting, gather all the necessary parts and tools. Choosing the right materials is important for safety and performance.
Key Components
- Transformer: The heart of the spot welder. Most people use a microwave oven transformer (MOT) because it is powerful and easy to find.
- Copper Electrodes: Copper conducts electricity well and withstands heat. Old copper rods or thick wires are ideal.
- Heavy Gauge Wires: Thick wires carry high current safely. Look for 8 AWG or thicker.
- Switch/Trigger: A foot pedal or a simple push button controls the welding process.
- Insulation and Mounting: Materials to isolate and hold parts, such as wood, plastic, or rubber.
- Casing: A strong box to protect the transformer and wiring.
- Cooling Fan: Helps prevent overheating during longer sessions.
- Protective Gear: Gloves, goggles, and a fire-resistant workspace.
Tools Needed
- Screwdrivers
- Drill and bits
- Wire cutter and stripper
- Soldering iron
- Multimeter
- Clamps
Many parts are available at hardware stores or online. Using recycled materials, like an old microwave transformer, can reduce costs.
Choosing The Right Transformer
The transformer is the most important part. It changes voltage and current to create the heat needed for welding.
Microwave Oven Transformer (mot) Vs. Other Types
Most DIY spot welders use an MOT because:
- It is powerful (usually 700–1200 watts)
- It is easy to modify
- It is cheap or free if you have an old microwave
Here’s a comparison with other transformer types:
| Type | Power | Availability | Ease of Modification |
|---|---|---|---|
| Microwave Oven Transformer (MOT) | 700–1200W | High | Easy |
| Car Battery Charger | 100–500W | Medium | Moderate |
| Custom Wound Transformer | Varies | Low | Hard |
MOTs are the best option for beginners. If you use a car battery charger or other transformer, you may need extra modifications for enough power.
Preparing The Transformer
Modifying the transformer is key to making a spot welder. This step involves removing the secondary winding and replacing it with thick wire.
Steps To Modify An Mot
- Remove the Secondary Winding: The secondary winding is usually made with thin wire. Carefully cut or pry it out without damaging the primary winding.
- Add a New Secondary Winding: Wrap 2–3 turns of thick copper wire (8 AWG or thicker) around the core. This produces low voltage (2–3 volts) but high current (over 500 amps).
- Secure the Winding: Use insulation tape to prevent shorts. Make sure the wire fits tightly.
This modification allows the transformer to deliver the high current needed for spot welding. Use a multimeter to check the voltage before continuing.
Building The Electrode Assembly
The electrodes are where the welding happens. They must be strong, heat-resistant, and conduct electricity well.
Making Copper Electrodes
You can make electrodes from:
- Copper rods (6–10 mm diameter)
- Thick copper wires
- Old electrical connectors
Shape the ends to a point or flat tip using a file. Attach electrodes to the wires from the transformer using bolts or solder. Mount them in a holder (wood or plastic) to keep them stable during welding.
Mounting And Insulation
Mount the electrodes so they face each other. Use clamps or holders to keep them steady. Insulate all connections to prevent shocks.
| Electrode Material | Durability | Heat Resistance | Ease of Shaping |
|---|---|---|---|
| Copper Rod | High | Excellent | Easy |
| Brass Rod | Medium | Good | Moderate |
| Steel Rod | Low | Poor | Hard |
Copper is the best choice. Avoid steel, as it does not conduct electricity well and wears out quickly.
Wiring And Safety Setup
Proper wiring is essential for safe operation. Use thick wires and insulate all connections.
Connecting Components
- Attach the new secondary winding wires to the copper electrodes.
- Connect the primary winding to a power switch or foot pedal.
- Add a cooling fan to the casing for longer sessions.
- Mount all parts in a strong, insulated box.
Always check connections with a multimeter. Loose wires or poor insulation can cause sparks or shocks.
Safety Tips
- Use protective gear: Gloves and goggles protect from sparks and burns.
- Work in a ventilated area: Welding produces heat and fumes.
- Keep flammable items away: Sparks can ignite nearby materials.
- Test with low power: Check the machine with short bursts before full use.
A common mistake is skipping insulation. Always cover exposed wires and terminals.
Assembling The Mini Spot Welding Machine
Now, assemble all parts into a working machine. Take your time to ensure all parts fit securely and safely.
Step-by-step Assembly
- Mount the transformer in the casing. Secure it with bolts or brackets.
- Install the electrodes: Attach them to holders and connect to the transformer’s secondary wires.
- Wire the switch or trigger: Connect the primary winding to a switch or foot pedal for easy control.
- Add the cooling fan: Place the fan near the transformer and wire it to the power supply.
- Insulate all connections: Use heat-shrink tubing or electrical tape.
- Test the machine: Plug it in, press the electrodes together, and use the switch to weld.
Check for overheating during the first test. If the casing gets too hot, add more ventilation or a stronger fan.
Testing And Using Your Spot Welder
Test the machine on small metal pieces before using it on real projects.
How To Use The Spot Welder
- Place two pieces of thin metal (like nickel strips or steel sheets) between the electrodes.
- Press the electrodes together to hold the metal.
- Activate the switch for a short burst (0.5–2 seconds).
- Release and check the weld.
If the metal melts too much or the weld is weak, adjust the welding time or electrode pressure.
Practical Example: Battery Pack Assembly
Spot welders are popular for making battery packs, especially 18650 cells.
- Place a nickel strip over the battery terminals.
- Use the electrodes to weld the strip in place.
- Repeat for each cell connection.
This method is safer than soldering, which can overheat batteries.
Troubleshooting Common Problems
Many beginners face issues with their homemade spot welders. Here are common problems and solutions:
Weak Welds
- Cause: Not enough current or poor electrode contact.
- Solution: Check wire thickness, tighten electrode holders, and ensure good contact.
Overheating
- Cause: Long welding times or poor cooling.
- Solution: Add a larger fan, reduce welding time, and allow breaks between sessions.
Sparks And Smoke
- Cause: Loose connections or short circuits.
- Solution: Check all wiring and insulation. Use a multimeter to find faults.
Electrode Wear
- Cause: Using poor materials or frequent use.
- Solution: Use high-quality copper rods. Sharpen or replace tips regularly.
Non-obvious insight: Many people overlook the importance of electrode cleanliness. Clean electrodes before each session to ensure a strong weld.
Improving Performance And Features
Once your basic spot welder works, you can add features to improve performance.
Add A Timer Circuit
A timer circuit gives precise control over welding time. This prevents overheating and makes welds more consistent.
- Use a simple relay timer or a microcontroller (like Arduino).
- Set adjustable welding durations (e.g., 0.5–2 seconds).
This upgrade is especially useful for battery pack assembly.
Upgrade Electrodes
Use thicker copper rods or special alloy tips for longer life. Short, pointed tips concentrate heat better.
Portable Design
Make your welder portable by using a smaller casing and adding a handle. This is useful for field repairs or moving between workspaces.
Data Table: Feature Upgrades
| Feature | Benefit | Difficulty |
|---|---|---|
| Timer Circuit | Consistent welds | Medium |
| Better Electrodes | Longer life | Easy |
| Portable Casing | Easy transport | Easy |
Safety And Maintenance
Homemade spot welders can be safe if used carefully. Regular maintenance keeps the machine reliable.
Maintenance Tips
- Check wires and insulation regularly for wear or damage.
- Clean electrodes after each use.
- Keep the transformer cool by running the fan during and after welding.
- Inspect switches and triggers for sticking or failure.
Non-obvious insight: Dust and dirt can cause short circuits. Keep the machine clean and dry.
Practical Uses For Mini Spot Welders
A mini spot welder is useful for many tasks:
- Battery pack welding: Safely join battery tabs.
- Small repairs: Fix metal parts, wires, or tools.
- Electronics projects: Attach metal contacts without soldering.
- Metal crafts: Make jewelry, models, or custom tools.
You can even repair broken metal objects at home, saving money and time.

Credit: www.youtube.com
Real-world Data: Diy Spot Welder Performance
DIY spot welders can deliver strong, reliable welds if built well. Here’s a comparison of typical performance:
| Welder Type | Max Current (A) | Weld Thickness (mm) | Cost ($) |
|---|---|---|---|
| Homemade MOT Welder | 500–800 | 0.1–0.3 | 30–70 |
| Commercial Mini Welder | 400–600 | 0.1–0.2 | 120–300 |
| Battery Charger Welder | 100–300 | 0.05–0.15 | 50–100 |
Homemade spot welders perform well for small tasks and cost much less than commercial models.
Non-obvious Insights For Beginners
- Transformer orientation matters: Position the transformer upright for better cooling and durability.
- Shorter wire runs improve performance: Keep wires between the transformer and electrodes as short as possible. This reduces resistance and increases current.
- Testing with different metals: Welders may behave differently with nickel, steel, or copper. Test on sample pieces before your main project.
These details make a big difference in weld quality and safety.
Frequently Asked Questions
What Metals Can I Weld With A Mini Spot Welder?
You can weld nickel, steel, and sometimes copper sheets up to 0.3 mm thick. Nickel is common for battery tabs, while steel works for small repairs. Copper is harder to weld because it conducts heat away quickly.
Is Spot Welding Safer Than Soldering For Battery Packs?
Yes. Spot welding does not heat the battery cells as much as soldering. This reduces the risk of battery damage or explosion. Always use proper safety gear and follow guidelines when welding batteries.
Can I Use Any Transformer For A Spot Welder?
No. You need a transformer that can deliver high current at low voltage. Microwave oven transformers are best. Avoid transformers with low power, as they may not weld metal properly.
How Do I Know If My Weld Is Strong?
A good weld is shiny, solid, and holds the metal pieces together firmly. Try pulling the pieces apart. If the weld breaks easily, adjust the welding time or electrode pressure.
What Are Common Mistakes When Building A Mini Spot Welder?
Common mistakes include using thin wires, poor insulation, and skipping cooling fans. Also, failing to clean electrodes before use can result in weak welds. Always check all parts before each session.
Building a mini spot welding machine at home is a rewarding project. With careful planning, the right materials, and attention to detail, you can create a tool that rivals commercial options for small jobs. Remember to prioritize safety, test your machine on sample pieces, and keep improving your design as you gain experience.
Whether you are making battery packs, fixing electronics, or working on metal crafts, your homemade spot welder will make these tasks easier and safer.