
A SharkBite fitting that refuses to release after months or years of service creates an immediate problem when the official disconnect clip is missing.
Knowing how to remove SharkBite push-to-connect fitting without tool prevents pipe damage, wasted fittings, and unnecessary cuts in tight spaces such as crawlspaces or behind walls.
The stainless-steel grab ring and O-ring seal hold firmly under pressure; incorrect force damages the pipe surface or deforms the brass body, making reuse impossible and forcing a longer repair.
Proper technique restores access while preserving both the fitting and the remaining pipe length for a clean reinstallation.
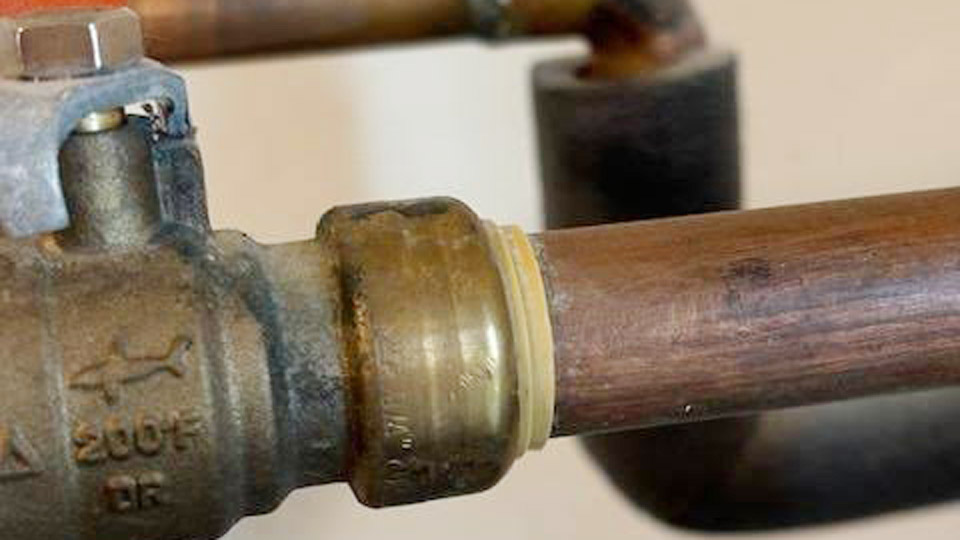
Image by r/askaplumber
Essential Preparation Before Any Removal Attempt
Water pressure and residual fluid must be eliminated first. Residual pressure can spray water the moment the seal breaks and can also keep the grab-ring teeth seated more tightly against the pipe.
Shutting Off Supply and Relieving Line Pressure
Locate the nearest isolation valve or the main shutoff. Close it fully, then open a downstream faucet to drain the line. For multi-story systems, open the highest and lowest fixtures to clear trapped air and water. Place a bucket or absorbent cloth under the joint to catch residual drips.
Cleaning the Pipe Surface and Identifying the Release Collar
Wipe the pipe and the face of the fitting free of dirt, scale, or mineral deposits. The release collar is the movable plastic or metal ring that sits against the body of the fitting and surrounds the pipe. Any debris here interferes with even pressure and can prevent the collar from sliding fully inward.
Mechanical Methods That Depress the Release Collar Without the Official Clip
The core action remains the same regardless of tool: the release collar must be pushed toward the fitting body so the internal grab-ring teeth expand away from the pipe surface. Once the teeth clear the pipe, a straight axial pull frees the connection.
Adjustable Crescent Wrench Technique
Open the jaws of an adjustable wrench just wide enough to slip over the pipe and rest squarely against the release collar. Position the wrench so the flat face of the jaw contacts the collar evenly. Apply firm, steady pressure toward the fitting body while the opposite hand pulls the pipe straight out.
A slight initial push of the pipe deeper into the fitting (approximately 1/8 inch) often unseats the teeth before the pull begins. This method works on ½-inch and ¾-inch lines when space allows full jaw access.
Open-End Wrench Size Matching
Select an open-end wrench whose jaw opening matches the pipe outside diameter closely enough to seat against the collar without excessive play. For common ½-inch PEX or copper, a ⅝-inch or ⅞-inch open-end wrench frequently provides the required contact.
Slide the wrench over the pipe, press the collar inward, and extract the pipe with a continuous straight pull. The rigid metal contact distributes force more uniformly than fingers alone.
Needle-Nose or Slip-Joint Pliers Application
Open the pliers so the tips or jaws contact opposite sides of the release collar. Squeeze gently but firmly to compress the collar while simultaneously withdrawing the pipe.
Avoid clamping the brass body itself; deformation of the fitting body can permanently bind the internal components. This approach suits fittings that have accumulated mineral scale and require localized force.
Hand-Only and Improvised Solutions for Restricted Access
When tools cannot reach the joint, hand pressure or flexible substitutes become necessary. These methods demand more physical force and careful alignment.
Direct Finger Compression on Smaller Diameters
On ½-inch and smaller fittings that have not been in service for years, grip the fitting body with one hand. Use the thumb and forefinger of the other hand to push the release collar fully inward while pulling the pipe axially.
A light rotational twist of the pipe during the pull can help break any corrosion bond without scoring the surface. Success depends on clean surfaces and sufficient hand strength; older fittings often resist this method.
Zip-Tie or Paracord Compression for Confined Spaces
Wrap a heavy-duty zip-tie or a loop of strong cord around the pipe immediately against the release collar. Pull both ends of the tie or cord toward the fitting body so the loop forces the collar inward. Maintain that pressure with one hand while the other hand extracts the pipe.
This technique is useful when the fitting sits against a stud or inside a narrow chase where a wrench cannot be positioned.
Handling Stubborn or Long-Installed Fittings
Fittings that have remained under continuous pressure for several years frequently embed the grab-ring teeth more deeply or accumulate scale that restricts collar movement.
Pre-Seating the Pipe Before Collar Depression
Push the pipe an additional ⅛ to ¼ inch into the fitting before attempting to depress the collar. This slight reseating can relieve residual tension on the teeth and allow the collar to travel farther. After the collar is fully depressed, reverse direction and pull the pipe free with steady force.
When Cutting Becomes the Practical Decision
If repeated attempts fail and the joint is inaccessible or the pipe shows scoring, cut the pipe 1–2 inches beyond the fitting with a tubing cutter. Discard the old fitting. Deburr the new pipe end thoroughly, mark the correct insertion depth, and install a fresh SharkBite coupling.
This approach sacrifices a short length of pipe but guarantees a reliable reseal and avoids further risk of damaging remaining tubing.
Post-Removal Inspection and Reuse Criteria
Once the pipe is free, examine both the pipe surface and the interior of the fitting. Deep tooth marks, ovalization, or cuts on the pipe require replacement of that section.
Inside the fitting, check that the O-ring remains intact, free of nicks, and properly seated, and that the grab ring shows no broken or bent teeth.
SharkBite fittings may be reused for temporary or testing purposes; permanent reinstallation after multiple removals is not recommended by the manufacturer because the sealing components experience progressive wear.
Decision Framework for Choosing the Removal Approach
Select the method according to available clearance, fitting age, and pipe material. Accessible joints with recent installations respond well to an adjustable wrench or open-end wrench. Restricted spaces favor the zip-tie or cord method. Older, scaled fittings often require the initial reseating push followed by pliers.
When any of these produce visible pipe damage or fail after several controlled attempts, cutting and replacing the joint is the correct technical decision.
Matching force application to the release-collar geometry preserves both the pipe and the possibility of fitting reuse, reducing material waste and labor on subsequent connections.
Successful removal without the dedicated disconnect tool hinges on even collar depression combined with a straight axial pull.
Advanced practice adds the pre-seating push and visual confirmation that the grab-ring teeth have fully retracted before force is applied, minimizing surface marking on PEX or copper and keeping the joint ready for immediate reassembly or permanent replacement.
FAQs
Can you remove a SharkBite fitting with just your hands?
Yes on smaller, recently installed fittings. Push the release collar fully inward with fingers while pulling the pipe straight out. Older or larger fittings usually need a wrench or pliers for adequate force.
What size wrench works for ½-inch SharkBite removal without the clip?
An adjustable crescent wrench set to slip over the pipe and seat against the collar, or a ⅝-inch to ⅞-inch open-end wrench, provides reliable contact for most ½-inch lines.
Will using pliers damage the SharkBite fitting?
Pliers used only on the release collar are acceptable. Clamping the brass body can deform it and permanently bind the internal grab ring, making the fitting unusable.
When should I cut the pipe instead of forcing the fitting off?
Cut when the collar will not depress fully after cleaning and reseating attempts, or when the pipe already shows deep scoring. Cutting 1–2 inches beyond the fitting and installing a new coupling is faster and safer than risking further damage.


