Welding a cast iron component to mild steel often fails at the first bead. The joint looks solid while still hot, then develops fine cracks in the heat-affected zone as it cools, or the weld metal itself turns hard and unmachinable.
This happens because cast iron’s high carbon content (typically 2–4%) migrates into the weld pool and forms brittle microstructures when mixed with low-carbon mild steel.
Knowing how to weld cast iron to mild steel correctly means selecting fillers that tolerate carbon pickup, controlling heat input so the casting does not quench the weld, and managing expansion differences between the two metals.
The decisions below focus on the practical variables that determine whether the joint survives service loads, thermal cycling, or machining.
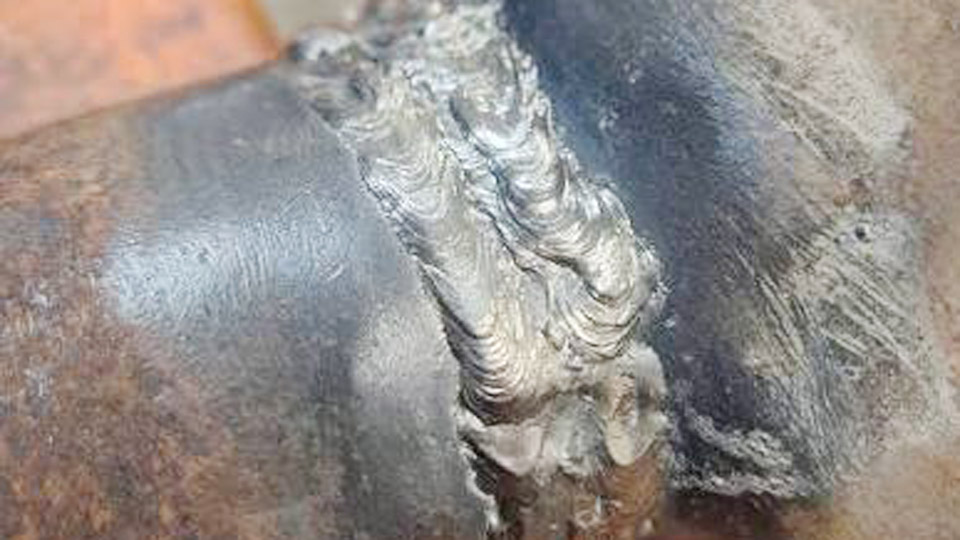
Image by fb/I See You Don’t Know Shit About Welding
Material Differences That Drive Process Selection
Carbon Content and HAZ Hardness
Gray cast iron contains free graphite flakes and combined carbon that dissolve rapidly under the arc. When that carbon enters a mild-steel weld pool, the resulting alloy can exceed 0.8% carbon locally.
Rapid cooling then produces martensite or ledeburite in the heat-affected zone (HAZ), raising hardness above 400 HB and leaving the joint crack-sensitive.
Mild steel, by contrast, stays soft and ductile under the same thermal cycle. The mismatch creates residual tensile stresses that the cast iron side cannot accommodate.
Thermal Expansion and Conductivity
Cast iron expands and contracts less than mild steel under the same temperature change. During welding the steel side wants to shrink more on cooling, placing the cast iron under tension. Combined with the low ductility of the cast structure, this differential movement is a primary cause of delayed cracking hours or days after the weld cools.
High thermal conductivity of the casting also pulls heat away from the weld zone faster than steel, accelerating the quench effect unless preheat is used to flatten the temperature gradient.
Filler Metal Selection for Dissimilar Joints
Pure Nickel (ENi-CI / Nickel-99) Electrodes
AWS ENi-CI electrodes deposit approximately 99% nickel. Carbon absorbed from the cast iron remains in solution or forms soft graphite rather than hard carbides, keeping the weld metal ductile (elongation typically 10–15%) and machinable. Typical amperage ranges for flat position are:
- 3/32 in (2.4 mm): 40–80 A
- 1/8 in (3.2 mm): 70–110 A
- 5/32 in (4.0 mm): 90–130 A
Use the lower end of the range to limit dilution. DC electrode positive or AC both work; many operators prefer AC to reduce arc blow on large castings. Nickel-99 is preferred for thin sections or parts that must be machined after welding.
Nickel-Iron (ENiFe-CI / Nickel-55) Electrodes
ENiFe-CI electrodes contain roughly 55% nickel and 45% iron. The higher iron content raises tensile strength (480–550 MPa versus 380–450 MPa for pure nickel) and improves tolerance to phosphorus in the casting.
Weld deposits are still largely machinable unless dilution is extreme. Amperage is similar to Nickel-99 but can run 10–15 A higher because the arc is more stable. Nickel-55 is the practical choice for thicker sections or higher-strength applications where pure nickel cost is a factor.
When Steel or Stainless Fillers Are Unacceptable
Mild-steel electrodes (E6010, E7018) or stainless (E309) produce hard, crack-prone deposits on cast iron because of carbon pickup. They may hold temporarily under compressive loads but fail under tension or vibration.
Silicon-bronze or aluminum-bronze can serve as low-heat alternatives for non-structural joints, but they create a weaker interface and are not true fusion welds.
Preheat and Interpass Temperature Control
Recommended Preheat Ranges by Section Thickness
Preheat reduces the cooling rate so that martensite formation is minimized and residual stresses stay lower. Typical ranges for gray iron to mild steel are:
- Thin sections (<½ in / 12 mm): 300–500 °F (150–260 °C)
- Medium sections (½–1½ in / 12–40 mm): 500–800 °F (260–430 °C)
- Heavy sections (>1½ in / 40 mm): 800–1100 °F (430–600 °C)
Never exceed 1400 °F (760 °C); above this temperature the casting enters the critical range and risks permanent microstructure change. Heat the entire casting whenever possible rather than applying local heat, which creates steep gradients that promote cracking.
Maintaining Interpass Temperature
Once preheated, the casting must stay within a 100–150 °F window of the original preheat throughout welding. Use temperature-indicating crayons or an infrared thermometer.
If interpass temperature drops, stop and reheat. Continuous monitoring is more important than the exact starting number because cast iron acts as a heat sink and cools rapidly once the torch or electrode is removed.
Stick Welding Procedure for Reliable Joints
Joint Preparation Requirements
Grind the cast iron surface until bright metal appears and the graphite layer is removed. A 60–75° single-V or double-V groove with a 1/16–3/32 in root face works for most butt joints. On the mild-steel side a standard 30–35° bevel is sufficient.
Remove all oil, paint, rust, and residual sand from casting cavities; contamination produces porosity and weak fusion. For cracked castings, drill stop-holes at crack ends and open the crack with a thin grinding disc before welding.
Welding Sequence and Bead Technique
Strike the arc on the mild-steel side and travel onto the cast iron so that dilution from the high-carbon base metal is reduced. Deposit short stringer beads ¾–1¼ in (20–30 mm) long. Immediately peen each bead lightly with a round-nose hammer while still hot to relieve shrinkage stress.
Skip to a distant location for the next bead rather than continuing in sequence; this keeps local heat input low. Maintain a short arc length (approximately equal to electrode diameter) and travel at a steady speed that produces a slightly convex bead. Avoid weaving wider than 2½ times electrode diameter.
Polarity and Current Selection
DC electrode positive gives deeper penetration and is preferred for most nickel electrodes. AC is useful on large, magnetized castings to reduce arc blow. Set current at the low-to-middle of the manufacturer’s recommended range; excess amperage increases dilution and residual stress. If the electrode sticks or the puddle freezes, raise amperage 5–10 A rather than lengthening the arc.
TIG Welding as an Alternative Process
Filler Wire and Shielding Gas Choices
TIG allows precise heat control and is useful for thin castings or precise repairs. Use pure nickel or nickel-iron bare rod matching the compositions of ENi-CI or ENiFe-CI. Argon shielding at 15–20 cfh is standard; helium can be added for thicker sections to increase heat input.
Set the machine to DC electrode negative. Amperage is typically 10–20% lower than the corresponding stick electrode size because there is no flux coating to stabilize the arc.
Heat Management Specific to TIG
Because TIG concentrates heat more than stick, preheat remains essential and interpass temperature must be watched closely. Deposit the same short beads and peen if the part geometry allows.
TIG is slower than stick for heavy sections and is rarely the first choice for production work, but it produces cleaner, more controllable deposits when appearance or subsequent machining is critical.
Managing Residual Stress and Cracking Risk
Short-Bead and Skip-Welding Logic
Long continuous beads build cumulative shrinkage force that the cast iron cannot absorb. By limiting each bead to roughly one inch and allowing the area to cool below interpass temperature before returning, the stress field remains local and manageable. On circular joints or closed shapes, balance the sequence so that contraction occurs symmetrically.
Peening Practice and Limits
Light peening with a ball-peen or pneumatic tool while the bead is still above 500 °F stretches the weld metal plastically and offsets some of the contraction.
Over-peening can work-harden the nickel deposit or introduce new surface cracks, so stop when the bead surface shows a slight texture change. Peening is most effective on the first two or three layers; later layers experience less constraint.
Post-Weld Cooling and Final Inspection
Controlled Cooling Methods
After the last bead, cover the entire casting with an insulating blanket, dry sand, or vermiculite and allow it to cool to room temperature over several hours. Rapid air cooling or quenching recreates the hard HAZ that the preheat was intended to prevent.
For critical parts, a controlled furnace cool from 1000 °F down to 200 °F at 50–100 °F per hour further reduces residual stress.
Visual and Dimensional Checks
Inspect for surface cracks with dye penetrant after the part reaches ambient temperature. Check alignment and distortion against the original dimensions; differential shrinkage often pulls the mild-steel side.
If machining is required, nickel deposits machine readily with carbide tooling at moderate speeds; high-speed steel tools dull quickly if residual hardness remains in the HAZ.
Decision Framework for Process and Filler Choice
When the joint must be machined and section thickness is under ¾ in, pure nickel stick or TIG is the lowest-risk route. For thicker structural sections where strength matters more than absolute machinability, nickel-iron electrodes provide a better strength-to-cost ratio.
If the casting cannot be fully preheated because of size or attached components, the cold-welding technique (very short beads, extensive peening, and minimal heat input) can still succeed with pure nickel, though success rates drop and multiple repair cycles may be needed.
Always verify the casting type first—gray iron, ductile iron, and malleable iron respond differently to the same procedure; a simple spark test or chemical analysis prevents mismatched expectations.
FAQ
Can you MIG weld cast iron to mild steel?
Yes, but only with specialized nickel-based flux-cored or solid wires formulated for cast iron. Standard mild-steel or stainless MIG wires produce hard, crack-prone deposits. Heat input with MIG is higher and less controllable than stick, so preheat and short-bead technique remain mandatory. Most shops still prefer stick for reliability.
What amperage should I use for 1/8-inch nickel rod on cast iron?
Start at 80–100 A DC electrode positive or AC and adjust for a fluid but not excessively fluid puddle. On thinner sections drop toward 70 A; on heavy sections you may reach 110 A. The goal is minimal dilution rather than maximum deposition rate.
Is preheat always required when welding cast iron to steel?
Nearly always for reliable results. Cold welding with pure nickel and aggressive peening can succeed on small, non-critical repairs, but the risk of cracking rises sharply. Any casting thicker than about ⅜ in or subjected to service stress should be preheated.
Why do nickel welds sometimes still crack after cooling?
Residual stress from differential contraction, incomplete graphite removal, or cooling that is still too rapid are the usual causes. Insufficient preheat or failure to maintain interpass temperature leaves a hard HAZ that cannot stretch with the shrinking weld metal. Re-preparing the joint and repeating the procedure with stricter thermal control usually resolves the problem.