Soldering stainless steel jewelry requires a different approach than working with traditional precious metals. The chromium oxide layer that gives stainless steel its excellent corrosion resistance also makes it more difficult for solder to bond properly.
Without the correct flux, solder alloy, and heat control, joints can fail, discoloration can occur, or delicate jewelry components may become distorted.
Whether you’re repairing a broken chain, resizing a ring, or assembling a custom stainless steel piece, understanding the proper soldering technique is essential for creating strong, clean, and durable joints.
Learning how to prepare the metal, select compatible materials, and apply heat effectively will help you achieve professional-quality results while avoiding the common mistakes that lead to weak or unattractive solder joints.
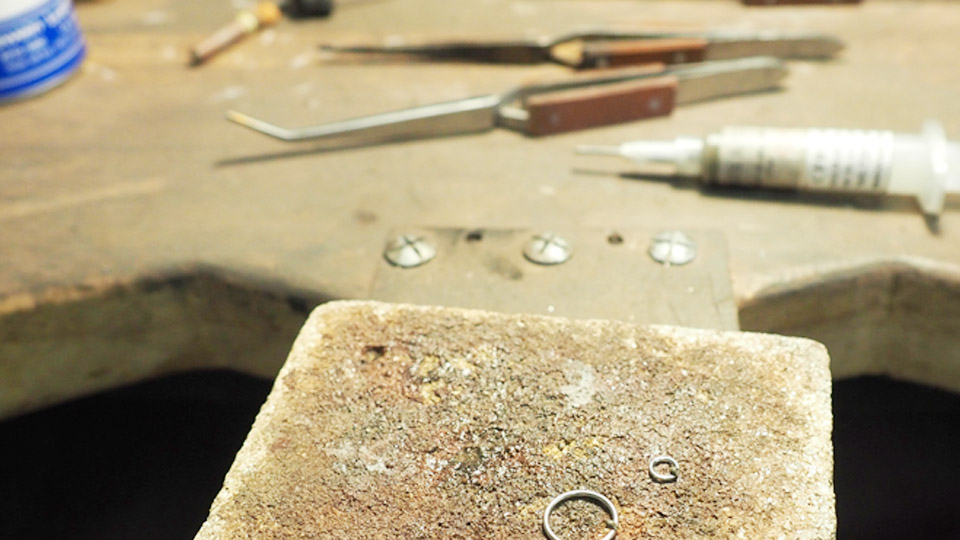
Image by perlesandco.co.uk
Why Stainless Steel Forms an Immediate Barrier to Solder
Stainless alloys used in jewelry—primarily 304 and 316—contain 16–20 % chromium. Within seconds of cleaning, that chromium reacts with air to form a thin, continuous oxide layer. Ordinary rosin or borax fluxes cannot dissolve this film, so molten solder remains spherical and never achieves capillary flow.
Chromium Oxide Thickness and Its Effect on Wetting
The oxide layer measures only a few nanometers yet raises the surface energy enough to prevent wetting. Once the layer reforms during heating, even a correctly chosen flux struggles if the joint stays hot longer than necessary.
Working speed therefore becomes a practical variable: heat the joint, activate the flux, and introduce solder in one continuous sequence.
Grade Differences That Change Flux Demand
Austenitic grades (304, 316) form the most tenacious oxides. Martensitic or lower-chromium stainless steels wet more readily but are less common in jewelry because they rust. For 316, which contains molybdenum, some fluxes require a small hydrochloric acid addition to cut the oxide fully.
Jewelry makers rarely need that level of aggression if they stay with phosphoric-acid or boron-modified pastes formulated for stainless.
Selecting Flux Formulated for Stainless Oxide Removal
Flux choice determines success more than any other single factor. Plumbing or electronic fluxes leave the chromium oxide intact and produce zero bond.
High-Activity Acid Fluxes Versus Black Flux
Phosphoric-acid-based fluxes (Superior No. 71 or equivalent) dissolve chromium oxide at soldering temperatures and leave residues that are relatively easy to neutralize.
Boron-modified “black” fluxes (Handy Flux Type B-1 or similar) remain active at higher silver-solder temperatures and help suppress further oxidation during the longer heat cycle needed for thicker jewelry components.
Both work; the acid flux is preferred for low-temperature silver-bearing solders, while black flux suits medium and hard silver solders above 700 °C.
Residue Behavior and Immediate Cleanup Requirements
Aggressive fluxes leave corrosive residues. If left on the metal they continue to attack the stainless itself and any adjacent silver or gold. Immediate quenching and thorough scrubbing or ultrasonic cleaning in a mild alkali or specialized stainless cleaner is mandatory. Residual flux that dries into crevices will produce green or brown corrosion stains weeks later.
Choosing Solder Alloys That Actually Bond to Stainless
Silver content is the decisive variable. Pure tin-lead solders wet poorly even with correct flux. Silver-bearing alloys wet and form a metallurgical bond once the oxide is removed.
Low-Temperature Silver-Bearing Options
Sn96/Ag4 (96 % tin, 4 % silver) flows near 221 °C and works with Stay-Brite or similar products. It is useful for delicate findings or when the surrounding metal cannot tolerate high heat. Tensile strength sits in the 10 000–25 000 psi range—adequate for light jewelry but marginal for load-bearing clasps.
Traditional Jewelry Silver Solders
Hard (flow ≈ 788 °C), medium (≈ 738 °C), and easy (≈ 719 °C) silver solders containing 45–75 % silver produce stronger joints. Sequence them correctly: hard first on the most critical joint, then medium, then easy, so earlier joints do not reflow. These alloys form a true intermetallic layer with the stainless once flux has cleared the oxide.
Silver Brazing Alloys for Maximum Strength
Alloys such as 56 % silver (SSF-6 or equivalent) flow above 650 °C and deliver the highest joint strength available short of welding. They require black flux and a hotter torch flame but create bonds that survive repeated flexing of jump rings and chain links.
Heat Source and Temperature Control Decisions
An iron is almost never adequate. Stainless conducts heat poorly compared with silver or copper, so the joint must be brought to temperature quickly before the oxide reforms.
Torch Flame Size and Fuel Choice
A small butane torch works for thin wire and findings under 1 mm. For thicker stock or multi-joint assemblies, a propane or acetylene-air torch with a #1 or #2 tip delivers the necessary BTU without overheating adjacent areas. Keep the reducing zone of the flame on the joint; an oxidizing flame accelerates chromium oxide growth.
Visual Temperature Indicators
Flux turns clear and glassy near 600 °C. At that point the stainless is ready to accept solder. Overheating past the point where flux turns green or black signals excessive oxidation and usually a failed joint. Practice on scrap until the timing becomes automatic.
Surface Preparation That Determines Capillary Flow
Mechanical cleaning removes bulk contaminants and the initial oxide, giving the flux a head start.
Abrasion and Degreasing Sequence
Sand or file the joint surfaces to bright metal immediately before flux application. Follow with a solvent wipe (acetone or isopropyl alcohol) to remove oils from handling. Avoid touching the cleaned surfaces. Any residual grease prevents flux from contacting the metal and leaves voids in the finished joint.
Joint Fit-Up for Capillary Action
Clearance of 0.05–0.15 mm produces the strongest capillary draw. Gaps larger than 0.25 mm require excess solder and often leave porosity. For jump rings, close the ring tightly so the ends meet under light spring pressure; the solder then flows into the line of contact rather than sitting as a surface fillet.
Executing the Solder Joint on Jewelry Components
The actual soldering sequence is short and must be continuous.
Apply a thin, even coat of the chosen flux to both surfaces. Position the parts on a charcoal or ceramic block so heat can be applied from below or the side. Heat the entire joint area until the flux liquefies and becomes transparent. Touch the solder (wire, pallion, or paste) to the joint; it should flash and flow instantly along the cleaned interface.
Withdraw the heat the moment flow occurs. Quench in water, then scrub residual flux under running water or in an ultrasonic cleaner with a mild detergent. Inspect under magnification: a continuous, bright fillet without voids or excess balling indicates success.
For multi-joint pieces, complete the highest-temperature solder first and protect earlier joints with anti-flux or heat sinks if necessary.
Post-Soldering Cleaning and Corrosion Prevention
Flux residues are the primary long-term failure mode.
Neutralize acid fluxes with a dilute baking-soda solution, then rinse thoroughly. Black flux residues require mechanical scrubbing or a commercial flux remover formulated for stainless.
After cleaning, passivate the joint if the piece will see moisture or skin contact: a brief immersion in citric or nitric acid solution restores the chromium oxide layer on the stainless while leaving the silver solder intact. Dry completely before polishing.
When Soldering Reaches Its Limits on Stainless Jewelry
Certain joints simply do not reward soldering effort.
Jump Rings and Continuous Wear Items
Closed jump rings under constant flexure eventually fatigue a soldered joint. Micro-TIG or pulse-arc welding produces a fusion joint that matches the parent metal strength and eliminates the dissimilar interface. Many professional chain-mail and permanent-jewelry makers have shifted entirely to welding for stainless components.
Mixed-Metal Assemblies
Soldering stainless to sterling or gold is possible with the fluxes and solders described above, but the difference in thermal expansion can stress the joint during cooling. Design the joint so the stronger stainless side carries the load, or switch to mechanical connections or laser welding when the piece must survive heavy use.
Strength and Appearance Trade-Offs
A correctly soldered stainless joint reaches roughly 30–50 % of the parent metal’s tensile strength. For decorative findings this is sufficient. For structural clasps or load-bearing links, welding remains the superior process. The visual difference is also clear: solder leaves a distinct color line, while a well-executed weld can be polished invisible.
Wrapping Up
Decision-making comes down to joint function and expected service life. Use the aggressive flux and silver-bearing solder combination when the joint is static or lightly loaded and color match is secondary. Move to fusion welding when cyclic stress or invisible finish is required.
The advanced insight is that stainless jewelry soldering is less about technique perfection and more about matching the oxide-removal chemistry and thermal mass of the specific component; once those two variables are controlled, the process becomes repeatable at production speed.
FAQs
Can You Solder Stainless Steel Jump Rings Successfully?
Yes, provided the ring ends are filed clean, black or phosphoric flux is used, and a silver-bearing solder is applied with a torch. The joint will hold for normal wear but remains weaker than a welded closure under repeated flexing.
What Temperature Is Required to Solder Stainless Steel Jewelry?
Low-temperature silver-bearing solders flow between 220–450 °C. Traditional hard, medium, and easy silver solders require 700–800 °C. The flux must reach its active temperature first; visual cues (clear glassy flux) are more reliable than numerical settings.
Is Regular Silver Solder Enough for Stainless Steel?
Regular silver solder works only when paired with a stainless-specific flux. Without the aggressive flux the solder will not wet the chromium oxide layer, regardless of silver content.
Why Does Solder Ball Up on Stainless Steel?
The chromium oxide film prevents wetting. Balling indicates either the wrong flux, insufficient heat to activate the correct flux, or surface contamination that the flux cannot penetrate.