Making your own spot welder can save you a lot of money and help you learn valuable skills. Spot welding is a fast, reliable way to join metal sheets, often used in auto repair, battery building, and small fabrication projects.
Many people think spot welding requires expensive equipment, but you can build a simple, effective spot welder for cheap with some basic tools and materials. This guide shows you how to do it safely, step by step, and provides practical advice based on real experience.
What Is A Spot Welder And Why Build One?
Spot welding uses electricity to melt and join metal at a single point. The process works best for thin sheets of steel or nickel. Commercial spot welders cost hundreds or thousands of dollars, but homemade versions can work for small projects at a fraction of the price.
Building your own spot welder helps you:
- Save money on equipment
- Learn about electrical circuits and metalwork
- Repair batteries, electronics, and car panels
- Customize the tool for your needs
It’s important to understand the basics of spot welding before starting. The welder needs to deliver high current (often over 100 amps) for a short time (milliseconds to seconds). The heat melts the metal, creating a strong bond.
Essential Safety Precautions
Before you build or use a spot welder, safety must come first. Spot welders use high current, which can be dangerous if handled incorrectly.
- Wear protective gear: Use gloves, eye protection, and closed shoes. Sparks and hot metal can cause burns.
- Work in a ventilated area: Welding produces fumes. Good airflow reduces risk.
- Avoid water and moisture: Electricity and water together are dangerous. Keep your workspace dry.
- Check wiring carefully: Faulty connections can cause electric shock or fire.
- Use insulated tools: Reduce the risk of accidental contact.
- Have a fire extinguisher nearby: Always be prepared for emergencies.
- Unplug when adjusting: Never touch internal parts when the welder is connected to power.
Many beginners overlook the importance of proper cable sizing. Small wires overheat quickly. Use thick copper cables for the main connections. Also, never use the welder for long periods continuously, as overheating can damage components.

Credit: mods-n-hacks.gadgethacks.com
Tools And Materials You Need
Building a cheap spot welder doesn’t require rare parts. Most items are available at hardware stores or online.
- Microwave oven transformer (MOT): The heart of the welder. Used ones are easy to find.
- Thick copper cable: For welding leads. 8 AWG or thicker is best.
- Copper rods or electrodes: Used for the welding tips.
- Solid wood or plastic: For handles and insulation.
- Bolts, nuts, and washers: For mounting electrodes.
- Electrical tape or heat shrink: For insulation.
- Switch or foot pedal: To control welding duration.
- Wires and connectors: For wiring everything together.
- Basic tools: Screwdrivers, drill, saw, wrench.
Optional:
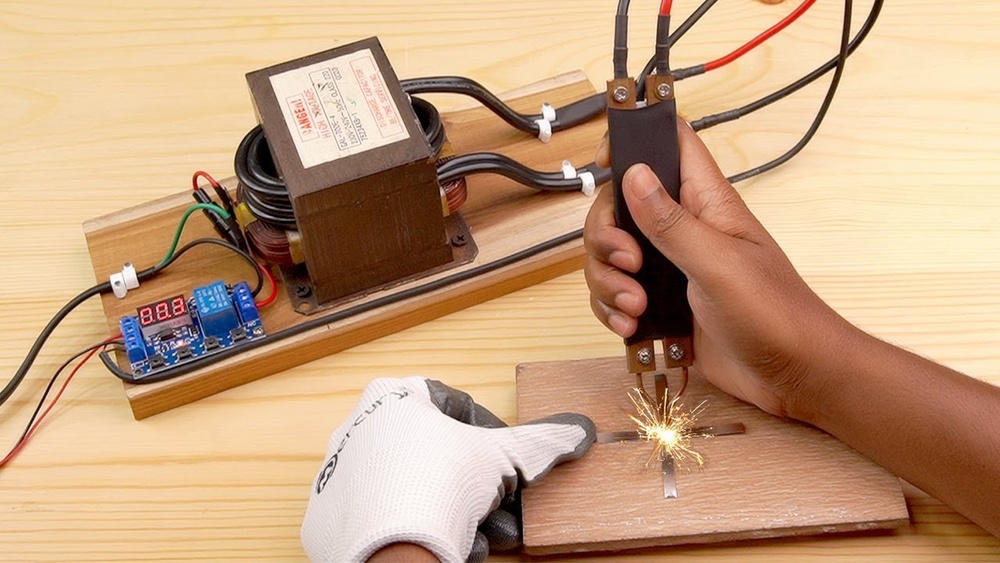
- Timer relay: For precise control of welding time.
- Cooling fan: To prevent overheating.
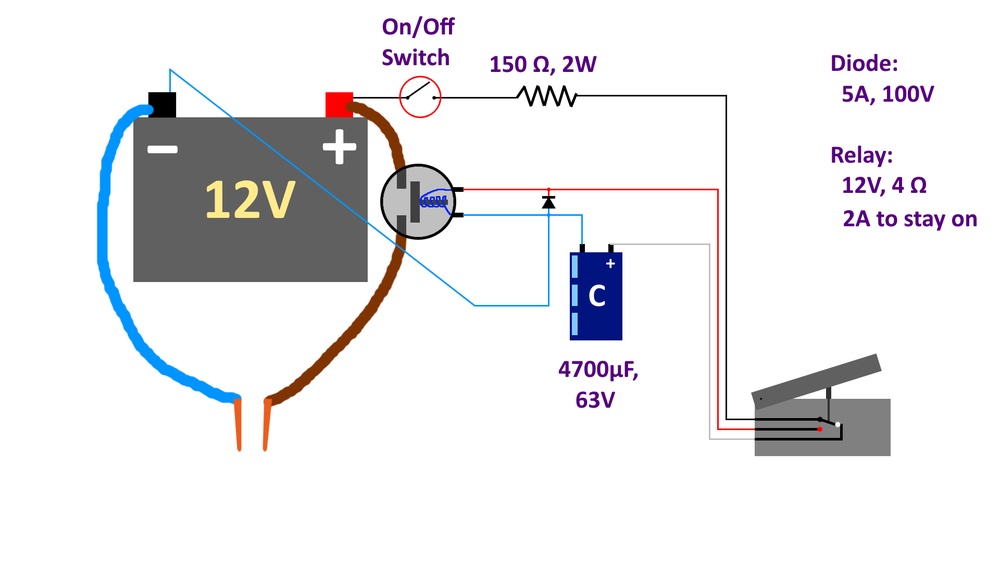
Some people try to use car batteries for spot welding, but this is risky and often ineffective. MOT-based welders are safer and more reliable.
Step-by-step Guide: Making A Cheap Spot Welder
This section gives clear steps to build a simple spot welder using a microwave oven transformer. This design is popular because MOTs are powerful and easy to modify.
1. Prepare The Microwave Oven Transformer
The transformer changes household voltage into high current. You need to remove the secondary winding and add a new one.
- Take apart the microwave. Remove the transformer carefully.
- The transformer has two coils: Primary (thicker wire) and secondary (many thin wires).
- Cut and remove the secondary winding using a hacksaw or chisel. Be careful not to damage the primary coil.
- Clean the core. Make sure there are no leftover wire pieces.
Non-obvious tip: Many beginners forget to leave some space for the new coil. Always check the fit before winding new wire.
2. Add A New Secondary Coil
To get high current, add a few turns of thick copper wire.
- Use 2–3 turns of 8 AWG copper wire. The wire must be insulated.
- Wind the wire tightly around the core where the secondary was.
- Secure the ends with bolts or heavy-duty connectors.
A common mistake is using too many turns. More turns reduce current and make welding weak.
3. Build The Electrode Arms
Electrode arms hold the welding tips and deliver current to the metal.
- Cut two pieces of solid wood or thick plastic, about 12–18 inches long.
- Drill holes at the end for copper rods.
- Fit copper rods or bolts at the ends. These are your electrodes.
- Fix the copper cable to each arm using bolts and washers.
Practical insight: Use copper rods from old plumbing or electrical connectors. Don’t use aluminum, as it wears out fast.
4. Assemble The Welder
Connect the transformer, cables, and arms together.
- Mount the transformer on a solid base.
- Attach electrode arms to the base, so they can move together.
- Connect copper cables from the transformer to each electrode.
- Insulate all exposed wires with tape or heat shrink.
If you have a timer relay, connect it to the switch or foot pedal. This gives better control and prevents overheating.
5. Add A Control Switch
You need a way to turn the welder on and off quickly.
- Use a heavy-duty switch or a foot pedal.
- Wire the switch between the transformer and power supply.
- Test the switch before welding.
Most people use foot pedals for hands-free control. This is safer and keeps your hands away from the electrodes.
6. Test Your Spot Welder
Before using on real projects, test the welder on scrap metal.
- Plug in and press the electrodes together on a piece of steel or nickel strip.
- Activate the switch for 0.5–2 seconds.
- Check if the metals are joined firmly.
- If the weld is weak, increase current or time. If it burns through, decrease.
Hidden insight: Some metals, like stainless steel, require more current or longer weld times. Always test before starting big jobs.
Comparing Homemade Spot Welders Vs Commercial Models
Building your own spot welder is cheap, but how does it compare to buying a commercial unit? Here’s a quick data comparison:
| Feature | Homemade MOT Welder | Commercial Spot Welder |
|---|---|---|
| Cost | $30–$80 | $300–$2000 |
| Max Current | 150–400A | 200–800A |
| Precision | Manual or timer relay | Digital control |
| Durability | Depends on build quality | Engineered for long life |
| Safety | Basic, requires care | Certified, safer |
| Repairability | Easy, parts available | May need manufacturer |
For most hobbyists, a homemade spot welder is enough. Commercial units are better for industrial work or frequent welding.
Practical Tips For Better Spot Welding
Getting good welds takes practice. Here are some tips:
- Clean the metal: Remove rust, paint, and oil before welding. Dirty surfaces cause weak joints.
- Adjust weld time: Start with short bursts. Increase only if needed.
- Keep electrodes sharp: Flat or worn electrodes produce weak welds. Reshape them with a file.
- Use proper pressure: Press electrodes firmly together, but don’t crush the metal.
- Let the welder cool: After 10–20 welds, let the transformer rest to avoid overheating.
Many beginners don’t check electrode alignment. If the tips don’t touch evenly, welds will fail.
Common Mistakes To Avoid
Building and using a spot welder can be tricky. Avoid these mistakes:
- Using thin cables: Thin wires limit current and cause overheating.
- Not insulating connections: Bare wires are dangerous. Cover all exposed metal.
- Ignoring ventilation: Welding produces smoke. Always work in a well-ventilated area.
- Applying too much weld time: Long bursts melt metal excessively.
- Skipping tests: Always test on scrap before real work.
- Poor electrode material: Use only copper for tips. Other metals degrade quickly.
If you notice weak welds or burning, check your cable connections and electrode condition.
Example Projects With A Homemade Spot Welder
Once your welder is ready, you can use it for many projects. Here are some examples:
- Battery pack building: Spot weld nickel strips to connect cells. Used in electric bikes and tools.
- Sheet metal repair: Fix car panels or build small boxes.
- Metal art: Join thin metal pieces for sculptures.
- Electronics repair: Secure battery tabs or metal contacts.
Spot welding is especially useful for 18650 battery packs. Soldering damages batteries, but spot welding is fast and safe.
| Project Type | Metal Thickness | Recommended Weld Time |
|---|---|---|
| Battery Pack | 0.1–0.2 mm | 0.5–1.5 sec |
| Sheet Metal Repair | 0.2–1 mm | 1–3 sec |
| Metal Art | 0.2–0.5 mm | 0.5–2 sec |
| Electronics Repair | 0.1–0.3 mm | 0.5–1 sec |
Always adjust weld time and pressure for different materials.

Credit: extremediy.org
Improving Your Spot Welder Over Time
After building your basic welder, you may want to upgrade it. Here are some ideas:
- Add a timer relay: Automatic timing improves consistency.
- Install a cooling fan: Keeps the transformer cool during long jobs.
- Upgrade electrodes: Use thicker or shaped copper rods for better welds.
- Build a better enclosure: Use a metal box for safety and durability.
- Add an ammeter: Measure current for more precise control.
Some users add a digital timer for exact weld times. This reduces mistakes and makes battery pack building easier.
Troubleshooting Common Problems
Spot welders sometimes fail or make weak joints. Here’s how to fix common issues:
- Welder not working: Check power supply, switch, and connections.
- Weak welds: Clean metal, check electrode pressure, and increase current.
- Overheating: Use thicker cables, add cooling, or reduce weld frequency.
- Electrodes sticking: Reduce weld time or reshape tips.
If your transformer gets hot quickly, let it cool down or add a fan. Don’t weld continuously for more than a few minutes.
How Much Does It Really Cost?
Let’s break down the real cost of a homemade spot welder:
| Component | Estimated Cost |
|---|---|
| Microwave Transformer | $0–$20 (used) |
| Copper Cable (2–3 ft) | $10–$15 |
| Copper Rods/Electrodes | $5–$10 |
| Wood/Plastic Arms | $5–$10 |
| Switch/Foot Pedal | $10–$15 |
| Insulation Materials | $5–$10 |
| Timer Relay (optional) | $10–$20 |
| Total | $30–$80 |
Most parts can be found second-hand or recycled, which lowers costs even more.
Where To Find Parts And Resources
Finding parts is easy if you know where to look:
- Old microwaves: Ask friends, check recycling centers.
- Hardware stores: Buy copper rods, cables, and insulation.
- Online marketplaces: Search for used transformers and timer relays.
- Electronics shops: Find switches and connectors.

Credit: www.youtube.com
Wrapping Up
Building a spot welder for cheap is a rewarding project. It teaches you about electricity, metalwork, and safety. With careful planning and attention to detail, you can make a reliable tool for home and workshop use. Remember to start small, test often, and always put safety first.
Frequently Asked Questions
How Dangerous Is A Homemade Spot Welder?
Homemade spot welders use high current, which can cause burns, shocks, or fire. Always wear protective gear and double-check all connections. Never use the welder in wet conditions.
Can I Use A Car Battery Instead Of A Transformer?
While some people try car batteries for spot welding, it is risky and usually gives poor results. Car batteries cannot deliver the required burst of high current safely. A microwave transformer is much better.
What Metals Can Be Spot Welded?
Spot welding works best for steel and nickel sheets under 2 mm thick. Copper and aluminum are more difficult because they conduct heat away quickly. For battery packs, nickel strips are ideal.
How Do I Know If My Weld Is Strong?
A good spot weld will hold two metal sheets together without breaking. You can test by pulling the sheets apart. If the metal tears before the weld breaks, your weld is strong.
How Long Should Each Weld Last?
Most welds take 0.5–2 seconds depending on metal thickness and current. Start with short bursts and adjust as needed. Using a timer relay helps you get consistent results.