Welding is a powerful skill that shapes metal for construction, repairs, or creative projects. But even the best welder needs the right workspace. That’s where a welding table comes in. If you’re just starting or want to improve your results, learning how to use a welding table correctly makes a big difference.
This article will guide you step-by-step, covering setup, safety, clamping, alignment, and tips that beginners often miss.
You’ll also find practical data, real examples, and answers to common questions. Let’s get started and make your welding safer, easier, and more precise.
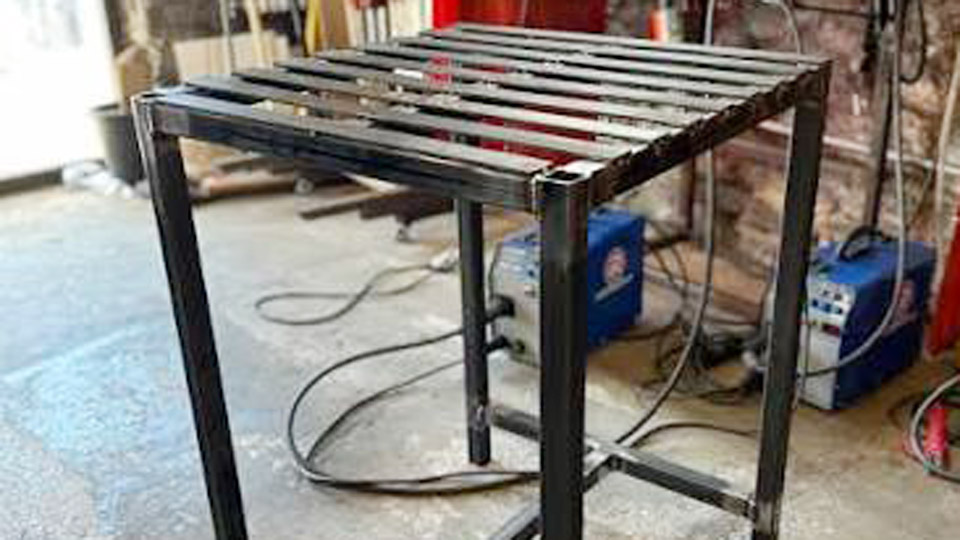
Image by theweldspace
Why A Welding Table Matters
A welding table is much more than a flat surface. It’s designed for heavy-duty work, with features that help you clamp, align, and weld metal pieces accurately. Unlike basic benches, welding tables resist heat, allow grounding, and offer plenty of holes or slots for tools. Using one gives you:
- Stable workspace: Prevents pieces from moving during welding.
- Safety: Reduces fire risks and keeps your tools organized.
- Accuracy: Lets you align parts and produce clean, strong welds.
- Efficiency: Saves time by holding parts and tools in place.
Many beginners think any flat surface will do. This mistake often leads to uneven welds, warping, and unsafe conditions. Investing in a proper welding table is essential for both hobbyists and professionals.
Choosing The Right Welding Table
Before you use a welding table, you need to pick one that fits your needs. Welding tables vary in size, material, features, and price. Here’s a quick comparison:
| Feature | Entry-Level Table | Professional Table |
|---|---|---|
| Size | 24″x36″ | 48″x96″ |
| Material | Steel (thin gauge) | Steel (thick, 1/2″ or more) |
| Weight Capacity | 300 lbs | 1000+ lbs |
| Surface Features | Few holes, basic slots | Grid holes, threaded inserts |
| Price Range | $100–$400 | $1000–$3000 |
Key factors when choosing:
- Size of your projects: Larger tables suit big welds. Smaller tables are portable.
- Material thickness: Thicker steel resists warping from heat.
- Surface features: Holes and slots help with clamping and alignment.
- Budget: Entry-level tables are cheaper but may limit precision.
A non-obvious insight: Many beginners overlook the importance of grounding points. Tables with built-in grounding reduce electrical hazards and improve weld quality.
Setting Up Your Welding Table
Proper setup is the foundation for safe and precise welding. Here’s what to do:
Location And Position
- Place your table in a well-ventilated area. Welding fumes are dangerous.
- Keep away from flammable materials. Metal sparks can ignite wood, paper, or chemicals.
- Ensure there’s space to move around. You’ll need room for tools, clamps, and materials.
Leveling And Stability
- Use a level to check the table surface. Even a slight tilt can ruin welds.
- Adjust feet or legs if your table has them. Stability prevents vibration during welding.
Electrical Grounding
- Attach a ground clamp to the table if your welder requires it.
- Check for paint or rust. Grounding works best on clean metal surfaces.
Organizing Tools
- Store welding tools close by: Clamps, hammers, wire brushes, gloves, helmet.
- Use side shelves or hangers if your table has them.
A practical tip: Many welders forget to test their grounding before starting. Run a small weld bead to check for proper grounding. Poor grounding often causes weak welds and excessive spatter.
Using Clamps And Fixtures
Clamping is a key skill when working with a welding table. Clamps hold parts steady, prevent movement, and allow you to weld accurately.
Types Of Clamps
- C-clamps: Strong grip for flat pieces.
- Quick-release clamps: Fast setup and removal.
- Magnetic clamps: Useful for odd angles and small parts.
- Corner clamps: Hold pieces at 90° for frames and boxes.
| Clamp Type | Best Use | Cost Range |
|---|---|---|
| C-clamp | Flat sheets, strong hold | $10–$30 |
| Quick-release | Frequent adjustments | $15–$40 |
| Magnetic | Small/angled pieces | $20–$50 |
| Corner clamp | Box/frame welding | $25–$60 |
How To Clamp
- Place metal pieces on the table.
- Align them as needed (using a square or tape measure).
- Select the right clamp for your project.
- Tighten clamps until pieces are secure, but not so tight that you bend the metal.
- Double-check alignment before welding.
A beginner mistake: Forgetting to check for thermal expansion. When metal heats up, it can expand and shift. Use clamps at multiple points and leave a small gap for expansion if welding long pieces.
Aligning Metal Pieces
Alignment is critical for strong, clean welds. Even small misalignments can weaken your project or make it look unprofessional.
Tools For Alignment
- Squares: Help keep angles at 90°.
- Tape measures: Check lengths and distances.
- Levels: Ensure flatness.
- Marking chalk: Draw lines for precise placement.
Steps For Accurate Alignment
- Clean the surfaces with a wire brush or grinder.
- Mark lines or points where pieces should meet.
- Use squares and levels to keep parts at the correct angle.
- Clamp everything tightly once aligned.
- Tack weld (make small welds) at key points before final welding.
A non-obvious tip: Tack welds should be spaced evenly. If you only tack at the ends, metal can warp in the middle. Place tack welds every 4–6 inches for longer pieces.
Welding Techniques On A Table
Now that your parts are clamped and aligned, it’s time to weld. Using a welding table makes this easier and safer, but you still need to follow proper technique.
Basic Welding Steps
- Put on safety gear: Helmet, gloves, jacket.
- Check the welding machine settings for your metal type and thickness.
- Position the torch or electrode at the right angle (usually 15–30° from vertical).
- Start with a tack weld to hold pieces together.
- Weld along the seam, moving steadily and evenly.
- Pause if needed to clean spatter or check alignment.
Table Features That Help
- Grid holes: Let you clamp at many points.
- Grounding slots: Make electrical contact easier.
- Flat surface: Prevents metal from sagging.
Cleaning Up
- After welding, use a wire brush or grinder to clean the weld bead.
- Remove clamps only after the metal cools. Hot metal can shift or warp if released too soon.
A practical insight: Many beginners don’t use the table’s holes to their full advantage. Try repositioning clamps in different holes for tricky welds or odd shapes.
Advanced Uses For Welding Tables
A welding table isn’t just for basic joining. With experience, you can use it for more complex tasks:
Jig Setup
- Build custom jigs for repeated welds. Jigs are fixtures that hold parts in a specific shape.
- Use threaded holes or inserts to mount jigs securely.
Fabrication And Assembly
- Weld multiple pieces together to form structures, frames, or supports.
- Tables help keep everything square and aligned.
Cutting And Grinding
- Most tables can handle cutting torch use or grinding metal.
- Use clamps to hold pieces during cutting for safety.
Repairs And Modifications
- Set up parts for repair, such as broken brackets or machinery.
- Tables let you work on heavy parts without lifting.
A non-obvious advantage: Welding tables let you practice new techniques, like multipass welds or different joint types (butt, lap, T-joint), without worrying about holding the metal by hand.
Safety Tips For Using A Welding Table
Safety is always first in welding. A welding table helps, but you must follow good practices.
Essential Safety Rules
- Wear flame-resistant clothing, gloves, helmet, and safety glasses.
- Keep a fire extinguisher nearby.
- Check for loose cables and grounding before each weld.
- Work in a well-ventilated space to avoid fumes.
Table Safety
- Don’t weld on painted or rusty surfaces; fumes can be toxic.
- Avoid placing flammable items on or near the table.
- Let metal cool before touching or moving.
Electrical Safety
- Always check grounding connections.
- Inspect cables for wear or damage.
- Disconnect power when changing parts or cleaning the table.
A statistic: According to the US Bureau of Labor Statistics, over 5000 welding-related injuries occur annually in the US. Most are preventable with proper safety habits.
Maintaining Your Welding Table
A welding table is a long-term investment. Regular maintenance keeps it safe and functional.
Cleaning
- Wipe the surface after each use. Metal dust and spatter can build up.
- Use a wire brush for stubborn spots.
- Avoid water, as it can cause rust.
Preventing Rust
- Apply a light coat of oil to the surface every few weeks.
- Store the table indoors or cover it if outside.
Checking For Damage
- Inspect for cracks, warping, or loose bolts.
- Fix problems before your next weld.
Upgrading
- Add new clamps, fixtures, or jigs as your skills grow.
- Consider adding wheels for mobility if your workspace changes.
A beginner mistake: Forgetting to oil the surface leads to rust, which affects grounding and weld quality. Make this a regular habit.
Common Welding Table Mistakes And How To Avoid Them
Everyone makes mistakes, especially when new to welding. Here are some common ones with solutions:
- Skipping grounding: Always connect the ground clamp. Poor grounding causes weak welds.
- Over-tightening clamps: Too much force bends metal. Tighten until secure, not until deformed.
- Ignoring table level: Use a level. Even small tilts affect weld strength.
- Not cleaning the surface: Dirt and rust interfere with welds and grounding.
- Using wrong clamps: Match the clamp type to your project for best results.
- Letting metal cool unevenly: Remove clamps only after the metal is cool to avoid warping.
- Forgetting tack welds: Tack before final welding to prevent shifting.
A practical tip: Write a checklist before each welding session. It helps you remember grounding, clamp choice, and alignment.
Comparing Welding Tables To Other Work Surfaces
Some welders use basic workbenches or improvised tables. Let’s compare:
| Surface Type | Heat Resistance | Grounding | Clamping Options | Safety |
|---|---|---|---|---|
| Welding Table | High | Excellent | Multiple holes/slots | Very safe |
| Wood Bench | Low | Poor | Few options | Unsafe (fire risk) |
| Steel Workbench | Medium | Good | Limited | Safer than wood |
A welding table is always safer and more efficient. Improvised surfaces limit your results and increase risks.
Practical Examples And Real-life Uses
Let’s look at how welders use tables for different jobs:
- Automotive repair: Welding frames or exhaust pipes needs precise alignment. Tables hold parts securely.
- Metal art: Artists weld sculptures on tables for stability and accuracy.
- Construction: Professionals build gates, fences, and supports on large tables.
- Home projects: DIYers make furniture or fix broken tools on small welding tables.
A real-life insight: Many welders create custom jigs for repeated parts, like brackets or hinges. This saves hours and ensures every piece matches.
Frequently Asked Questions
What Size Welding Table Should I Buy?
Pick a table based on your typical project size. For small DIY jobs, a 24″x36″ table is enough. For professional work, aim for 48″x96″ or larger. Consider your workspace and how often you move projects.
Can I Use A Welding Table Outside?
Yes, but protect it from weather. Rain causes rust, and wind can blow sparks. Cover the table after use and check for rust often. Work in a shaded area to avoid glare.
How Do I Clean A Welding Table?
Use a wire brush to remove spatter and dirt. Wipe with a dry cloth. Apply a thin layer of oil to prevent rust. Avoid water and harsh chemicals.
What Clamps Work Best For Welding Tables?
C-clamps and quick-release clamps are best for general use. Corner clamps are ideal for frames. Magnetic clamps help with odd shapes. Choose clamps based on your project and table features.
Is A Welding Table Safe For Beginners?
Yes. Welding tables are safer than regular benches. They prevent fire risks, offer stable clamping, and improve grounding. Always follow safety rules, wear gear, and check your setup before welding.
Wrapping Up
Welding tables make metalwork easier, safer, and more precise. Whether you are new or experienced, using one correctly brings better results. With the right setup, tools, and habits, you’ll build stronger projects and enjoy welding more. Remember, even small improvements in your workspace can lead to big gains in quality and safety.