
Attempting to repair cracked plastic without understanding how to weld plastic together with JB Weld can lead to weak bonds, recurring cracks, or complete repair failure.
Unlike thermal plastic welding, JB Weld creates a structural adhesive bond rather than melting and fusing the plastic, making proper surface preparation and product selection essential for a durable repair.
Factors such as the plastic type, joint design, and curing time all influence the final strength of the repair. Whether you’re fixing an automotive trim piece, household item, or plastic housing, using the correct application technique helps improve adhesion and extend the life of the repair.
Understanding when JB Weld is the right solution—and when traditional plastic welding is a better option—will help you achieve stronger, longer-lasting results while avoiding common repair mistakes.
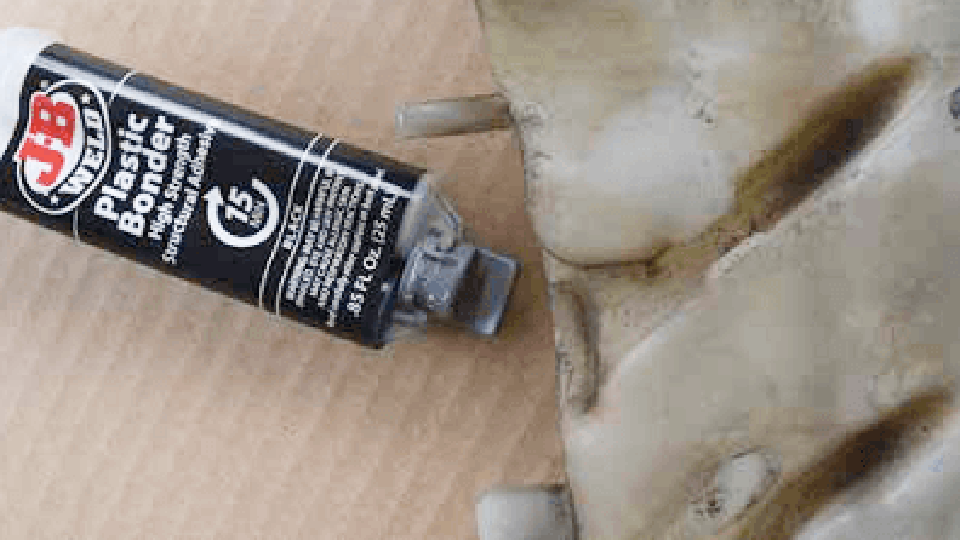
Image by mechanics-mag
Selecting the Right JB Weld Product for Plastic
PlasticWeld Syringe Versus PlasticBonder
PlasticWeld Syringe is a two-part epoxy formulated for rigid plastics. It delivers 3900 PSI tensile strength, sets in five minutes at room temperature, and reaches full cure in one hour.
The cured material is translucent yellow and works well on PVC, ABS, and many composites. It is best when you need a relatively clear bond line and moderate gap filling.
PlasticBonder is a two-part urethane adhesive. It provides 3770 PSI tensile strength, sets in 15 minutes, and can be sanded after 30 minutes.
Available in black or tan, it bonds thermosets, thermoplastics, carbon-fiber composites, coated metals, and concrete. The longer open time gives more working room for larger assemblies or parts that require precise alignment.
Choose PlasticWeld Syringe when speed and clarity matter on rigid substrates. Choose PlasticBonder when the part experiences impact, vibration, or needs a color match to black plastic.
When to Use PlasticWeld Epoxy Putty
The putty version is a hand-kneadable stick rated at only 700 PSI. It has a 20–25 minute work life and functional cure in two to three hours. Use it exclusively for filling voids, rebuilding missing sections, or creating a moldable fillet—not for primary structural joints.
After curing it can be drilled, sanded, and painted, but the lower strength means it should always be backed by a higher-strength adhesive or mechanical reinforcement when load is present.
Plastics That Refuse to Bond
Most JB Weld products, including the plastic-specific lines, show poor adhesion to polypropylene (PP), polyethylene (PE/HDPE/LDPE), and PTFE (Teflon). These low-surface-energy polymers resist wetting.
If the part is marked PP or PE, or if a simple water-drop test shows the liquid beading rather than spreading, do not rely on JB Weld alone. Specialty plastic welders that melt the base material or primers designed for polyolefins are required.
Surface Preparation That Determines Bond Integrity
Cleaning Agents That Actually Work
JB Weld technical guidance specifies acetone or lacquer thinner for final cleaning. These solvents remove oils, mold-release agents, and residual plasticizers without leaving a film.
Soap and water can be used for initial degreasing, but the surface must be completely dry afterward. Alcohol is not recommended because it can leave petroleum residues that interfere with adhesion.
After solvent wipe, allow full evaporation. Any remaining solvent trapped under the adhesive creates voids that reduce shear strength.
Mechanical Abrasion Requirements
Light sanding with 80–120 grit paper or a Scotch-Brite pad creates the microscopic roughness needed for mechanical interlocking. On smooth injection-molded surfaces the adhesive relies almost entirely on this texture.
Remove all dust with a clean, dry cloth or compressed air before applying adhesive. Do not touch the prepared surface with bare hands; skin oils recontaminate the area instantly.
Handling Contaminated or Painted Surfaces
Paint, primer, or old adhesive must be removed down to bare plastic. Scrape or sand until the substrate is exposed. On glass-filled or fiber-reinforced plastics, avoid aggressive grinding that exposes fibers excessively; the goal is a uniform matte surface, not a polished or fiber-rich one.
Application Technique and Working Time Control
Mixing Ratios and Dispensing
Both PlasticWeld Syringe and PlasticBonder use a 1:1 mix ratio. The dual-syringe design meters equal volumes when the plunger is depressed evenly. For critical joints, dispense onto a clean mixing surface and stir thoroughly until the color is uniform. Incomplete mixing leaves uncured resin pockets that become failure points under load.
Static mixers supplied with some packages can be used for continuous bead application, but they are single-use. Once material begins to thicken inside the mixer, discard it.
Open Time Versus Clamp Time
PlasticWeld’s five-minute set time requires rapid assembly. Position parts, apply adhesive, and clamp or tape within that window. PlasticBonder’s 15-minute set allows more adjustment. In both cases, maintain pressure until the adhesive reaches handling strength.
Excessive clamp pressure can squeeze the bond line too thin; aim for a continuous film roughly 0.1–0.5 mm thick depending on gap.
Temperature below 40 °F slows both set and cure. Warm the parts and adhesive to room temperature before use for consistent results.
Gap Filling Strategy
For gaps larger than 1–2 mm, first fill with PlasticWeld putty to rebuild the geometry, allow it to reach functional cure, then apply a structural layer of PlasticBonder or PlasticWeld Syringe over the repaired area. This hybrid approach combines bulk fill capability with higher tensile performance at the joint interface.
Strength Expectations and Service Limitations
Interpreting Published Tensile Values
The 3900 PSI and 3770 PSI figures are laboratory tensile strengths measured on properly prepared specimens. Real-world joint strength is lower because of peel forces, uneven loading, and residual stresses in molded parts.
Design the repair so the adhesive primarily carries shear rather than pure tension or peel. Overlap joints and scarf geometries outperform butt joints.
Heat, Chemical, and Moisture Resistance
Both products are rated to approximately 250 °F continuous. Short-term exposure slightly above that temperature is usually tolerable, but prolonged heat softens the bond. Water resistance is limited; neither product is intended for continuous immersion or high-pressure fluid exposure.
Fuel and strong solvents can attack the cured material over time. For under-hood or chemical environments, verify compatibility with a small test sample.
Post-Cure Machining and Finishing
After full cure, PlasticBonder can be sanded at 30 minutes; PlasticWeld Syringe reaches sandable condition closer to one hour. Both accept most automotive primers and paints once the surface is cleaned of any residual amine blush. Drill and tap only after full cure to avoid cracking the still-maturing polymer.
Real-World Joint Design Choices
Reinforcing High-Stress Repairs
On bumper covers, radiator tanks, or load-bearing brackets, add mechanical reinforcement. Fiberglass cloth wetted with the same adhesive, or small metal or plastic patches bonded across the joint, distribute stress and raise the effective load capacity.
For cracked ABS instrument panels or PVC fittings, a simple scarf joint combined with a thin reinforcing strip on the back side often restores original strength.
Temperature and Humidity Effects During Cure
High humidity can interfere with urethane systems such as PlasticBonder. Work in a controlled environment when possible. Extreme cold extends open time but delays full strength development; heat accelerates both but can reduce final properties if the mix becomes too hot before application.
Testing Before Full Service
After the recommended cure period, apply a controlled load or flex the part while observing the bond line. Any cracking, peeling, or soft spots indicate incomplete preparation or mixing. Repair failures discovered in the shop are far cheaper than failures in service.
Decision Framework for Permanent Versus Temporary Repairs
When the plastic is rigid, the joint can be designed in shear, and surface energy is adequate, JB Weld PlasticWeld or PlasticBonder produces a durable, paint-ready repair that often outlasts the surrounding material.
When the polymer is PP or PE, or the part experiences continuous flexing and high impact, the adhesive approach becomes a temporary measure at best.
In those cases the correct long-term solution is either a true hot-gas or extrusion plastic welder that melts compatible filler rod into the base material, or complete replacement of the part.
Matching product chemistry to polymer type, enforcing solvent cleaning plus abrasion, and designing the joint for shear rather than peel remain the three variables that separate successful field repairs from repeated failures.


