
Corroded or leaking copper water lines force a choice between soldering in new rigid sections or switching to flexible piping. The decision on how to replace copper pipe with flexible piping determines labor time, long-term reliability under freeze-thaw cycles, and whether open-flame work is even possible inside finished walls.
Flexible options—primarily PEX tubing and, in limited cases, soft copper coils—eliminate most fittings, reduce galvanic risk at transitions, and allow continuous runs through framing without the heat and skill demands of sweat joints.
Incorrect fitting selection or improper preparation of the copper stub produces leaks that appear only under sustained pressure, turning a simple repair into structural damage.
Matching the transition method to access constraints, code requirements, and the expected service life of the line keeps the system watertight and serviceable.
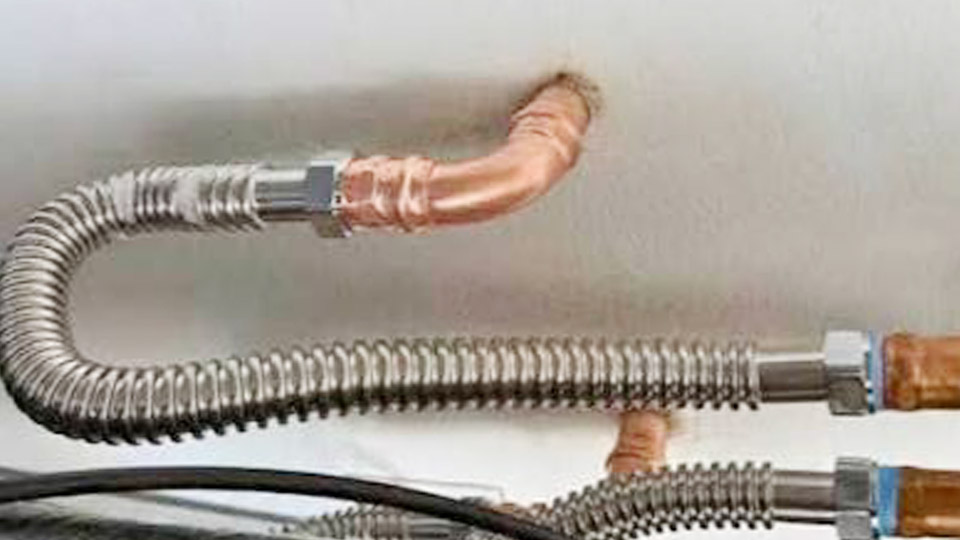
Image by To Do Plumbing
Choosing the Flexible Material for Copper Replacement
Material selection controls flexibility, connection method, freeze performance, and inspector acceptance. The two practical flexible choices for potable water are cross-linked polyethylene (PEX) and soft (annealed) copper tubing. Rigid copper is left only where codes or high-temperature exposure demand it.
PEX-A Expansion System Performance
PEX-A offers the highest degree of cross-linking and the greatest flexibility. It expands under freeze conditions roughly three times more than other PEX types before rupturing, then returns closer to original dimension.
Connections use an expansion tool that enlarges the tube and a PEX ring; the tube’s memory shrinks the material tightly onto the fitting barbs within seconds. Working pressure ratings typically reach 160 psi at 73 °F and 100 psi at 180 °F.
The system produces the strongest mechanical joint of the common PEX methods and is preferred for long home-run lines from a manifold where continuous runs reduce potential leak points.
PEX-B Crimp and Cinch Characteristics
PEX-B is the most widely stocked and lowest-cost option. It relies on copper crimp rings or stainless-steel cinch clamps compressed over barbed fittings. Crimp tools must be calibrated; a go/no-go gauge verifies the ring diameter after compression.
Cinch clamps require less clearance and work well in tight joist spaces. Freeze resistance is good but lower than PEX-A. Pressure and temperature ratings match PEX-A under normal residential conditions.
PEX-B is the practical default for branch-and-tee replacements where tool cost and speed matter more than maximum expandability.
When Flexible Copper Tubing Makes Sense Instead
Soft copper coils remain useful for short appliance connections, water-heater stubs, or locations where plastic is restricted by local code or temperature. The tubing bends with a spring bender to avoid kinks; once kinked it must be discarded.
Joints are still made by soldering or compression fittings, so the flexibility advantage is limited to routing, not to eliminating heat. Flexible copper retains the same corrosion and thermal-expansion behavior as rigid copper and does not solve the original problem of pinhole leaks in aggressive water chemistry.
Selecting the Copper-to-Flexible Transition Fitting
The transition is the highest-risk point. Three primary methods exist; each trades permanence, tool requirement, and accessibility.
Push-to-Connect Fittings for Speed and Accessibility
Brass push-to-connect fittings (SharkBite-style) accept both copper and PEX on opposite ends. An internal stainless grab ring and O-ring seal the joint when the pipe is inserted to the marked depth—typically 0.95 in for ½-in tubing.
No specialized tools beyond a deburring tool and depth gauge are required. These fittings are rated for permanent installation in most jurisdictions when used on clean, round pipe within the manufacturer’s pressure and temperature limits.
They excel in finished spaces or crawlspaces where torch work is impractical. Cost per joint is higher, but labor time drops sharply.
Crimp or Cinch Mechanical Connections
A copper-to-PEX adapter with a smooth copper socket or male thread on one side and barbs on the other is used. The copper side may be soldered or threaded; the PEX side receives a crimp ring or cinch clamp.
Position the ring ⅛–¼ in from the tube end, centered over the barbs, then compress until the tool releases or the gauge confirms proper diameter.
This method produces a compact, low-profile joint favored by many inspectors for concealed locations. Tool investment is moderate and rings are inexpensive.
Sweat Adapters for Permanent Installations
A female or male sweat adapter is cleaned, fluxed, and soldered directly onto the prepared copper stub. The opposite end accepts a PEX barb, expansion fitting, or threaded transition. This creates the smallest footprint and is preferred in open mechanical rooms or new construction.
Heat must be controlled so residual temperature does not travel into any nearby PEX; a wet rag or heat-blocking putty protects plastic components. Once cooled, the joint is permanent and matches traditional copper practice.
Preparing the Existing Copper Stub and Routing the New Line
Surface condition and geometry of the copper end control seal integrity more than the fitting itself.
Cutting, Deburring, and Cleaning Requirements
Shut off the supply and drain the line completely. Cut the copper with a wheel-type tubing cutter to produce a square face; avoid hacksaw cuts that leave oval or jagged ends. Deburr both the inside and outside edges so no sharp material can cut an O-ring or prevent full insertion.
Clean the exterior with emery cloth or a wire brush until bright metal is visible for the length of the fitting engagement. Oxidation or residual flux left under a push-fit seal is a common source of delayed weeping.
Support Spacing and Bend Radius Limits
PEX must be supported horizontally at intervals of 32 in for 1-in and smaller diameters (check local code; some jurisdictions require 24–32 in). Use plastic or coated metal clamps that do not crush the tube.
Maintain the manufacturer’s minimum bend radius—typically 8 times the outside diameter for PEX-B and tighter for PEX-A—to prevent kinking or flow restriction.
Route through the center of studs and joists; protect any section within 1½ in of the edge with steel strike plates. Continuous runs reduce fittings but still require expansion loops or offsets on long hot-water lines to accommodate thermal movement.
Connection Sequence and System Verification
Execution order and verification prevent the most frequent callbacks.
Insertion Depth and Tool Calibration Checks
Mark insertion depth on both copper and PEX with the fitting’s gauge or manufacturer’s specification. For push-fit, push firmly until the mark disappears and the grab ring engages.
For expansion systems, expand the tube and ring, slide over the fitting within the working window (usually 8–10 seconds), and allow full recovery.
For crimp systems, verify every ring with the go/no-go gauge immediately after compression. A single under-crimped ring will pass visual inspection yet fail under pressure.
Isolation, Filling, and Leak Inspection
After all joints are complete, close fixture valves and slowly reopen the main supply while watching every transition. Pressurize to working pressure first, then raise to 1½ times working pressure or the code-required test pressure for the prescribed hold time (commonly 15–30 minutes with no drop).
Inspect each joint visually and by touch for moisture. Any leak requires the joint to be cut out and remade; push-fit fittings can sometimes be removed with the manufacturer’s tool and reused once, while crimped or expanded joints cannot.
Material Compatibility, Code Constraints, and Service Life Factors
Dissimilar-metal contact, UV exposure, and temperature limits govern longevity.
PEX must not contact bare copper or steel in a way that creates sustained stress or galvanic cells without isolation. Brass transition fittings provide the necessary barrier. Keep PEX away from direct sunlight and high-temperature sources such as flue pipes or recessed lighting; UV and sustained temperatures above 180–200 °F degrade the polymer.
Local codes may restrict PEX in certain commercial or multi-family applications or require specific listing marks (NSF, ASTM). Manifold (home-run) layouts improve pressure balance and isolate fixtures but increase tubing length; traditional branch-and-tee layouts use less material yet place more joints in series.
Wrapping Up
When the copper section is short and accessible, a push-to-connect or crimp transition completed in under an hour restores service with minimal disruption. Full-house conversion favors PEX-A or PEX-B run from a central manifold, eliminating most intermediate fittings and providing superior freeze tolerance.
The decisive variables remain access for tools or torch, required permanence, and the water chemistry that originally attacked the copper.
Matching the transition method and support schedule to those constraints produces a system whose leak rate is lower than the copper it replaces and whose service intervals are measured in decades rather than years.
Advanced practice further reduces risk by documenting every joint type and test pressure for future reference, allowing any later modification to reuse the same approved connection standard.


