
Building your own welded table is one of the most rewarding DIY metalworking projects. Whether you need a sturdy workbench, a custom dining table, or a unique piece for your workshop, welding gives you strength, flexibility, and creative freedom.
Many beginners feel nervous about making their first welded table, but with the right approach, tools, and a clear plan, you can create a solid, professional-looking piece—no matter your skill level.
This guide walks you through every step: planning, material selection, safety, welding techniques, assembly, finishing, and practical tips to avoid common mistakes. If you want your table to last for years, pay attention to the small details that make all the difference.
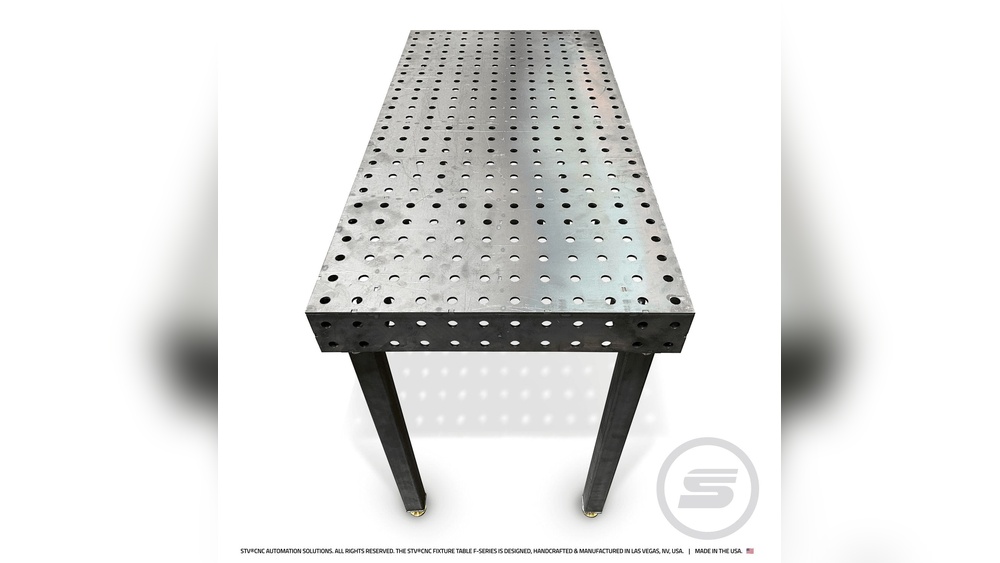
Planning Your Welded Table
A good plan is the heart of any successful welding project. Before you start, think carefully about table size, purpose, and location. These factors affect everything from material choice to welding technique.
Choosing The Table Type
Ask yourself: Why do I need this table? Common options include:
- Workbench: Strong, meant for heavy use.
- Dining table: Stylish, may use thinner metal.
- Side table: Smaller, less weight.
Think about dimensions. For example, a standard workbench is about 60” long x 30” wide x 34” high. For dining tables, 72” x 36” x 30” is typical.
Sketching And Measurements
Draw a simple sketch. Mark the length, width, and height. Show leg placement and bracing. Don’t guess! Accurate measurements prevent costly errors later.
Material Selection
Metal tables use different materials:
- Mild steel: Most common; easy to weld.
- Stainless steel: Resists rust; harder to weld.
- Aluminum: Lightweight; needs special welding.
For beginners, mild steel square tubing is ideal. It’s strong, affordable, and easy to cut.
Gathering Materials
List everything you’ll need:
- Metal tubing (for frame/legs)
- Tabletop material (metal sheet, wood, or glass)
- Welding rods or wire
- Grinding discs
- Paint or finish
Buy about 10% extra metal—mistakes happen.
Essential Tools And Safety Gear
Welding requires more than just a welder. Safety is critical, and the right tools make the work smoother.
Welding Equipment
There are several types of welders. Here’s a comparison of the most common:
| Welder Type | Skill Level | Typical Use | Cost Range |
|---|---|---|---|
| MIG | Beginner | General fabrication | $200–$900 |
| TIG | Advanced | Precise welds | $700–$2,500 |
| Stick | Intermediate | Heavy-duty | $150–$800 |
MIG welders are easiest for beginners. They work well with mild steel tubing.
Other Tools
- Angle grinder: For cleaning welds and cutting metal.
- Clamps: Hold pieces in place.
- Measuring tape and square: For accurate cuts.
- Wire brush: Cleans weld area.
Safety Gear
Never weld without:
- Welding helmet: Protects eyes from UV.
- Leather gloves: Prevent burns.
- Fire-resistant jacket: Shields arms and chest.
- Respirator: Stops inhaling fumes.
- Steel-toe boots: Guard feet.
According to the US Bureau of Labor Statistics, welding injuries are most often caused by not wearing proper protection. Invest in quality safety gear—your health is worth more than the table.
Cutting And Preparing The Metal
Good welds start with clean, correctly cut metal. Rushing this step leads to uneven joints and weak welds.
Measuring And Marking
Use a measuring tape and metal square to mark each piece. Double-check every measurement before cutting.
Cutting Techniques
You can cut metal with:
- Angle grinder: Good for small jobs.
- Metal chop saw: Faster and more accurate.
- Plasma cutter: Expensive but precise.
For square tubing, an angle grinder with a cutoff wheel is enough for most DIY tables.
Cleaning The Metal
Welds won’t stick to dirty or rusty metal. Clean each cut edge with a wire brush or grinder. Remove paint, oil, and rust. This step improves weld strength and reduces spatter.
Dry Fitting
Before welding, lay out all the pieces on the floor or workbench. Check the fit. If anything looks crooked or doesn’t match your sketch, fix it now. Beginners often skip this step, but it saves hours later.
Setting Up For Welding
A stable, safe work area is essential. Welding produces heat, sparks, and fumes. Prepare your space carefully.
Work Surface
Use a steel workbench or heavy metal table. Wood surfaces can catch fire. Keep the area clear of flammable materials.
Securing The Pieces
Clamp the metal pieces tightly. Even slight movement can ruin the weld. Use corner clamps for the legs and frame—this keeps everything square.
Checking Alignment
Use a carpenter’s square at each joint. Misaligned legs are a common mistake. If your table isn’t square now, it won’t be later.

Credit: askforney.com
Welding The Frame
Now you’re ready to weld. Most DIY tables use a simple frame: four legs, bracing, and a top support.
Tack Welding
Start with tack welds. These are small welds that hold pieces together, but aren’t permanent. Tack each joint, then check alignment again. If something is crooked, you can break a tack weld and adjust.
Full Welds
Once everything is square, start welding each joint fully. Move slowly and steadily. Beginners often weld too fast—this causes weak welds and poor penetration.
Common Welding Mistakes
- Welding over dirty metal (weak joints)
- Moving too fast (shallow welds)
- Using too much heat (burns through metal)
- Not clamping pieces (misalignment)
If you’re new to welding, practice on scrap metal first. This gives you confidence and helps you spot mistakes before working on your table.
Welding Bracing
Add cross braces for extra strength. Diagonal or horizontal braces prevent wobbling. Weld these after the main frame, checking alignment as you go.
Attaching The Tabletop
The tabletop can be metal sheet, wood, or glass. Each material needs a different approach.
Metal Tabletop
If using metal, cut a sheet to size. Weld it directly to the frame, or use bolts if you want it removable. For a heavy-duty workbench, metal is ideal.
Wood Tabletop
Wood adds warmth and style. Drill holes in the frame, then use lag screws to attach the wood. For a smoother finish, add rubber grommets between the metal and wood.
Glass Tabletop
Glass is stylish but fragile. Weld small metal tabs or supports onto the frame, then rest the glass on top. Use rubber pads to prevent slipping.
| Tabletop Material | Strength | Style | Maintenance |
|---|---|---|---|
| Metal | High | Industrial | Low |
| Wood | Medium | Warm | Medium |
| Glass | Low | Modern | High |
Grinding And Cleaning Welds
After welding, your table may have sharp edges, bumps, or splatter. Grinding improves both appearance and safety.
Using An Angle Grinder
Fit a grinding disc to your angle grinder. Smooth each weld until flush with the frame. Don’t grind too deep—you could weaken the joint.
Checking For Weak Spots
Look for cracks, gaps, or holes. If you find any, re-weld and grind again. Good welds should look like a smooth, even bead.
Cleaning The Surface
Wipe the frame with a cloth and solvent. Remove dust, grease, and metal shavings. This prepares the surface for painting or finishing.
Painting And Finishing
A painted or coated table resists rust and looks professional. Choose a finish that suits your space.
Painting Metal
Use rust-resistant paint. Spray paint works well for DIY tables. Apply at least two coats. Let each coat dry fully before the next.
Powder Coating
For a tougher finish, consider powder coating. This is more expensive but lasts longer. Many shops offer powder coating for about $50–$100 per table frame.
Protecting Wood Or Glass
Seal wood with polyurethane or oil. Clean glass with a non-abrasive cleaner.
Adding Adjustable Feet
For uneven floors, weld or bolt on adjustable feet. This prevents wobbling. These cost about $10–$20 for a set.
Practical Tips For A Strong, Lasting Table
Welding is part art, part science. Here are some tips from experienced welders:
- Practice welds on scrap metal first.
- Double-check measurements before cutting.
- Clamp everything before welding.
- Clean each joint thoroughly.
- Use tack welds to test fit.
- Let paint dry fully between coats.
- Don’t rush the process—good welds take time.
Many beginners forget to check for heat warping. Welds create intense heat, which can bend metal. Weld opposite sides in sequence to reduce warping.
Another overlooked step is checking table height after attaching the feet or tabletop. Adjust if needed before final finishing.
Common Mistakes And How To Avoid Them
Even experienced welders make mistakes. Knowing them ahead of time helps you build a better table.
Overheating The Metal
Too much heat burns holes in thin tubing. Use lower settings and move steadily.
Poor Alignment
If you don’t use clamps and a square, your table will wobble. Check alignment at every step.
Incomplete Cleaning
Paint, oil, or rust prevents strong welds. Always clean before welding.
Ignoring Safety
Welding without a helmet or gloves can cause severe injuries. Never take shortcuts.
Skipping Bracing
Tables without bracing are weak. Always add cross supports.
Cost Breakdown And Time Estimates
Building a welded table can be affordable, but costs vary. Here’s a typical breakdown:
| Item | Estimated Cost |
|---|---|
| Metal tubing (frame/legs) | $40–$100 |
| Tabletop material | $30–$150 |
| Welding wire/rods | $10–$20 |
| Paint/finish | $15–$40 |
| Adjustable feet | $10–$20 |
| Safety gear (if new) | $80–$200 |
Total cost: $85–$330 (excluding welder purchase).
Time estimate: Most DIY tables take 6–10 hours total. Beginners may need a weekend to finish.
Real-life Example: Building A Workbench
Let’s look at a practical example. Mark, a hobbyist welder, built a workbench for his garage:
- Frame: 2” x 2” mild steel tubing, cut to 60” x 30” x 34”
- Top: 14-gauge steel sheet
- Bracing: Horizontal supports at 12” and 24” heights
- Feet: Adjustable, bolted to frame
Mark spent $180 on materials and finished in two days. He used a MIG welder, clamped everything, and welded opposite sides to prevent warping. His workbench holds over 400 lbs, showing the strength of welded construction.
Advanced Options For Custom Tables
Once you master basic welding, you can try more advanced designs:
- Curved legs: Use a pipe bender.
- Decorative joints: TIG weld for cleaner finishes.
- Integrated shelves: Weld supports for extra storage.
- Custom colors: Powder coat in any shade.
Wrapping Up
Welding a table is a hands-on project that boosts your skills and gives you a custom piece to enjoy for years. With careful planning, the right tools, and attention to detail, even beginners can build a strong, attractive table.
Remember: safety and patience are your best friends. As you gain confidence, you’ll find endless ways to customize your tables for any space or need.
Frequently Asked Questions
What Is The Best Welder For Beginners?
A MIG welder is best for most beginners. It’s easy to use, works well with mild steel, and produces clean welds. Stick welders are cheaper, but harder to master. TIG welders give precise results but require more skill.
How Thick Should The Metal Be For A Table Frame?
For most tables, use 16-gauge or 14-gauge square tubing (about 1.5–2 mm thick). This gives enough strength without being too heavy. For heavy-duty workbenches, use thicker tubing.
Can I Weld A Table Without Professional Experience?
Yes, many DIYers weld tables with no prior experience. Practice on scrap metal first, watch online tutorials, and follow safety rules. Start with a simple design, and take your time.
How Do I Prevent The Table From Rusting?
Clean and dry the metal, then use rust-resistant paint or powder coating. For outdoor tables, apply extra coats and check regularly for chips or scratches.
Is Welding A Table Expensive?
Building your own table is usually cheaper than buying a custom metal table. Material costs range from $85–$330, depending on size and finish. Safety gear and tools are an upfront investment, but you can reuse them for other projects.


