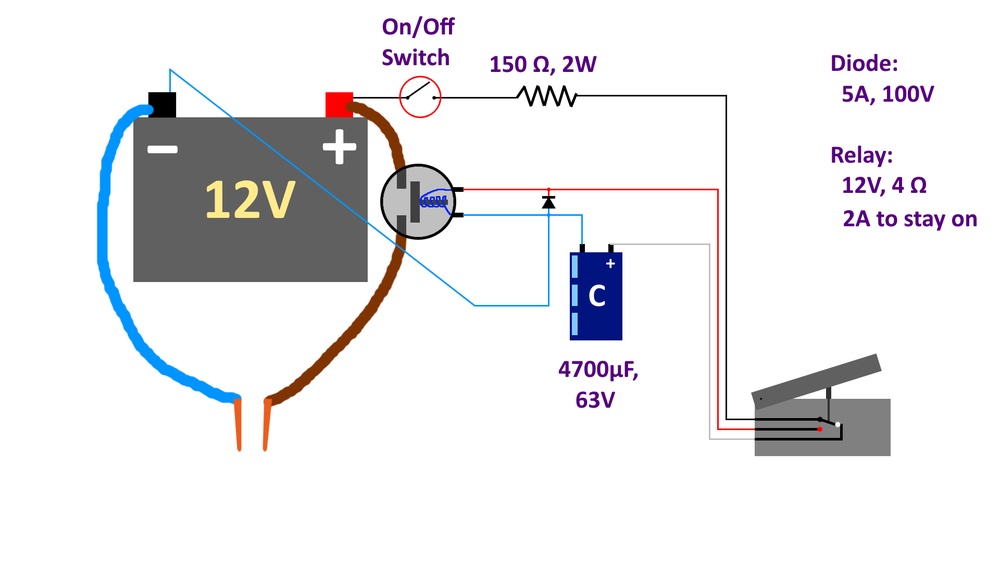
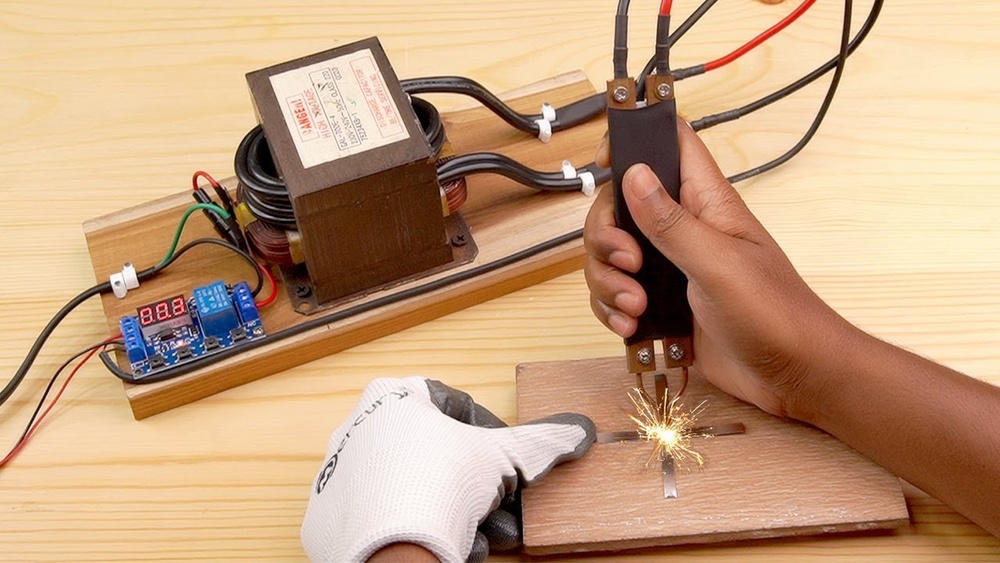
Building your own spot welding machine is not just a fun project—it can save you money, teach you about electrical engineering, and give you a useful tool for joining thin sheets of metal. Spot welding is widely used in automotive work, battery assembly, and DIY metal projects.
But many beginners worry about safety, the complexity of the build, or which parts to choose. With clear steps and practical advice, you can make a spot welder at home, even if you have limited experience.
This guide will help you understand the process, select the right materials, avoid common mistakes, and make your spot welding machine work reliably.
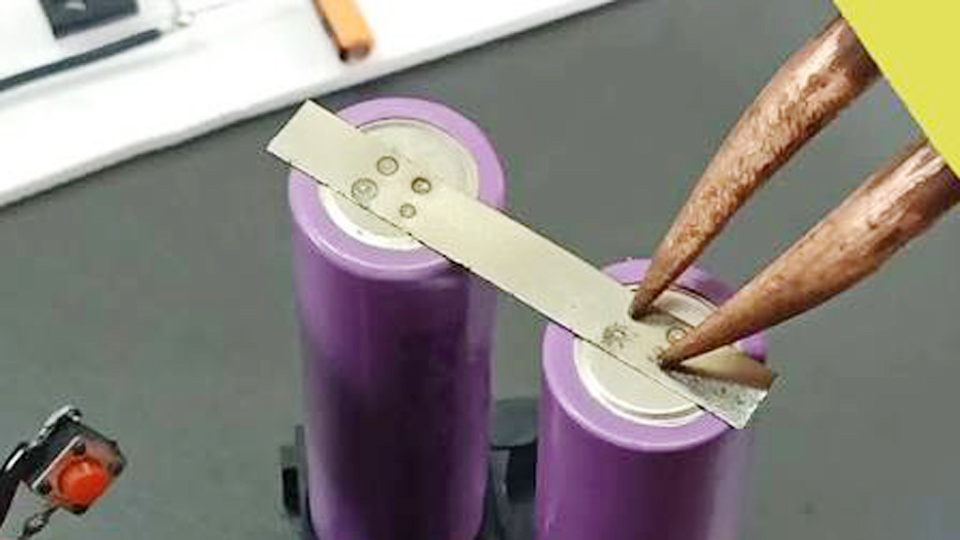
Image by rjtechunlimited
What Is A Spot Welding Machine?
A spot welding machine joins two metal sheets by applying pressure and a short burst of high electric current at a small area (the “spot”). The heat melts the metal locally, creating a strong bond when it cools. The main components are:
- Transformer: Converts high voltage to low voltage, high current.
- Electrodes: Conduct electricity and apply pressure.
- Control circuit: Times the current and controls welding duration.
- Frame: Holds everything together and allows movement.
Spot welding is ideal for metals like steel and nickel, especially in thin sheets or battery tabs.
Planning Your Spot Welding Machine Project
Before starting, decide what your spot welder will do. Will you use it for small battery packs, car bodywork, or thin sheet metal? Knowing your purpose will help you choose the right transformer, electrode size, and build quality.
Key Questions To Ask
- What materials will you weld? Steel, nickel, copper, or other metals may need different settings.
- How thick are the sheets? Thin metals (0.1–1 mm) require less power than thick ones.
- How often will you use it? Frequent use needs durable parts.
- Do you want manual or automatic control? Manual is simpler; automatic gives consistent results.

Credit: www.hardware-pro.com
Essential Materials And Tools
Building a spot welding machine does not require rare parts, but quality matters. Here are the essential items:
- Microwave oven transformer (MOT): Used transformers from old microwaves are common and cheap. They deliver high current.
- Copper electrodes: Copper conducts electricity well and resists wear.
- Heavy-duty wires: Thick wires handle high current without overheating.
- Switch or relay: For controlling current flow.
- Timer circuit (optional): For automatic weld timing.
- Metal frame: Supports the machine.
- Insulation material: Prevents electrical shocks.
- Safety equipment: Gloves, goggles, and fire-resistant clothes.
You also need tools like a drill, wrenches, pliers, soldering iron, and a multimeter.
Approximate Cost Breakdown
| Component | Estimated Cost (USD) |
|---|---|
| Microwave Transformer | $10–$30 |
| Copper Electrodes | $15–$40 |
| Heavy Wires | $10–$25 |
| Switch/Relay | $5–$15 |
| Timer Circuit | $10–$20 |
| Metal Frame | $10–$50 |
| Safety Gear | $20–$60 |
The total cost varies, but most builds can be done for $80–$240.
Understanding The Transformer
The transformer is the heart of your spot welding machine. It takes high voltage (like 120V AC) and converts it to low voltage (about 2–3V), but with very high current (up to 800–2000 amps). This high current is what melts the metal.
How To Modify A Microwave Transformer
- Remove the secondary winding: This is the thinner wire (many turns) that produces high voltage. Cut it out carefully.
- Add thick copper wire: Wind 2–3 turns of thick wire (8 AWG or bigger) as the new secondary. This gives low voltage, high current.
- Secure the winding: Make sure there are no loose wires. Use insulation to prevent shorts.
Tip: Beginners often miss the importance of tight winding and proper insulation. Loose wires can cause short circuits and reduce power.
Making The Electrodes
Electrodes need to conduct electricity and withstand heat. Copper rods (about 6–12 mm diameter) are ideal. They should be shaped to a point or small flat area. The electrodes must be held firmly but also be replaceable.
Electrode Mounting
- Attach electrodes to movable arms. Wood or plastic insulators prevent current from flowing into the frame.
- Use screws or clamps for easy replacement.
- Align electrodes so they press together directly.
Insight: Many DIY spot welders fail because electrodes are misaligned or not tight enough, leading to weak welds.
Building The Frame
The frame gives stability and allows movement for the electrodes. You can use metal pipes, angle iron, or even strong wood. The frame should let you press the electrodes together with enough force (often by hand, but some designs use a spring).
Frame Design Tips
- Keep the frame compact.
- Allow easy access to the electrodes.
- Make sure moving parts do not touch live wires.
Wiring And Electrical Connections
High current needs thick wires and secure connections. Use copper wire (at least 8 AWG) for all power paths. Solder or bolt wires to the transformer and electrodes.
Common Mistakes
- Using thin wires (they heat up and reduce power).
- Loose connections (they cause sparks and power loss).
- Forgetting insulation (risk of electric shock).
Adding A Control Circuit
You can weld manually by pressing a switch, or add a timer for consistent welds. A simple timer circuit uses a relay and a 555 timer chip. You set the welding time (0. 1–2 seconds) for each weld.
Timer Circuit Example
- 555 timer controls a relay.
- Relay switches power to the transformer.
- Adjust timer with a potentiometer.
Practical Tip: For battery welding, short weld times (0.2–0.5 seconds) are best to avoid overheating.

Credit: www.youtube.com
Final Assembly And Testing
Once all parts are ready, assemble the machine:
- Mount the transformer securely.
- Attach electrodes to arms and insulate them.
- Connect wires from transformer to electrodes.
- Install switch or timer circuit.
- Check all connections.
- Test with scrap metal. Start with short welds.
Testing Checklist
- Do electrodes touch directly?
- Are wires cool after a few welds?
- Does weld hold metal together?
If welds are weak, check alignment and increase welding time or force.
Safety Considerations
Spot welding involves high current and can be dangerous if not handled carefully.
Key Safety Tips
- Always wear insulated gloves and eye protection.
- Keep water and flammable materials away.
- Do not touch live wires or electrodes.
- Use proper insulation everywhere.
- Never leave the machine unattended when powered.
Non-obvious Insight: Many people overlook the risk of burns from hot electrodes or metal. Always let the weld cool before touching.
Spot Welding Machine Vs Other Welding Types
How does a spot welding machine compare to other common welders? Here’s a quick overview:
| Welding Type | Main Use | Skill Level | Cost |
|---|---|---|---|
| Spot Welding | Joining thin sheets | Beginner–Intermediate | Low–Medium |
| MIG Welding | General metal work | Intermediate | Medium–High |
| TIG Welding | Precision work | Advanced | High |
| Stick Welding | Heavy duty | Beginner–Intermediate | Medium |
Spot welding is easier for beginners and ideal for battery packs or thin metal sheets, but not suitable for thick metal.
Troubleshooting Your Spot Welding Machine
If your spot welder is not working as expected, these are the most common issues:
- Weak welds: Increase force, check electrode alignment, use thicker wire.
- No weld: Check transformer wiring, switch, and timer circuit.
- Excessive sparks: Reduce welding time, check for loose connections.
- Overheating: Use thicker wires, allow cooling time between welds.
- Blown fuse: Machine draws too much current—use a dedicated circuit.
Example: Fixing Weak Welds
If your welds break easily, try pressing the electrodes harder, increasing the weld time, or using thicker copper for the electrodes.
Non-obvious Insight: Many beginners forget to clean the metal surface. Dirty or rusty metal reduces welding quality.
Practical Uses Of A Homemade Spot Welder
A homemade spot welding machine is useful in many projects:
- Battery pack assembly: Welding nickel strips to cells.
- Automotive repairs: Joining car body panels.
- DIY metal crafts: Making boxes, frames, and brackets.
- Electronics: Building custom enclosures.
Real-world Example
A hobbyist made a spot welder for less than $100 and used it to build a battery pack for an electric bike. The machine produced over 500 strong welds without overheating.
Upgrading Your Spot Welding Machine
As you gain experience, you may want to upgrade:
- Foot pedal switch: Frees your hands for positioning.
- Digital timer: Allows precise control of weld duration.
- Cooling fan: Keeps transformer cool during heavy use.
- Replaceable electrodes: Makes maintenance easier.
Upgrade Comparison
| Upgrade | Benefit | Added Cost |
|---|---|---|
| Foot Pedal | Hands-free operation | $10–$30 |
| Digital Timer | Precise welds | $20–$50 |
| Cooling Fan | Longer run time | $10–$25 |
| Replaceable Electrodes | Easy maintenance | $5–$20 |
Upgrades improve performance but are not required for basic welding.
Environmental And Legal Considerations
Spot welding is safer and produces less pollution than other welding types, but you must dispose of old transformers responsibly. Check local regulations for electrical equipment recycling.
Also, some areas have safety codes for homemade electrical devices. Follow them to avoid fines or hazards.
Wrapping Up
Building a spot welding machine at home is a rewarding project that gives you new skills and a practical tool. With careful planning, quality parts, and attention to safety, you can make reliable welds for many metalworking tasks.
Whether you are assembling batteries, fixing a car, or exploring DIY metal projects, your homemade spot welder will serve you well.
Remember to upgrade as your skills grow, and always follow safety guidelines for a successful and safe experience.
Frequently Asked Questions
What Thickness Of Metal Can A Homemade Spot Welder Handle?
Most DIY spot welders can join sheets between 0.1 mm and 1 mm thick. For thicker metals, you need a larger transformer and more force. Battery welding usually uses 0.1–0.2 mm nickel strips.
Is It Safe To Use A Microwave Transformer For Spot Welding?
Yes, if you use proper insulation and safety gear. Microwave transformers are powerful, but dangerous if handled carelessly. Always disconnect power before making adjustments, and never touch exposed wires.
How Long Does It Take To Build A Spot Welding Machine?
Most builds take 4–8 hours if you have the parts and tools ready. Beginners may need more time for wiring and troubleshooting. Planning and testing are important for safe operation.
Can I Use Aluminum For Electrodes Instead Of Copper?
Copper is best because of its high conductivity and heat resistance. Aluminum wears out quickly and may not provide consistent welds. If you must use aluminum, replace electrodes often.
What Is The Main Cause Of Weak Welds?
The most common reasons are poor electrode contact, dirty metal surfaces, or too short weld time. Always clean the metal, align electrodes precisely, and experiment with timing for strong welds.