
A temporary JB WaterWeld patch on a copper pipe often outlives its usefulness when a permanent soldered or mechanical repair becomes necessary. The cured epoxy putty bonds aggressively to the metal surface, and incorrect removal techniques score the wall, thin the tube, or leave residue that prevents proper fluxing and capillary action.
Knowing how to remove JB WaterWeld for copper pipe correctly preserves wall thickness, maintains pressure integrity, and prepares a clean surface for brazing or compression fittings.
Improper heat or aggressive abrasion turns a simple cleanup into a section replacement, adding time and material cost.
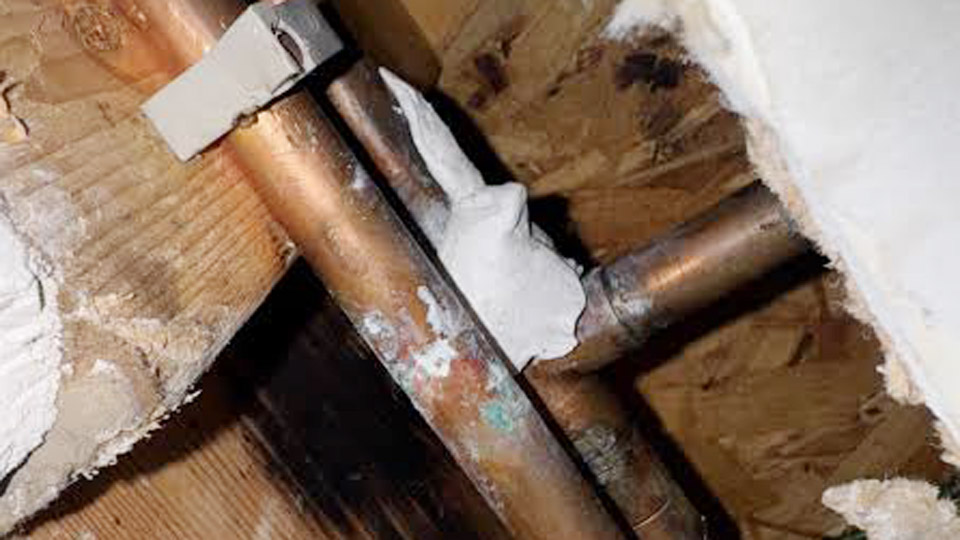
Image by r/DIY
Evaluating the Cured Patch Before Starting Removal
Identifying Full Cure Versus Partial Set
WaterWeld reaches handling strength in roughly one hour and full chemical cure within 24 hours under typical conditions. A fully cured patch feels hard, resists fingernail indentation, and shows a uniform off-white color.
Partial-cure material yields slightly under pressure and peels more readily with solvents. Confirm cure state first—attempting aggressive heat or grinding on incompletely cured putty simply smears residue into the copper surface.
Measuring Patch Thickness and Coverage
Thicker applications (greater than 3–4 mm) require staged removal. Thin films respond well to solvent and light abrasion. Coverage that wraps fully around the pipe demands circumferential scoring to create release points.
Note proximity to existing soldered joints; excess heat conducted through the copper can reflow nearby joints or anneal the tube, reducing its hardness and pressure rating.
Assessing Pipe Condition and Access
Inspect for existing pitting, green oxidation, or wall thinning around the leak site. Soft-drawn copper yields more readily to tool pressure than hard-drawn tubing. Restricted access behind walls or in tight joist spaces favors heat-gun control over open-flame tools and limits mechanical options to hand scrapers rather than powered grinders.
Mechanical Removal Techniques That Limit Wall Damage
Scoring and Controlled Scraping Sequence
Begin with a sharp utility knife or carbide scraper. Score the perimeter of the patch approximately 0.5–1 mm deep, staying within the epoxy layer. Create intersecting cuts across thicker sections to divide the mass into smaller plates.
Insert a thin putty knife or plastic scraper under a scored edge and apply steady leverage parallel to the pipe axis. Work circumferentially rather than radially to avoid digging into the copper. Remove bulk material first; leave a thin residual film for later chemical or light abrasive cleanup.
Abrasive Options Ranked by Aggressiveness
60- to 80-grit sandpaper or a coarse Scotch-Brite pad removes remaining films effectively on accessible surfaces. Progress to 120-grit only after bulk epoxy is gone.
Avoid coarse grinding discs or aggressive wire wheels on thin-wall copper (Type M or DWV); these can reduce wall thickness by several thousandths of an inch in seconds. For confined spots, a rotary tool with a fine abrasive bit run at low speed under light pressure works, but monitor heat buildup continuously.
Tool Selection for Different Pipe Diameters
On ½-inch and ¾-inch tubing, a narrow scraper or dental-style pick provides better control. Larger diameters allow broader putty knives. Always support the opposite side of the pipe when applying force to prevent ovalizing or denting soft copper.
Controlled Heat Softening for Stubborn Layers
Temperature Targets Relative to WaterWeld Ratings
WaterWeld is rated for continuous service near 250–300 °F (121–149 °C). Heating the epoxy above this range softens the polymer matrix without requiring the 600 °F threshold often cited for standard steel-reinforced JB Weld.
A heat gun set between 250–400 °F, held 2–4 inches from the surface and kept moving, typically softens the putty within 1–3 minutes. Infrared thermometers help avoid localized overheating.
Heat-Gun Technique Versus Open Flame
Prefer a variable-temperature heat gun for copper. The broad, controllable airstream distributes heat more evenly than a focused torch flame. If a propane torch is the only option, use a soft, oxidizing flame and continuous motion; never dwell.
Copper’s high thermal conductivity rapidly spreads heat along the tube, so shield adjacent soldered joints with wet rags or heat-sink clamps. Stop heating the moment the epoxy becomes pliable and begins to lift under scraper pressure.
Managing Heat-Affected Zones
Excessive temperature can anneal copper, reducing tensile strength and making the tube more susceptible to deformation under pressure. Keep the heated zone as short as practical.
After bulk removal, allow the pipe to return to ambient temperature before solvent application or final abrasion so residual heat does not accelerate solvent evaporation or warp thin sections.
Solvent and Residue Cleanup Procedures
Effective Solvents for Post-Mechanical Residue
Acetone remains the most practical solvent for residual WaterWeld films on copper. Apply with a lint-free cloth, allow 5–15 minutes dwell time, then wipe. Methyl ethyl ketone (MEK) works similarly but requires stricter ventilation.
Isopropyl alcohol (90 %+ ) assists on lighter residues. Avoid prolonged contact of aggressive solvents with nearby plastic fittings or valve seals.
Application Sequence After Heat or Scraping
Once bulk epoxy is removed, saturate residual spots, cover with plastic film if possible to slow evaporation, and re-scrape after dwell. Repeat until the copper shows consistent metallic color without cloudy or chalky patches.
Final wipe with clean acetone followed by a water rinse removes solvent traces that could interfere with subsequent flux or soldering.
Surface Verification Before Permanent Repair
A clean copper surface for soldering or brazing must be free of epoxy residue, oil, and heavy oxide. Bright metal that accepts flux uniformly indicates readiness. Any remaining haze or sticky feel signals incomplete cleanup; additional light abrasion and solvent cycles are required.
Decision Criteria: Clean In Place or Cut and Replace
When Wall Integrity Is Compromised
If mechanical removal has already thinned the wall, or if the original leak involved significant corrosion under the patch, cutting out the section and installing a coupling or new length is the more reliable path. Copper pipe pressure ratings assume full wall thickness; localized thinning creates stress risers under cyclic pressure or thermal expansion.
Time and Access Considerations
In accessible runs with minimal surrounding damage, thorough cleaning followed by proper soldering usually restores full service. Behind finished walls or in multi-story stacks, the labor of opening finishes often exceeds the cost of a short replacement section and two couplings. Evaluate both material cost and downstream risk of a second failure.
Preparing for the Permanent Joint
After successful removal, ream, clean, flux, and solder or use approved mechanical fittings according to code. The surface left by careful WaterWeld removal accepts capillary solder joints as reliably as new tube when residual epoxy and heat discoloration are fully eliminated.
Wrapping Up
Choosing the combination of scoring, controlled heat, and solvent cleanup that matches patch thickness and pipe accessibility yields a copper surface ready for permanent repair without unnecessary section replacement.
The critical advanced decision is recognizing when residual wall thickness or heat-affected microstructure already compromises long-term reliability—cutting and coupling at that point prevents a future failure under system pressure.
Faqs
How long does it take to remove fully cured JB WaterWeld from copper?
Bulk removal typically requires 15–40 minutes depending on patch size and access; residual cleanup with solvent adds another 10–20 minutes.
Will a heat gun damage copper pipe when removing WaterWeld?
Used at 250–400 °F with continuous motion and heat shielding on nearby joints, a heat gun softens the epoxy without annealing or thinning the tube.
Can acetone fully dissolve cured JB WaterWeld?
Acetone softens and lifts residual films effectively after mechanical bulk removal but does not dissolve thick cured sections by itself.
Is it better to replace the copper section instead of cleaning?
Replace when wall thinning, deep pitting, or extensive heat discoloration is present; otherwise thorough cleaning followed by proper soldering restores service.


