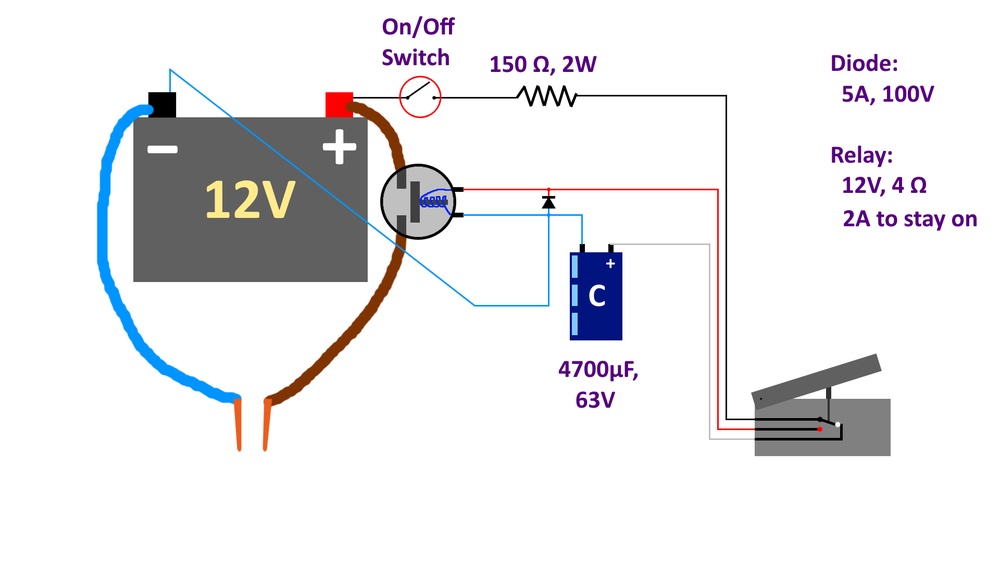
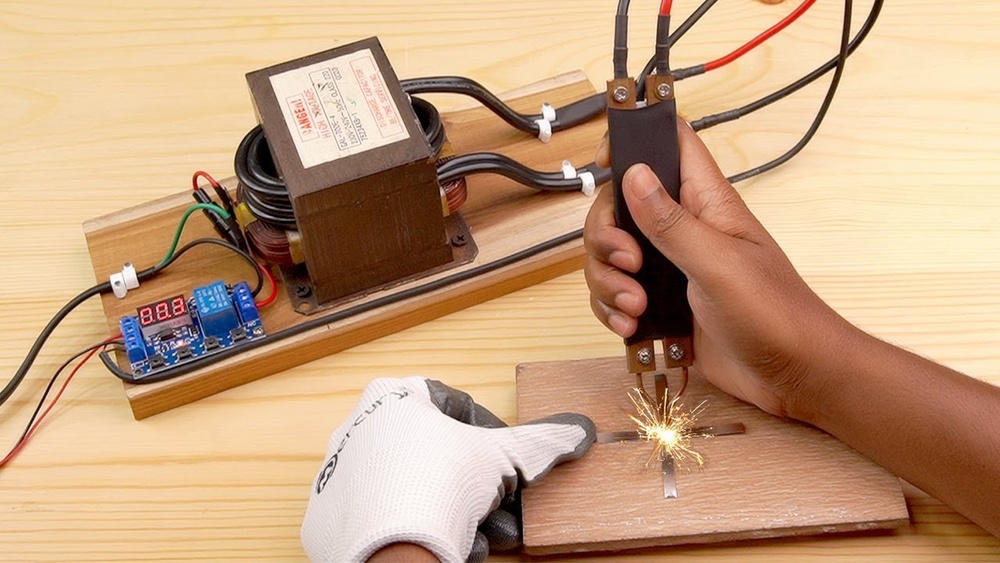
Building your own DIY spot welding machine can be a rewarding project. It gives you the power to join metal sheets, repair battery packs, or create custom tools—all without buying expensive equipment.
Many people think spot welding is only for factories, but with the right guidance, you can make a safe and effective machine at home.
This article will walk you through the steps, explain how spot welding works, help you choose materials, and highlight important safety tips. You’ll also find useful tables, practical advice, and answers to common questions.
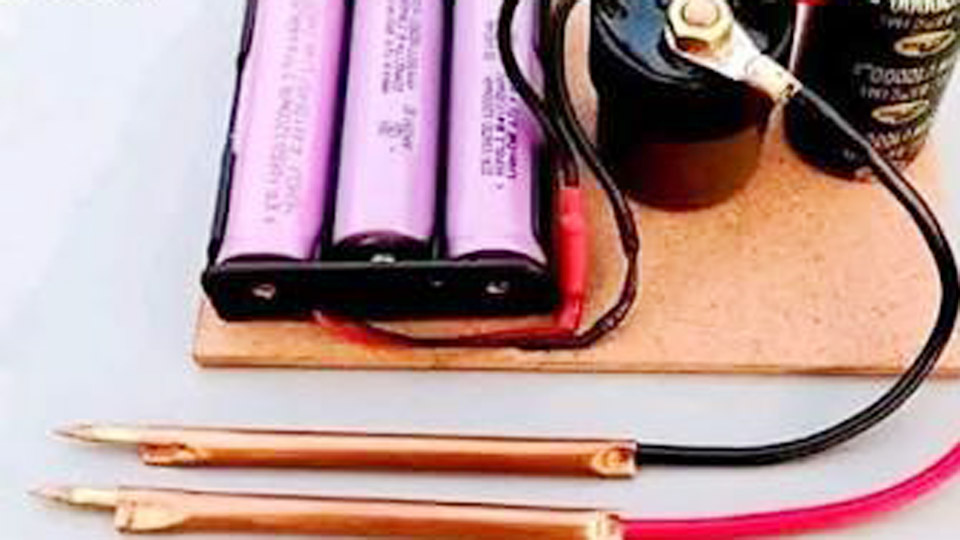
Image by fb/Electronic circuit, project & design
Understanding Spot Welding
Spot welding is a process that joins metal sheets using heat from an electric current. The current flows through electrodes, melting the metal at the contact point. When the metal cools, it forms a solid joint. This method is popular for sheet metal work, battery packs, and car repairs.
A typical spot weld uses a short burst of high current—usually between 1000 and 3000 amps—over a few milliseconds. The strength of a spot weld depends on the metal type, thickness, and the quality of the weld.
Key Uses For Diy Spot Welding
- Repairing battery packs (like 18650 lithium cells)
- Fabricating sheet metal brackets
- Building small metal enclosures
- Fixing broken wires or connectors
Essential Materials And Tools
Before you start, gather the necessary materials and tools. Using proper parts is crucial for safety and performance.
Main Components Needed
- Transformer (usually from a microwave oven)
- Copper electrodes (thick copper rods or bars)
- Heavy-duty switches (such as a relay or foot pedal)
- High-power cables (welding cables or thick copper wire)
- Insulation materials (heat-resistant tape, tubing)
- Metal frame (steel or aluminum to mount parts)
- Power cord (rated for high current)
- Cooling system (optional, for longer welds)
Basic Tools
- Screwdrivers, wrenches, and pliers
- Drill and bits
- Metal saw or hacksaw
- Soldering iron and solder
- Multimeter (to check voltage and current)
- Safety gear (gloves, eye protection)
Example Material Sources
Many parts can be found in old appliances or at local hardware stores. For example, a microwave oven transformer (MOT) is a common choice. Copper rods are often available at electrical supply stores.
Choosing The Right Transformer
The transformer is the heart of your spot welder. Most DIY spot welders use a modified microwave oven transformer because it provides high current at low voltage, which is ideal for spot welding.
Transformer Comparison
Here’s a quick comparison of common transformer types:
| Transformer Type | Voltage | Current | Availability |
|---|---|---|---|
| Microwave Oven Transformer (MOT) | ~2V (after modification) | 1000–2000A | Easy to find |
| Car Battery Charger | 12V | 30–50A | Moderate |
| Arc Welding Transformer | ~50V | 50–200A | Less common |
Microwave oven transformers are best for most home spot welders. They are cheap and deliver plenty of current after rewinding the secondary coil.
Rewinding The Transformer
To make the transformer suitable for spot welding:
- Remove the secondary winding (the thinner wire) from the MOT.
- Replace it with 2–3 turns of thick copper wire (about 10–20mm² cross-section).
- Secure the new winding to prevent movement.
This modification lowers the voltage and increases the current, making it perfect for spot welding.
Designing The Electrode System
Electrodes transfer the current and pressure to the metal. Copper is ideal because it conducts electricity well and resists heat.
Electrode Materials
- Copper rods (preferred, 8–12mm diameter)
- Brass (acceptable for short welds)
- Steel (not recommended)
Electrode Shapes
Common shapes include pointed tips and flat pads. Pointed tips focus the current for smaller welds, while flat pads are better for large sheets.
Mounting Electrodes
Mount electrodes on insulated arms, such as wooden or plastic handles. Secure the electrodes with screws or clamps. Attach the welding cables directly to the electrode bases.
Building The Frame And Mount
A solid frame keeps your spot welder stable and safe. Most DIY builders use steel or aluminum for strength.
Frame Design Tips
- Use thick metal (at least 3mm) for the base and arms.
- Make sure the electrodes align exactly when closed.
- Add a spring or hinge for easy opening.
- Include mounting holes for switches and cables.
Example Frame Materials
- Steel flat bars
- Aluminum channels
- Wooden blocks (for insulation, not strength)
A well-designed frame prevents vibration and ensures good contact between electrodes.
Wiring And Electrical Safety
Proper wiring is essential. High current can be dangerous if not handled correctly.
Wiring Steps
- Use thick copper cables (at least 16mm² cross-section).
- Connect the transformer’s secondary coil to the electrodes.
- Install a high-power relay or foot pedal to control current.
- Insulate all exposed wires with heat-resistant tape.
- Attach a safe power cord to the transformer’s primary side.
Electrical Safety Comparison
| Wiring Type | Current Capacity | Fire Risk | Recommended Use |
|---|---|---|---|
| 16mm² copper cable | Up to 2000A | Low | Spot welding |
| 10mm² aluminum cable | Up to 1000A | Medium | Small welds |
| Standard household wire | <15A | High | Not suitable |
Always double-check your connections and keep wires short to minimize resistance.
Adding A Switching System
A switching system lets you control the welding current. Most people use a foot pedal or heavy-duty relay.
Types Of Switches
- Foot pedal (mechanical, easy to use)
- Relay (electric, controlled by button)
- Solid-state relay (for advanced builds)
Installation Tips
- Mount the switch away from metal parts.
- Use thick wires for all switch connections.
- Test the switch before welding.
Cooling And Heat Management
Spot welding generates a lot of heat. Cooling is important, especially for long sessions.
Cooling Methods
- Air cooling (natural airflow)
- Water cooling (pump water through electrode holders)
- Heat sinks (attach metal fins to electrodes)
Data On Cooling Efficiency
| Cooling Method | Max Weld Time (min) | Electrode Temperature | Maintenance Needed |
|---|---|---|---|
| Air cooling | 10 | 90°C | Low |
| Water cooling | 30+ | 40°C | Medium |
| Heat sink | 15 | 70°C | Low |
Water cooling is best for frequent use, but air cooling works for most home projects.

Credit: www.rjtechunlimited.com
Step-by-step Building Instructions
Now, let’s build the DIY spot welding machine. Follow these steps closely for safety and success.
1. Prepare The Transformer
- Remove the secondary coil from the MOT.
- Wind 2–3 turns of thick copper wire for the new secondary.
- Secure the winding with epoxy or tape.
2. Build The Frame
- Cut steel or aluminum bars to size.
- Assemble the base and arms using bolts or welds.
- Attach electrode holders to the arms.
3. Install Electrodes
- Shape copper rods into pointed tips or pads.
- Mount electrodes onto insulated handles.
- Connect welding cables securely.
4. Wire The System
- Connect the transformer secondary to electrodes.
- Attach a relay or foot pedal switch.
- Insulate all exposed wires.
- Connect the primary side to the power cord.
5. Test For Safety
- Use a multimeter to check for short circuits.
- Plug in the machine with the power off.
- Test the switch and electrode movement.
6. Final Assembly
- Mount the transformer firmly to the frame.
- Arrange cables neatly to avoid tangling.
- Add safety covers if needed.
7. First Weld
- Place two metal sheets between electrodes.
- Press the switch for 0.5–2 seconds.
- Check the quality of the weld.
Practical Tips For Better Welding
Making good spot welds requires practice and attention to detail. Here are some practical tips:
- Clean metal surfaces before welding for stronger joints.
- Adjust weld time—too short means weak welds, too long can burn through.
- Apply steady pressure with the electrodes.
- Use proper protective gear (gloves, goggles).
- Start with small test pieces before working on important projects.
Non-obvious Insights
- Electrode maintenance: Regularly file or sand electrode tips to keep them clean and sharp. Dirty or worn electrodes can cause weak welds and overheating.
- Short cable length: Keep welding cables as short as possible. Long cables increase resistance, lowering current and weld quality.
- Transformer cooling: If your transformer gets hot, add a small fan to improve its lifespan. Overheating can cause insulation failure and reduce power.

Credit: www.youtube.com
Common Mistakes And How To Avoid Them
Even experienced builders can make mistakes. Here are some common errors and ways to prevent them:
- Using thin wire for welding cables—this limits current and causes overheating.
- Forgetting insulation—exposed wires can shock you or cause fires.
- Poor electrode alignment—misaligned electrodes lead to weak or uneven welds.
- Ignoring cooling—overheating damages the machine and electrodes.
- Not testing with a multimeter—always check for shorts before first use.
Safety Precautions
Working with high voltage and current is dangerous. Always follow these safety rules:
- Unplug the machine before making adjustments.
- Use insulated tools and handles.
- Wear rubber-soled shoes to prevent shocks.
- Keep water and metal tools away from live wires.
- Never touch electrodes or cables while the machine is powered.
Real-world Example: Battery Pack Spot Welding
One popular use for DIY spot welders is assembling battery packs. For example, many people build custom lithium-ion packs for electric bikes or power tools.
Process:
- Arrange battery cells in the desired shape.
- Place nickel strips across the terminals.
- Use the spot welder to join the strips to cell tops.
- Check for strong connections and repeat.
Spot welding is preferred over soldering for batteries because it avoids overheating the cells.
Troubleshooting Guide
If your spot welder isn’t working as expected, try these solutions:
- Weak welds: Increase current or weld time. Clean electrodes and metal surfaces.
- Electrodes get too hot: Improve cooling or reduce weld time.
- Machine trips circuit breaker: Check for short circuits, use thicker wires.
- Transformer hums loudly: Secure windings, check for loose parts.
- Switch not working: Test relay or pedal, replace if faulty.
Improving Your Diy Spot Welder
After your first build, you may want to upgrade:
- Add a digital timer for precise welds.
- Install a cooling fan or water system.
- Use better electrodes (pure copper).
- Improve frame rigidity for smoother operation.
- Add safety covers and indicator lights.
These upgrades can make your machine more reliable and easier to use.
Frequently Asked Questions
What Metals Can I Spot Weld With A Diy Machine?
You can weld steel, nickel, and some copper sheets. Aluminum is harder to weld due to its high conductivity. Most battery pack projects use nickel strips.
How Much Current Does A Spot Welder Need?
A typical DIY spot welder uses 1000–2000 amps of current for a few milliseconds. This is why a modified microwave transformer is ideal.
Is Spot Welding Dangerous?
Yes, it can be dangerous if not handled carefully. Always use insulation, wear safety gear, and unplug the machine before adjustments.
Can I Use Household Wire For Welding Cables?
No. Household wire is too thin and cannot handle high current. Use thick copper cable (at least 16mm²) for safety and performance.
How Do I Know If My Weld Is Strong?
A strong weld should not break when you try to pull the sheets apart. You can also check visually—the weld spot should be shiny and slightly melted.
Closing Thoughts
Building your own DIY spot welding machine is a challenging but rewarding project. It gives you control over your metalwork and battery pack repairs, saves money, and teaches valuable skills. By following the instructions, using quality materials, and respecting safety guidelines, you can create a reliable spot welder that lasts for years. Remember to test carefully, make upgrades as needed, and keep learning. With patience and practice, you’ll soon master spot welding at home.