Attempting to fusion-weld brass directly to steel almost always fails. The brass melts and loses zinc long before the steel reaches bonding temperature, leaving a porous, brittle interface full of voids and intermetallic compounds.
How to braze brass to steel solves this by using a lower-melting filler that bonds both metals without melting either base metal.
The process relies on capillary action, controlled heat input, and the correct flux to produce joints that routinely exceed 50,000 psi tensile strength and remain ductile under thermal cycling.
Wrong filler, exhausted flux, or uneven heating produces the same weak, sooty results that plague fusion attempts.
Correct choices of alloy, clearance, and heating sequence turn a difficult dissimilar-metal problem into a repeatable, high-strength joint suitable for mechanical assemblies, heat exchangers, and repair work.
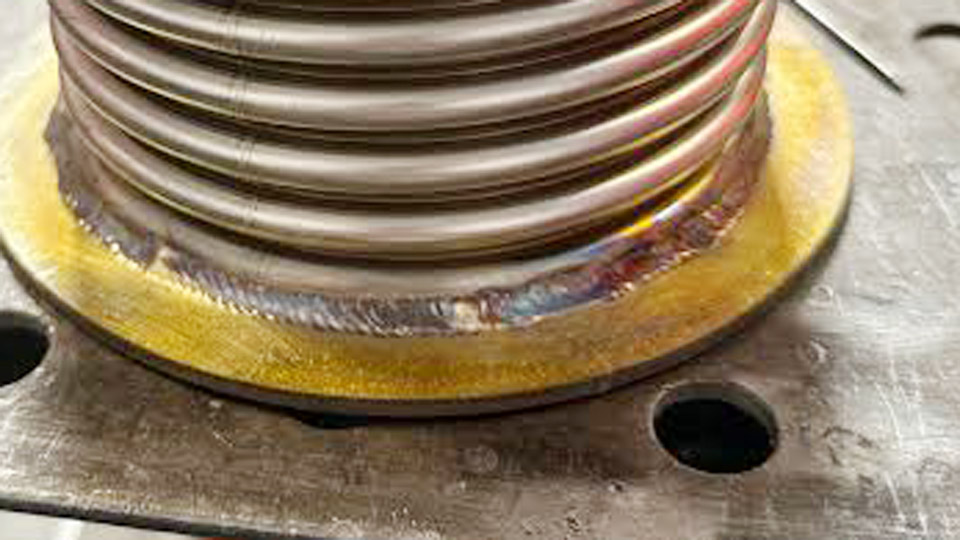
Image by r/Welding
Why Fusion Welding Fails and Brazing Succeeds on Brass-Steel Combinations
Brass melts between roughly 1,650–1,800 °F depending on zinc content, while mild steel remains solid until approximately 2,600 °F. Any process that tries to create a common molten puddle overheats the brass, drives off zinc as toxic fumes, and forms brittle copper-iron intermetallics at the interface. Brazing keeps both base metals solid and uses a filler whose liquidus sits below the solidus of the brass.
Thermal Expansion Mismatch and Its Effect on Joint Integrity
Brass expands more than steel when heated. A room-temperature clearance of 0.002–0.003 inch can close completely at brazing temperature if the brass is the outer member, starving the joint of filler.
The reverse configuration (steel outside) requires almost zero clearance at room temperature so that the proper capillary gap opens at heat. Ignoring this produces incomplete fill and early fatigue failure under cyclic loading.
Strength Expectations Versus Fusion Welds
A properly executed silver-brazed joint can reach 60,000–70,000 psi tensile strength. Silicon-bronze joints typically deliver 50,000–60,000 psi.
Neither matches the full strength of the steel parent metal, but both exceed the strength of the brass in most practical thicknesses and remain ductile enough to absorb vibration without cracking.
Choosing the Correct Filler Metal for Brass-to-Steel Brazing
Filler selection determines both process temperature and final mechanical properties. Phosphorus-bearing alloys must be avoided because they form brittle iron phosphides on steel.
Silicon Bronze (ERCuSi-A) for General-Purpose Work
Silicon bronze melts in the 1,600–1,800 °F range and deposits cleanly with good wetting on both brass and steel. Tensile strength falls in the 50–60 ksi band.
It tolerates moderate joint gaps better than pure silver alloys and produces a color that blends reasonably with brass. Use 1/16-inch or 3/32-inch rod for most torch work; larger diameters increase heat input unnecessarily.
Silver-Bearing Alloys for Lower Temperature and Higher Strength
Alloys containing 45–56 % silver (examples: Safety-Silv 45, Safety-Silv 56, BAg-1 equivalents) flow between 1,145–1,400 °F. The lower temperature reduces zinc loss from the brass and minimizes distortion.
Joint strengths routinely exceed 70,000 psi when clearance and flux are correct. Cost is higher, but the reduced heat input justifies the expense on thin sections or heat-sensitive assemblies.
Low-Fuming Bronze and Phosphor Bronze Options
Low-fuming bronze reduces zinc oxide fumes and is useful for indoor work where ventilation is limited. Phosphor bronze adds wear resistance for sliding surfaces but still requires a non-phosphorus formulation when the steel side is present. Both operate in roughly the same temperature window as silicon bronze.
Flux Requirements Specific to Brass-Steel Joints
Flux removes oxides and prevents re-oxidation during the heating cycle. Steel forms oxides rapidly; brass forms zinc oxides. A single flux must handle both.
White Flux Versus Black Flux Selection
AWS FB3-A type white flux (borax-fluoride based) remains active from approximately 1,050 °F to 1,600 °F and covers the majority of silver and silicon-bronze work.
Black flux, containing added boron, extends protection to higher temperatures and longer heating cycles; it is preferred when silicon-bronze or nickel-silver fillers push past 1,600 °F or when residual mill scale is present on the steel.
Apply flux as a paste to both joint faces and the surrounding area that will see heat. Reapply if the cycle is prolonged and the flux begins to dry or blacken.
Application Thickness and Coverage
A thin, continuous layer is sufficient on brass. Steel needs a heavier coat because oxide formation is more aggressive. Flux that becomes clear and watery indicates the joint has reached the correct temperature window. Powdery or black residue signals exhausted flux and requires cleaning and re-fluxing before continuing.
Joint Design and Clearance Decisions That Control Capillary Flow
Capillary action fills the joint only when the gap at temperature falls between 0.002 and 0.005 inch. Outside that range the filler either fails to enter or forms a weak fillet with voids.
Accounting for Differential Expansion in Sleeve and Butt Joints
When brass is the outer member of a sleeve joint, machine additional clearance (0.004–0.006 inch at room temperature) so the gap shrinks to the ideal range at heat. When steel is outer, a light interference or zero clearance at room temperature opens correctly.
Butt joints require accurate edge preparation and often a small chamfer to provide a reservoir for filler without starving the root.
Fillet Size Versus Strength
A modest external fillet adds little strength compared with full capillary fill. Excessive fillet volume increases residual stress and can mask incomplete internal wetting. Aim for a smooth concave fillet no larger than necessary for visual inspection and load distribution.
Torch Setup, Flame Chemistry, and Heating Sequence
Oxy-acetylene remains the most controllable heat source for most shop work. Propane or MAP-Pro can serve for thin sections with silver alloys, but heat delivery is slower.
Neutral Flame Preference and Tip Size
A neutral flame (equal oxygen and acetylene) prevents carburization or excessive oxidation. Tip size should match the thermal mass of the thicker member—usually the steel. Oversized tips overheat the brass; undersized tips prolong the cycle and exhaust the flux.
Heating Priority: Steel First, Then Brass
Because steel has higher thermal conductivity and mass, begin heating on the steel side and move in circular patterns across the joint. Watch the flux. When it turns clear and fluid, the brass will already be near temperature.
Touch the filler to the joint; if it melts and is drawn in, temperature is correct. If the rod balls up, more heat is required. Never melt the filler in the flame and drip it onto a cold joint.
Execution Technique That Produces Reliable Capillary Fill
Clamp or fixture the parts so they cannot move once heat is applied. Movement while the filler is liquid produces cracks or incomplete bonding.
Filler Introduction and Flow Control
Introduce the rod at the point of highest heat and allow capillary action to pull it through the joint. Advance the flame ahead of the advancing meniscus so the filler follows the heat rather than freezing behind it.
On long seams, work in short segments, keeping previously filled sections below the solidus of the filler to avoid remelting and porosity.
Avoiding Zinc Fuming and Base-Metal Melting
If the brass begins to show bright yellow or white fumes, temperature is too high. Withdraw the flame, allow slight cooling, and resume with more attention to the steel side. Once the joint is filled, remove heat and allow still-air cooling. Quenching creates residual stress and can crack the brass.
Post-Braze Cleaning, Inspection, and Strength Verification
Flux residue is corrosive if left in place. Hot water and a stiff brush remove most white flux. Black flux often requires mechanical brushing or a mild acid pickle followed by thorough rinsing.
Visual and Mechanical Checks
A continuous, smooth fillet without pinholes or incomplete wetting indicates success. Dye-penetrant inspection reveals surface-connected voids. For critical parts, a simple bend or torsion test on a sample joint confirms ductility. Sectioning a test piece under a microscope verifies full capillary penetration.
Distortion Management on Thin Sections
If warpage appears, the heating cycle was too long or uneven. Future assemblies benefit from copper heat sinks, intermittent heating, or a shift to lower-temperature silver alloys that reduce total heat input.
Wrapping Up
Successful brass-to-steel brazing rests on three interlocking decisions: a phosphorus-free filler matched to the required strength and temperature, a flux active across the entire heating cycle, and a clearance that accounts for differential expansion.
When those three elements align, the joint fills by capillary action, solidifies without voids, and delivers consistent mechanical performance.
Advanced operators further reduce residual stress by using short-cycle induction heating or controlled atmosphere furnaces once the process is proven on torch samples, eliminating flux residue entirely on production runs.