
Knowing how to join copper to PVC is essential when connecting plumbing systems that combine metal and plastic piping. Because copper and PVC cannot be welded or soldered directly to each other, using the wrong joining method can lead to leaks, pressure loss, premature joint failure, and costly repairs.
Selecting the correct transition fitting, adhesive, or mechanical connector also helps maintain system integrity while accommodating differences in thermal expansion and material properties.
Whether you’re installing new plumbing, repairing a water line, or adapting existing pipework, understanding the proper connection method ensures a durable, code-compliant result.
I’ll explain the most reliable ways to join copper and PVC, when each method is appropriate, and the common mistakes that can compromise long-term performance.
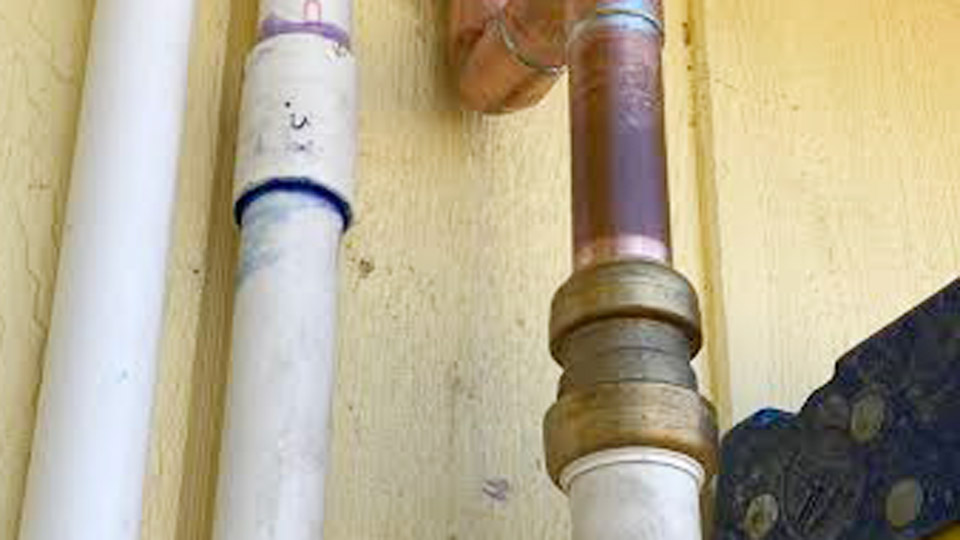
Image by r/Plumbing
Understanding Material Challenges in Copper-PVC Transitions
Dimensional and Sizing Differences
Copper tubing (typically Type L or M) uses nominal sizes based on outside diameter, such as 1/2″ CTS measuring approximately 0.625″ OD. Schedule 40 PVC uses inside diameter nominals, so a 1/2″ PVC has a larger OD (around 0.84″).
Standard fittings fail without a proper transition adapter that bridges these mismatches. Always verify exact pipe dimensions with calipers before selecting components.
Thermal expansion adds complexity. PVC expands significantly more than copper (about 3–5 times the rate), creating stress at rigid joints over temperature cycles. Flexible or properly anchored transitions accommodate this movement.
Pressure and Temperature Ratings
PVC Schedule 40 handles up to 220–600 PSI at 73°F depending on size, but derates sharply with heat (e.g., ~50% at 110°F). Copper withstands higher pressures and temperatures. The joint must match the system’s lowest rating, typically the PVC or fitting side. For hot water lines, consider CPVC instead of standard PVC or use appropriate derating factors.
Galvanic corrosion poses minimal direct risk between copper and PVC (PVC is non-conductive), but brass or metal components in fittings require attention if other metals are present. Dielectric features in some unions help isolate metals.
Code and Application Considerations
Plumbing codes (e.g., IPC) mandate approved adapter or transition fittings for dissimilar materials. Use them in accessible locations for push-fit or unions; permanent solvent or soldered joints suit concealed runs. Applications include water supply transitions, drain repairs, or well-to-house connections.
Primary Methods for Joining Copper to PVC
Threaded Adapter Connections
Threaded adapters provide a versatile, removable option. Solder or sweat a copper female adapter to the copper pipe, then thread it to a male PVC adapter glued to the PVC line (or vice versa, following the male-plastic-to-female-metal rule to avoid cracking PVC threads).
Key Decisions:
- Use lead-free solder (e.g., 95/5 tin-antimony) for potable water.
- Apply PTFE tape or approved pipe dope to threads clockwise; avoid over-tightening (typically 1/2 to 3/4 turn past hand-tight).
- Suitable for moderate pressures; ideal when future disassembly is needed.
This method suits repairs where you need to isolate sections.
Compression Fittings for Tool-Minimal Joins
Compression fittings excel for quick, solder-free installations. Slide the nut and olive (ferrule) onto the copper pipe, insert into the fitting body, then connect the PVC side via solvent cement or threaded adapter. Tighten the nut to compress the ferrule, creating a seal.
Practical Parameters:
- Best for 1/2″ to 1″ lines.
- Pressure ratings often 125–150 PSI.
- Deburr copper thoroughly to protect the ferrule and O-rings.
- Reusable but inspect for deformation on disassembly.
Professionals favor compression for tight spaces or when open flame is risky.
Push-Fit Transition Couplings (e.g., SharkBite Style)
Push-fit connectors offer the fastest solution. Specialized PVC-to-copper transition couplings feature color-coded ends: one for CTS copper (tan collar), one for IPS PVC (white collar). Push pipes to the internal stop after marking insertion depth.
Installation Details:
- Cut pipes square, deburr copper, and mark insertion depths (typically 1–2 inches depending on size).
- No tools required beyond a cutter and deburring tool.
- Removable with a disconnect clip; higher cost but excellent for emergencies.
- Verify compatibility with Schedule 40/80 PVC and copper types.
These shine in accessible areas for quick fixes but check local codes for concealed use.
Flexible Rubber Couplings and Clamps
For non-pressurized drains or DWV systems, use shielded flexible couplings (e.g., Fernco-style) with stainless steel clamps. Position the rubber sleeve over both pipes and tighten clamps evenly.
When to Choose:
- Accommodates minor misalignment and movement.
- Ideal for repairs where exact sizing varies.
- Lower pressure tolerance; not for supply lines.
Specialized Direct and Hybrid Fittings
Emerging options include pre-crimped copper-PVC hybrids or crimp-style transitions. These provide near-permanent bonds by mechanically locking PVC into a flared copper end. Follow manufacturer cure times and insertion depths strictly.
Step-by-Step Execution for Common Techniques
Preparing Pipes for Any Joint
- Shut off water and drain lines.
- Measure and cut squarely using dedicated cutters (tubing cutter for copper, ratchet cutter for PVC).
- Deburr copper inside and out; lightly sand PVC gloss for better adhesion.
- Clean with appropriate solvents—emery cloth for copper shine, dry cloth for PVC.
- Dry-fit components first to confirm alignment and depth.
Soldered Copper to Threaded/PVC Transition
- Apply flux to copper and fitting.
- Heat with torch until flux bubbles; feed solder to flow fully around joint.
- Cool naturally; wipe residue.
- Glue PVC side with primer then solvent cement (twist 1/4 turn, hold 30 seconds).
- Allow full cure (up to 24 hours) before pressure testing.
Full Compression or Push-Fit Assembly
Follow fitting-specific insertion marks. For compression, tighten progressively with two wrenches. Test under pressure incrementally.
Support pipes adequately to prevent stress on the joint from weight or vibration.
Factors Influencing Method Selection
System Type: Supply vs. Drain
Pressurized potable lines demand robust, rated transitions like compression or soldered adapters. Drainage favors flexible couplings for ease and vibration absorption.
Skill Level and Tools Available
Beginners benefit from push-fit. Experienced welders/plumbers leverage soldering for permanent, low-cost strength in copper sections.
Cost and Longevity Trade-offs
Push-fit: Fast but premium-priced. Threaded/compression: Balanced. Soldered: Lowest material cost, highest skill barrier.
Environmental and Performance Demands
Account for temperature swings, chemical exposure, and burial (use approved underground fittings). Anchor transitions to minimize movement.
Advanced Considerations for Professional Results
Testing and Leak Prevention
Pressure test at 1.5x operating pressure or per code. Use soapy water on joints or electronic detectors. Monitor for weeks after installation as PVC cement cures fully.
Expansion and Support
Install expansion loops or flexible sections near transitions. Support copper every 8–10 feet, PVC per manufacturer (often closer due to sag).
Material Compatibility Beyond Copper-PVC
When transitioning further (e.g., to galvanized), incorporate dielectric unions. Match pressure/temperature deratings across the entire run.
Maintenance and Troubleshooting
Inspect accessible joints annually. Common issues: improper deburring causing O-ring damage, insufficient cure time, or mismatched sizes. Disassemble push-fit or compression for repairs; cut out permanent joints.
Real-World Performance Insights
In residential retrofits, properly executed transitions last decades when matched to system demands. Compression and push-fit reduce labor time significantly compared to traditional methods, while soldered adapters provide the most integrated feel in hybrid lines.
The key decision is balancing accessibility, permanence, and code compliance with the specific pressures and fluids involved.
For critical high-pressure or hot water applications, prioritize fittings with elastomeric seals and verify third-party listings (NSF, IAPMO). Advanced pros often combine techniques—soldering copper runs then transitioning once to PVC mains—for optimal flow and minimal joints.
FAQ
Can you directly weld or glue copper to PVC?
No. Copper requires soldering or mechanical attachment; PVC uses solvent cement. Always employ a rated transition fitting. Direct attempts fail due to material incompatibility.
What is the best fitting for high-pressure copper-to-PVC connections?
Compression or soldered threaded adapters generally outperform push-fit for permanent, high-pressure use. Match ratings to the lowest component (often PVC Schedule).
Do I need special tools for SharkBite-style transitions?
No special tools beyond pipe cutters and deburring tools. Ensure proper depth marking for full engagement.
How long should PVC cement cure before pressurizing a copper-PVC joint?
Follow manufacturer guidelines—typically 1–2 hours for handling, up to 24 hours for full pressure. Hot or humid conditions extend times.


