
A leaking plastic water tank can quickly lead to water loss, structural damage, and higher utility costs if the problem is left untreated. Knowing how to repair plastic water tank leakage correctly is important because not every crack, puncture, or seam failure requires the same repair method.
Using the wrong filler, adhesive, or heat-welding technique can result in weak bonds that fail under water pressure or repeated temperature changes, forcing you to repeat the repair or replace the tank entirely.
Identifying the type of plastic and the cause of the leak is the first step toward a durable fix that restores the tank’s performance. With the proper repair approach, you can stop leaks effectively, extend the service life of the tank, and avoid unnecessary replacement expenses while maintaining reliable water storage.
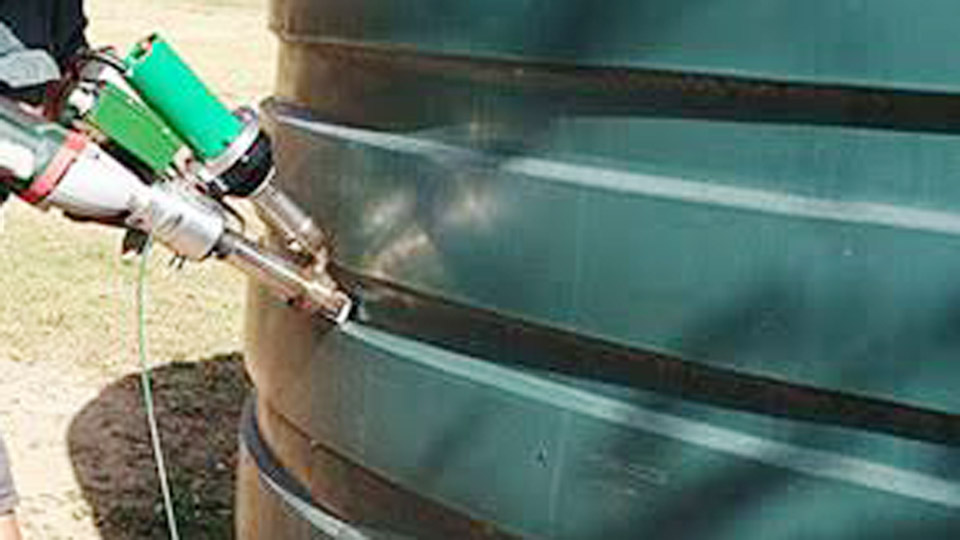
Image by mjrplasticweldingservices
Identifying the Cause of Leaks in Plastic Water Tanks
Common Damage Mechanisms in HDPE Tanks
HDPE tanks crack due to UV degradation from prolonged sun exposure, which embrittles the surface over years. Mechanical impacts from debris, improper support causing flexing under water weight, or freeze-thaw cycles in colder climates also create stress cracks. Installation stress around fittings or overfilling exacerbates seam weaknesses.
Cracks often initiate at high-stress zones like the base, sides near outlets, or along molded seams. Pinhole leaks appear from abrasion or manufacturing defects. Differentiate surface crazing (cosmetic) from through-wall cracks by pressure testing or visual inspection with the tank partially filled.
Assessing Repairability Before Welding
Evaluate crack length, location, and tank contents. Cracks under 12 inches (30 cm) in non-critical areas suit DIY welding. Longer cracks or those at the bottom under full head pressure often indicate replacement, as welds cannot fully restore original hoop strength.
For potable water tanks, ensure all materials meet food-grade or NSF standards to avoid leaching. Drain the tank completely, clean interiors professionally if needed for hazardous residues, and confirm the plastic type—most rotational-molded tanks are HDPE or LLDPE. Use a burn test or consult manufacturer markings for confirmation.
Tools and Materials for Professional-Grade Repairs
Gather a plastic welding kit with a temperature-controlled hot air gun or iron (300–550°F / 150–290°C range for HDPE), matching polyethylene welding rods (typically 3–5mm diameter, natural or black), stainless steel mesh or wire reinforcement for structural cracks, utility knife, rotary tool with abrasive bits, drill with 1/8-inch bit, acetone or isopropyl for cleaning, and clamps or supports.
Advanced setups include extruder welders for thicker sections or larger repairs. Avoid generic adhesives; they achieve only 30–50% of parent material strength versus 80–100% for proper fusion welds.
Plastic Welding Techniques for Leak Repair
Hot Air Welding Process for Cracks
Hot air welding melts the base material and filler rod into a homogeneous bond. Preheat the area evenly to 250–300°F (120–150°C) to make it pliable without scorching. V-groove the crack with a rotary tool for better penetration, drilling stop-holes at each end to prevent propagation.
Insert the rod into the gun or feed manually. Maintain a 45–60° rod angle and consistent travel speed (typically 4–8 inches per minute depending on gun output). Apply moderate pressure to fuse layers.
For leaks, build multiple passes: root pass for penetration, then cap passes for reinforcement. Target a weld bead width 2–3 times the crack width.
Reinforcement Methods for Structural Integrity
Incorporate stainless steel mesh over larger cracks or high-stress areas. Clean and groove the surface, position the mesh, then weld over it so molten plastic encapsulates the mesh for tensile strength. This technique significantly improves resistance to flexing and pressure.
For thinner walls, use plastic welding staples or speed welding nozzles for faster deposition. Monitor interpass temperature to avoid overheating previous beads, which causes oxidation and weak bonds.
Temperature, Speed, and Parameter Control
HDPE welding requires precise parameters: nozzle temperature 480–570°F (250–300°C), air flow 40–60 liters per minute, and distance 0.2–0.4 inches from the surface. Too low causes poor fusion; too high leads to burn-through or degradation. Practice on scrap to calibrate your specific gun.
Weld in a draft-free area to maintain consistent heat. For vertical repairs, work upward to use gravity for bead support. Post-weld, allow natural cooling without quenching to prevent internal stresses.
Preparation Steps for Reliable Welds
Surface Preparation and Cleaning
Thorough cleaning determines weld success. Drain the tank, remove all moisture, and abrade 1–2 inches around the damage with 80–120 grit to remove oxidation and contaminants. Wipe with acetone to eliminate oils and residues. Roughening increases surface area for mechanical interlocking.
Mark the repair zone and ensure alignment. For internal access on larger tanks, support the area to prevent sagging during heating.
Identifying Plastic Type and Compatibility
Test compatibility by welding a small scrap rod to an inconspicuous area. HDPE rods bond poorly to polypropylene or other resins. Mismatched materials result in delamination under load or temperature changes.
Step-by-Step Execution for a Typical Crack Repair
- Drain and dry the tank completely.
- Clean and abrade the area.
- Drill stop holes and V-groove the crack.
- Preheat and tack the repair.
- Apply root pass with rod, followed by reinforcement if using mesh.
- Build cap passes for smooth contour.
- Inspect for voids and cool slowly.
- Pressure test after 24 hours.
This sequence minimizes distortion and maximizes fusion depth.
Common Challenges and Solutions in Tank Repairs
Dealing with Thick Walls and Large Holes
Thicker rotational-molded tanks (8–15mm walls) demand extruder or high-output welders for adequate heat penetration. For holes, cut a patch from matching material, bevel edges, and weld from both sides where possible. Backing with temporary supports prevents burn-through.
Environmental and Post-Repair Factors
UV exposure degrades repairs faster; apply compatible UV stabilizers or coatings after welding. In high-vibration or temperature-fluctuating environments, monitor for creep. Hydrostatic testing at 1.5x operating pressure verifies integrity.
When Adhesives or Sealants Are Appropriate Alternatives
For minor pinholes or temporary fixes, NSF-approved polyurethane sealants with fabric reinforcement offer flexibility where welding access is limited.
However, they lack the fusion strength of welding and may fail under repeated pressure or movement. Use welding for permanent structural repairs.
Advanced Considerations for Professional Welders
Equipment Selection and Upgrades
Entry-level iron kits suit small jobs, but professionals benefit from variable-temperature hot air systems with digital readouts and nitrogen capability to reduce oxidation. Extrusion welders excel for production-level tank fabrication or extensive repairs.
Testing and Quality Assurance
Visual inspection checks for uniform bead, no porosity, or lack of fusion. Dye penetrant or ultrasonic testing detects subsurface defects. For critical applications, perform burst or long-term pressure hold tests.
Material Science Insights
HDPE’s high molecular weight requires sufficient heat soak for chain entanglement. Over-welding introduces residual stresses; under-welding leaves voids. Optimal weld factor (strength ratio to parent material) approaches 0.9+ with proper technique.
Decision-Making for Repair vs. Replacement
Choose welding when the tank’s overall condition justifies investment—sound walls, accessible damage, and compatible materials. Factor in downtime, water quality requirements, and long-term costs.
A well-executed plastic weld often outlasts sealant patches by years under normal conditions, providing reliable performance in agricultural, residential, or industrial settings.
Treat the repair as localized re-manufacturing. Focus on achieving full molecular diffusion across the joint rather than mere surface adhesion. This mindset separates adequate fixes from welds that restore near-original pressure and fatigue resistance.
FAQ
What is the best way to repair a leaking plastic water tank?
Plastic welding with matching HDPE rods and proper surface prep offers the strongest, longest-lasting repair. Clean, groove, and fuse multiple passes; reinforce larger cracks with mesh.
Can you weld a crack in a polyethylene water tank?
Yes. Use hot air or extrusion welding techniques tailored to HDPE. Match filler material exactly and control temperature to ensure fusion without degradation.
How long does a plastic welded tank repair last?
Properly executed welds last years under normal use, often matching or exceeding sealant longevity. UV protection and avoiding overload extend service life significantly.
Is epoxy or sealant better than welding for plastic tank leaks?
Welding provides superior structural integrity through material fusion. Sealants suit temporary or low-stress applications but flex and fail sooner under pressure or movement.


